Setup steps
Warning
These instructions are only valid if you’ve installed GeoNode following the guide at Setup & Configure HTTPD !!
If you are working remotely, you should first connect to the machine that has your GeoNode installation. You will need to perform the following steps in a directory where you intend to keep your newly created project.
1 2 3 4 5 | $ apt-get install python-django
$ django-admin startproject my_geonode --template=https://github.com/GeoNode/geonode-project/archive/master.zip -epy,rst
$ cd my_geonode
$ sudo pip install -e . --upgrade --no-cache
$ python manage.py migrate
|
Note
You should NOT use the name geonode for your project as it will conflict with your default geonode package name.
These commands create a new template based on the geonode example project.
Make sure that the directories are reachable and have the correct rights for the users geonode and www-data:
1 2 | $ sudo chown -Rf geonode: *
$ sudo chmod -Rf 775 my_geonode
|
If you have a brand new installation of GeoNode, rename the /home/geonode/geonode/local_settings.py.sample to local_settings.py and edit it’s content by setting the SITEURL and SITENAME. This file will be your main settings file for your project. It inherits all the settings from the original one plus you can override the ones that you need.
Note
You can also decide to copy the /home/geonode/geonode/local_settings.py.sample to /path/to/my_geonode/my_geonode/local_settings.py in order to keep all the custom settings confined into the new project.
Warning
In order for the edits to the local_settings.py file to take effect, you have to restart apache.
Edit the file /etc/apache2/sites-available/geonode.conf and change the following directive from:
WSGIScriptAlias / /home/geonode/geonode/wsgi/geonode.wsgi
to:
WSGIScriptAlias / /path/to/my_geonode/my_geonode/wsgi.py
Edit the file /path/to/my_geonode/my_geonode/wsgi.py and add the following lines at the beginning:
1 | from django.core.wsgi import get_wsgi_application
|
Edit the file /etc/apache2/sites-available/geonode.conf and modify the DocumentRoot as follows:
Note
It’s a good practice to make copies and backups of the configuration files before modifying or updating them in order to revert the configuration at the previous state if something goes wrong.
1 2 3 4 5 6 7 8 9 10 11 12 13 14 15 16 17 18 19 20 21 22 23 24 25 26 27 | <VirtualHost *:80>
ServerName http://localhost
ServerAdmin webmaster@localhost
DocumentRoot /home/geonode/my_geonode/my_geonode
ErrorLog /var/log/apache2/error.log
LogLevel warn
CustomLog /var/log/apache2/access.log combined
WSGIProcessGroup geonode
WSGIPassAuthorization On
WSGIScriptAlias / /home/geonode/my_geonode/my_geonode/wsgi.py
<Directory "/home/geonode/my_geonode/my_geonode/">
<Files wsgi.py>
Order deny,allow
Allow from all
Require all granted
</Files>
Order allow,deny
Options Indexes FollowSymLinks
Allow from all
IndexOptions FancyIndexing
</Directory>
...
|
Then regenerate the static JavaScript and CSS files from /path/to/my_geonode/ and restart apache
1 2 | $ python manage.py collectstatic
$ sudo service apache2 restart
|
Customize the Look & Feel
Now you can edit the templates in my_geonode/templates, the CSS and images to match your needs like shown in customize.theme_admin!
Note
After going through the theming guide you’ll have to return to this site to execute one more command in order to finish the theming!
When you’ve done the changes, run the following command in the my_geonode folder:
1 2 | $ cd /home/geonode/my_geonode
$ python manage.py collectstatic
|
And now you should see all the changes you’ve made to your GeoNode.
Source code revision control
It is recommended that you immediately put your new project under source code revision control. The GeoNode development team uses Git and GitHub and recommends that you do the same. If you do not already have a GitHub account, you can easily set one up. A full review of Git and distributed source code revision control systems is beyond the scope of this tutorial, but you may find the Git Book useful if you are not already familiar with these concepts.
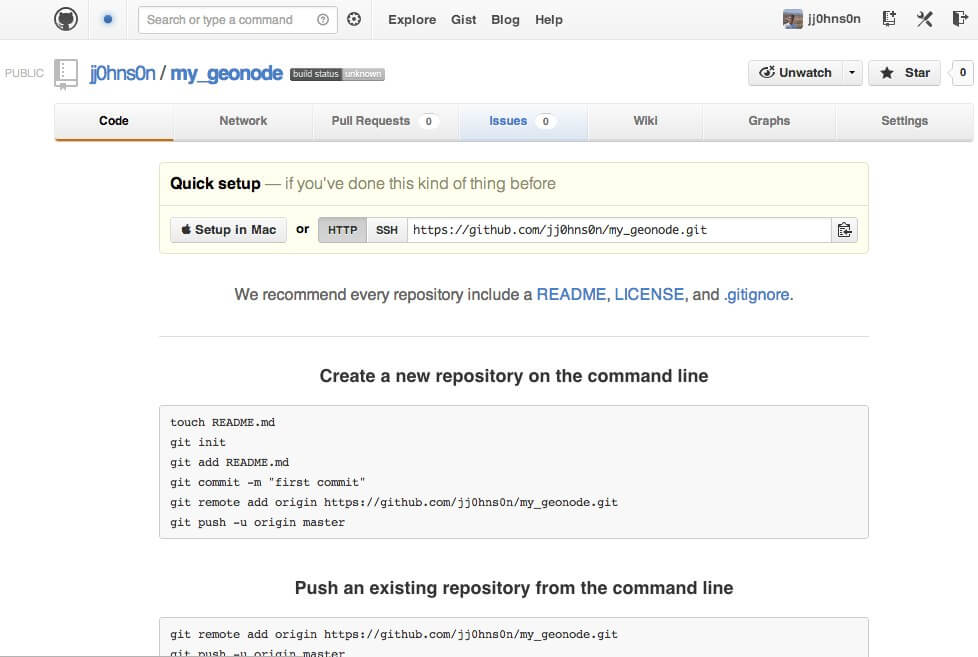
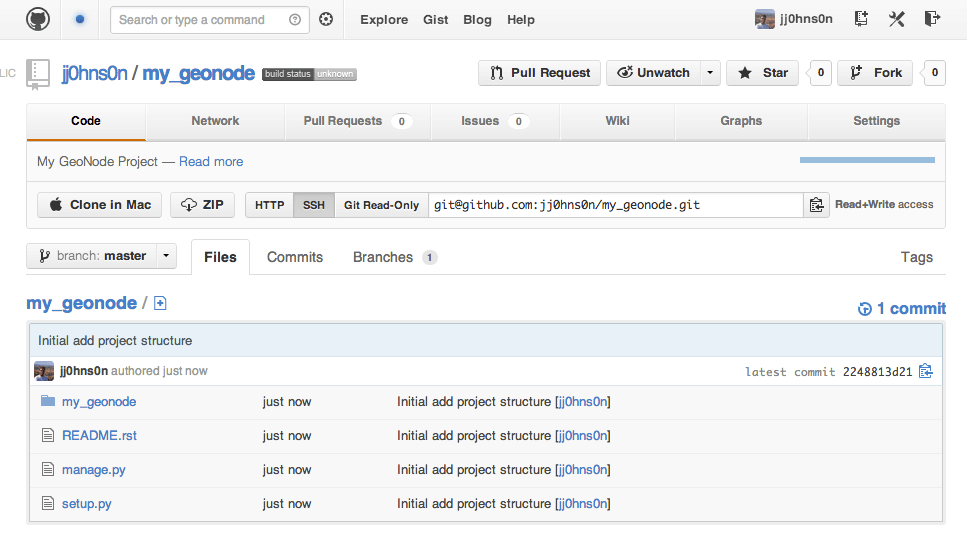
Create a new repository in GitHub. You should use the GitHub user interface to create a new repository for your new project.
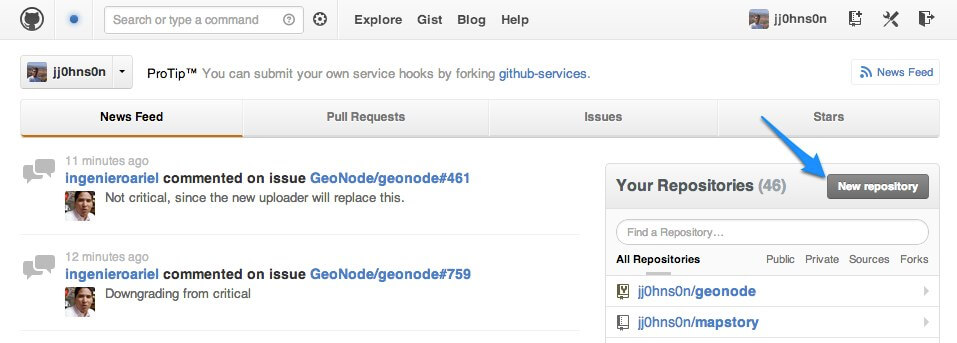
Creating a new GitHub Repository From GitHub’s Homepage

Specifying new GitHub Repository Parameters
Your new Empty GitHub Repository
Initialize your own repository in the my_geonode folder:
1
$ sudo git initAdd the remote repository reference to your local git configuration:
1
$ sudo git remote add origin <https url of your custom repo>Add your project files to the repository:
1
$ sudo git add .Commit your changes:
1
2
3
4
5
  # Those two command must be issued ONLY once
$ sudo git config --global user.email "my@email"
$ sudo git config --global user.name "myuser"

$ sudo git commit -am "Initial commit"
Push to the remote repository:
1
$ sudo git push origin master
Further Reading
- If you want more information on how to GitHub works and how to contribute to GeoNode project, go to the section “Contributing to GeoNode”
- If you want to customize the Logo and Style of my_geonode, go to the section “Theming your GeoNode project”
Here below you can find some more details about the custom project structure and info on some of the most important Python files you may want to edit.
The following section is mostly oriented to advanced users and developers.
Project structure
Your GeoNode project will now be structured as depicted below:
|-- README.rst
|-- manage.py
|-- my_geonode
|   |-- __init__.py
|   |-- settings.py
|   |-- local_settings.py
|   |-- static
|   |   |-- README
|   |   |-- css
|   |   |   |-- site_base.css
|   |   |-- img
|   |   |   |-- README
|   |   |-- js
|   |       |-- README
|   |-- templates
|   |   |-- site_base.html
|   |   |-- site_index.html
|   |-- urls.py
|   |-- wsgi.py
|-- setup.py
You can also view your project on GitHub.
Viewing your project on GitHub
Each of the key files in your project are described below.
manage.py
manage.py is the main entry point for managing your project during
development. It allows running all the management commands from each app in your
project. When run with no arguments, it will list all of the management commands.
settings.py
settings.py is the primary settings file for your project. It imports the settings from the system geonode and adds the local paths. It is quite
common to put all sensible defaults here and keep deployment specific configuration
in the local_settings.py file. All of the possible settings values and
their meanings are detailed in the Django documentation.
A common paradigm for handing ‘local settings’ (and in other areas where some python module may not be available) is:
- try:
- from local_settings import *
- except:
- pass
This is not required and there are many other solutions to handling varying deployment configuration requirements.
urls.py
urls.py is where your application specific URL routes go. Additionally,
any overrides can be placed here, too.
wsgi.py
This is a generated file to make deploying your project to a WSGI server easier.
Unless there is very specific configuration you need, wsgi.py can be
left alone.
setup.py
There are several packaging options in python but a common approach is to place
your project metadata (version, author, etc.) and dependencies in setup.py.
This is a large topic and not necessary to understand while getting started with GeoNode development but will be important for larger projects and to make development easier for other developers.
static
The static directory will contain your fixed resources: CSS, HTML,
images, etc. Everything in this directory will be copied to the final media
directory (along with the static resources from other apps in your project).
templates
All of your projects templates go in the templates directory. While
no organization is required for your project specific templates, when overriding
or replacing a template from another app, the path must be the same as the template
to be replaced.
Staying in sync with mainline GeoNode
Warning
These instructions are only valid if you’ve installed GeoNode using apt-get !!
One of the primary reasons to set up your own GeoNode project using this method is so that you can stay in sync with the mainline GeoNode as the core development team makes new releases. Your own project should not be adversely affected by these changes, but you will receive bug fixes and other improvements by staying in sync.
Upgrade GeoNode:
$ apt-get update
$ apt-get install geonode
Verify that your new project works with the upgraded GeoNode:
$ python manage.py runserverNavigate to http://localhost:8000.
Warning
These instructions are only valid if you’ve installed GeoNode following the guide at Setup & Configure HTTPD !!
Upgrading from source code repo:
Upgrade GeoNode:
$ cd /home/geonode/geonode
$ git pull origin master
Verify that your new project works with the upgraded GeoNode:
$ python manage.py runserverNavigate to http://localhost:8000.