Custom Installation Guide
Use this if you want to know how to manually deploy GeoNode or if you want to deploy it on a server which is not fresh. Otherwise please use the Quick Installation Guide . The manual installation is intended for those who are comfortable with Linux system administration.
Note
Here is the link to our Quick Installation Guide .
Recommended Minimum System Requirements
For deployment of GeoNode on a single server, the following are the bare minimum system requirements:
- 6GB of RAM, including swap space.
- 2.2GHz processor. (Additional processing power may be required for multiple concurrent styling renderings)
- 1 GB software disk usage.
- Additional disk space for any data hosted with GeoNode and tiles cached with GeoWebCache. For spatial data, cached tiles, and “scratch space” useful for administration, a decent baseline size for GeoNode deployments is 100GB.
- 64-bit hardware recommended.
Installing Dependencies
Some external software must be installed before you can install GeoNode. The GeoNode package contains both the Java and Django web application code for GeoNode, but requires some external software installed to complete the GeoNode platform.
This includes:
- A Python interpreter
- A Java Runtime Environment (JRE)
- Apache Tomcat servlet container
- Python development libraries
- PostgreSQL database
- The GDAL, GEOS, and OGR geospatial software libraries
For detailed information on dependencies please refer to the section Dependencies.
For convenience, appropriate commands to retrieve these dependencies on Ubuntu 14.04 LTS are listed below:
$ sudo apt-get install         \
        apache2                \
        gcc                    \
        gdal-bin               \
        gettext                \
        git-core               \
        libapache2-mod-wsgi    \
        libgeos-dev            \
        libjpeg-dev            \
        libpng-dev             \
        libpq-dev              \
        libproj-dev            \
        libxml2-dev            \
        libxslt-dev            \
        openjdk-7-jre          \
        patch                  \
        postgresql             \
        postgis                \
        postgresql-9.3-postgis-scripts \
        postgresql-contrib     \
        python                 \
        python-dev             \
        python-gdal            \
        python-imaging         \
        python-pastescript     \
        python-psycopg2        \
        python-support         \
        python-urlgrabber      \
        python-virtualenv      \
        tomcat7                \
        unzip                  \
        zip
Note
Before you copy the command into the terminal and run it, check the versions, you might have to adjust them!
Note
Be sure that you’ve installed all the required dependencies before you go further with the installation of GeoNode.
Please choose between one of the two methods to finish the installation-configuration of GeoNode:
- Configure using the ubuntu config file. This is the recommended way, using the provided .sh scripts
- Configure manually, doing each step by hand as opposed to using the .sh scripts
In the end you will have the same running instance of Geonode.
Configure Manually
Download Code
Download the code using git.
# download code from github
$ git clone https://github.com/GeoNode/geonode.git

# change into the folder called geonde
$ cd geonode

# Installs django etc.
$ sudo pip install -e . --upgrade --no-cache

# Downloads geoserver.war
$ sudo paver setup
Now if you like to see if all is working so far type:
# starts everything with default configs! NOT for production!
$ sudo paver start

# stops all and you can continue with complete install
$ sudo paver stop
This will start GeoNode at http://localhost:8000/ with the default configurations, using Jetty as the servlet container and SQLite as the database.
Note
If running the paver start command produces an “Address already in use” exception for port 8080, try running the paver stop command and then paver start again. If the exception still occurs then another web server is already bound to that port. If this is a fresh Ubuntu install then Tomcat was automatically started when you installed the package and you can safely stop it with sudo service tomcat7 stop.
Also GeoNode won’t start without using the command above. To change this, the following configurations of the used components have to be done.
Configure
Complete steps to configure Geonode include the stack:
- Servlet Container
- Apache Tomcat for GeoServer
- Static File Server
- Apache httpd
- Python/WSGI Container
- mod_wsgi
- Django Database
- PostgreSQL
Configure Postgresql and Postgis
At this point, GeoNode uses sqlite3 as the default db. The following steps will show you how to make geonode to use postgresql and postgis.
Create geonode user and database
First of all a user called geonode (with password geonode),
as well as a database called geonode has to be created.
To create the user:
$ sudo -u postgres createuser -P geonode
Now you will be asked to enter a password.
This must be geonode (you can change it if you want to, but be aware that you
have to edit the local_settings.py if you do so!)
To create the databases (the geonode one and the spatial for shapefile imports):
$ sudo -u postgres createdb -O geonode geonode
$ sudo -u postgres createdb -O geonode geonode_data
$ sudo su postgres
$ psql -d geonode_data -c 'CREATE EXTENSION postgis;'
$ psql -d geonode_data -c 'GRANT ALL ON geometry_columns TO PUBLIC;'
$ psql -d geonode_data -c 'GRANT ALL ON spatial_ref_sys TO PUBLIC;'
$ exit
This creates databases called geonode and geonode_data (which automatically has the postgis extension as well!) with owner geonode.
Change authentication method
In the PostgreSQL config path, /etc/postgresql/9.3/main, you should find the
file pg_hba.conf.
This file has to be edited in order to allow the geonode user to have access to
the database. Therefore change the directory to this file and open it:
$ cd /etc/postgresql/9.3/main
$ sudo vi pg_hba.conf
At this point, the file should contain the following default settings:

Then change the authentication method of the following entry from peer to trust:
#TYPE   DATABASE    USER    METHOD
local   all         all     md5
After changing this file, the postgres service has to be restarted.
This is essential, because otherwise the changed configurations won’t be considered!
To restart the postgresql server type
$ sudo service postgresql restart
Note
service could be also called postgresql-9.1 or postgresql-9.2 depending on your installation
Additional entry:
#Type   DATABASE    USER       ADDRESS         METHOD
host    geonode     geonode    127.0.0.1/32    md5
Setup local settings
The next step is to set the local settings.
In the directory ../geonode/geonode a file called
local_settings.py.sample exists.
It includes all the settings to change the default db from sqlite3 to
postgresql.
Rename the file to local_settings.py.
$ sudo mv geonode/local_settings.py.sample geonode/local_settings.py
Uncomment line 10 and modify line 12 as follows:
'ENGINE': 'django.contrib.gis.db.backends.postgis',
'NAME': 'geonode_data',
Note
If you do not use geonode as password for your database, then you have to edit the local_settings.py and change your password in this part of the file.
Add the following as a directive:
ALLOWED_HOST = ['domain or IP']
Synchronize db
To synchronize the database, run the Django command migrate
$ python manage.py migrate
Django configurations
The Django frontend can be served in various ways, one of the most performant is Apache httpd with mod_wsgi installed.
You will also need a web server capable of simply serving static files; if you are using Apache httpd it can serve this purpose as well.
Note
The Django project has further documentation on how to serve Django applications at https://docs.djangoproject.com/en/1.8/howto/deployment/ .
Before the web server will be configured, some other steps are needed to execute.
Create new superuser
A new Django superuser has to be created
$ python manage.py createsuperuser
You will be asked to enter a username, an email address and a password.
Create local static files
The collectstatic command will create a new folder static_root.
$ python manage.py collectstatic
Enable geonode upload function
An empty folder called uploaded must be created
$ sudo mkdir -p /home/user/geonode/geonode/uploaded
If using the Apache web server, change owner to www-data
$ sudo chown www-data -R /home/user/geonode/geonode/uploaded
Webserver configurations (Apache and mod_wsgi)
Make apache to load the mod_wsgi module
If you’ve done the installation from above, you should already have a httpd.conf file that includes one line:
LoadModule wsgi_module /path/to/modules/mod_wsgi.so
Note
If you do not already have this,
then please add this line to httpd.conf now!
Beside this module you also have to enable the proxy module.
This can be done very easily using
$ sudo a2enmod proxy_http
We have to create one more configuration file for geonode.
Go to the folder sites-available and create a file called geonode:
$ cd /etc/apache2/sites-available
$ sudo gedit geonode
This file should include the following, but don´t forget to adjust the paths!
WSGIDaemonProcess geonode python-path=/home/user/geonode:/home/user/.venvs/geonode/lib/python2.7/site-packages user=www-data threads=15 processes=2

<VirtualHost *:80>
    ServerName http://localhost
    ServerAdmin webmaster@localhost
    DocumentRoot /home/user/geonode/geonode

    ErrorLog /var/log/apache2/error.log
    LogLevel warn
    CustomLog /var/log/apache2/access.log combined

    WSGIProcessGroup geonode
    WSGIPassAuthorization On
    WSGIScriptAlias / /home/user/geonode/geonode/wsgi.py

    <Directory "/home/user/geonode/geonode/">
    Order allow,deny
        Options Indexes FollowSymLinks
        Allow from all
        IndexOptions FancyIndexing
    </Directory>

    Alias /static/ /home/user/geonode/geonode/static/
    Alias /uploaded/ /home/user/geonode/geonode/uploaded/

    <Proxy *>
        Order allow,deny
        Allow from all
    </Proxy>

    ProxyPreserveHost On
    ProxyPass /geoserver http://localhost:8080/geoserver
    ProxyPassReverse /geoserver http://localhost:8080/geoserver

</VirtualHost>
Enable the new site
$ sudo a2ensite geonode
This command will create a file geonode in the folder sites-enabled.
Now reload apache
$ sudo service apache2 reload
If you now type localhost into your web browser, the geonode webpage will appear.
You can now login with your newly created superuser account.
But if you visit the Django admin interface,
you will only see the content of this webpage without any design.
To change this, you have to change the following entry in our geonode
configuration file:
$ sudo gedit /etc/apache2/sites-available/geonode
Change this entry:
Alias /static/ /home/user/geonode/geonode/static/
to:
Alias /static/ /home/user/geonode/geonode/static_root/
Now reload apache2
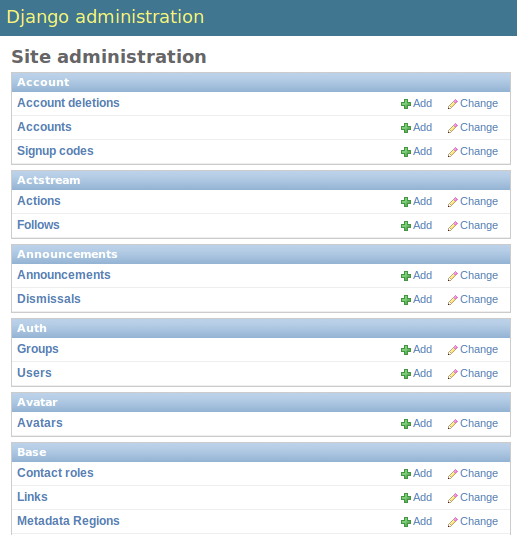
again using sudo service apache2 reload and visit localhost/admin.
Now you should be able to see this:
Change permissions of folders
$ sudo chown www-data:www-data /home/user/geonode/geonode/static/
$ sudo chown www-data:www-data /home/user/geonode/geonode/uploaded/
$ sudo chown www-data:www-data /home/user/geonode/geonode/static_root/
$ sudo service apache2 reload
Configure application server
The GeoServer web application must be served using a Java Servlet container;
two popular and free containers are Jetty and Tomcat.
Jetty is used as default in your GeoNode installation.
Typically a Java web application (WARs) can be deployed by simply copying the
.war file into the appropriate place.
So if you are going to use Tomcat instead, then copy the geoserver.war file
into Tomcat’s webapps directory, as shown in the steps below.
Deploy your geoserver with Tomcat
To do so we need Tomcat installed and not running. So if you’ve got Tomcat running at the moment, stop it:
$ sudo /etc/init.d/tomcat7 stop
You can find the geoserver.war in the folder downloaded in your geonode directory:
geonode/downloaded/geoserver.war
Now copy this file into the webapps folder of tomcat:
$ sudo mv geonode/downloaded/geoserver.war /var/lib/tomcat7/webapps/
By starting tomcat it will unpack the geoserver.war and create a new directory
tomcat/webapps/geoserver:
$ sudo /etc/init.d/tomcat7 start
Let’s try to visit http://localhost:8080/geoserver or localhost/geoserver.
You will now see the GeoServer homepage:

Warning
Geoserver is not a Vanilla Geoserver install, please use the geoserver.war that comes with geonode. In the future we might use a Vanilla Geoserver, it is being discussed.
GeoNode’s GeoServer integration requires some specific extensions to help GeoNode in managing GeoServer layers. GeoNode releases include a GeoServer WAR archive with these extensions pre-installed. However, some manual configuration may still be needed in case of not standard installation.
Configure GeoServer
Configure GeoServer with the location of the GeoNode site, used for authentication (so that GeoServer can recognize logins from the main site). This setting defaults to http://localhost:8000/, so if you are running the GeoNode Django application on a different port, or on a different server from the one running GeoServer, then you will need to change this in two places.
Firstly, by adding a block
of XML to WEB-INF/web.xml within the unpacked application directory, like
so:
<context-param>
    <param-name>GEONODE_BASE_URL</param-name>
    <param-value>http://localhost/</param-value>
</context-param>
The <param-value> tag should enclose the URL to the Django application
homepage.
And secondly, update the value of the baseUrl tag in
data/security/auth/geonodeAuthProvider/config.xml:
<org.geonode.security.GeoNodeAuthProviderConfig>
  <id>-54fbcd7b:1402c24f6bc:-7fe9</id>
  <name>geonodeAuthProvider</name>
  <className>org.geonode.security.GeoNodeAuthenticationProvider</className>
  <baseUrl>http://localhost/</baseUrl>
</org.geonode.security.GeoNodeAuthProviderConfig>
Note
While we intend to provide a detailed, accurate explanation of the installation process, if you run into problems with the process described in this document, please don’t hesitate to let the GeoNode team know so we can keep it up to date.
Configure using the Ubuntu config file
This is a semi-automatic configuration, involving two .sh scripts.
Download the code using git.
# download code from github
$ git clone https://github.com/GeoNode/geonode.git
$ cd geonode
- Installer configuration file (located in ``package/support/config-ubuntu.sh``) This is the first thing to edit.
- The installer script (located in ``package/install.sh``) Second thing to edit.
- First open the
package/support/config-ubuntu.shinstaller configuration file. Now provide the details of your installation, such as where your web server looks for documents. - Second, open
install.shand configure to your needs.
Note
you might have to change the postgresql and postgis versions in this file, according to the versions you use!
Once edited (if necessary) run the ./install.sh file with the following commands:
# change into the folder called "package"
$ cd package

# run the install.sh with the ubuntu config.sh
$ sudo ./install.sh support/config-ubuntu.sh

# call geonode binary django-admin.py create django super user
$ geonode createsuperuser

# create the IP address to your public address
$ sudo geonode-updateip -p yourpublicaddress

# if geoserver and geonode are not on the same machine then also add the local geonode address
$ sudo geonode-updateip -p yourpublicaddress -l yourlocaladdress
GeoNode can now be accessed at http://localhost