Accessing the panel
Note
The “staff” flag, which controls whether the user is allowed to log in to the admin interface, can be set by the admin panel itself.
The panel can be reached from Admin link of the User Menu in the navigation bar (see the picture below) or through this URL: http://<your_geonode_host>/admin.
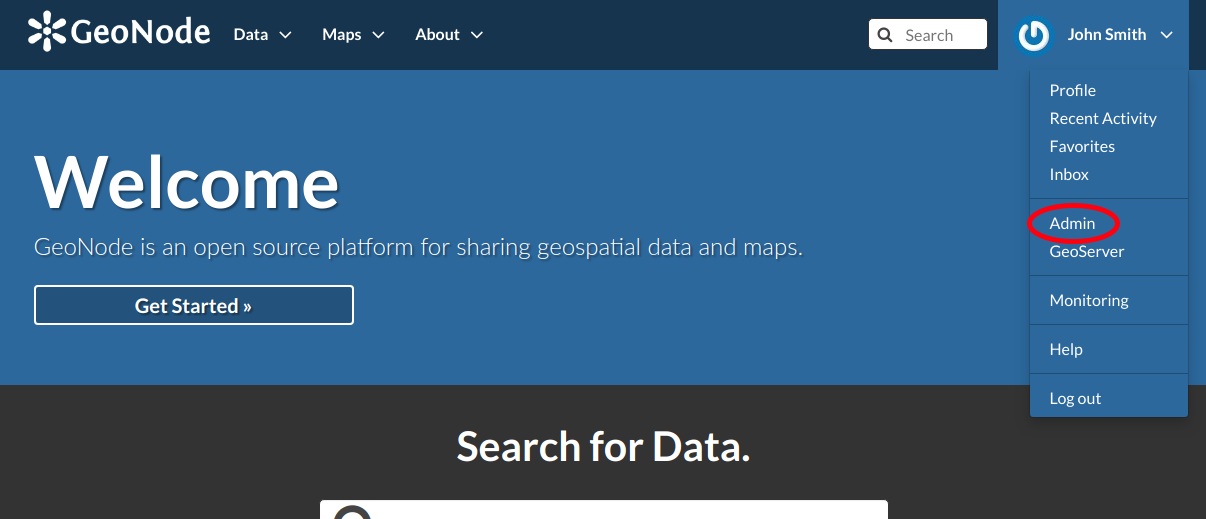
The Admin Link of the User Menu
When clicking on that link the Django-based Admin Interface page opens and shows you all the Django models registered in GeoNode.
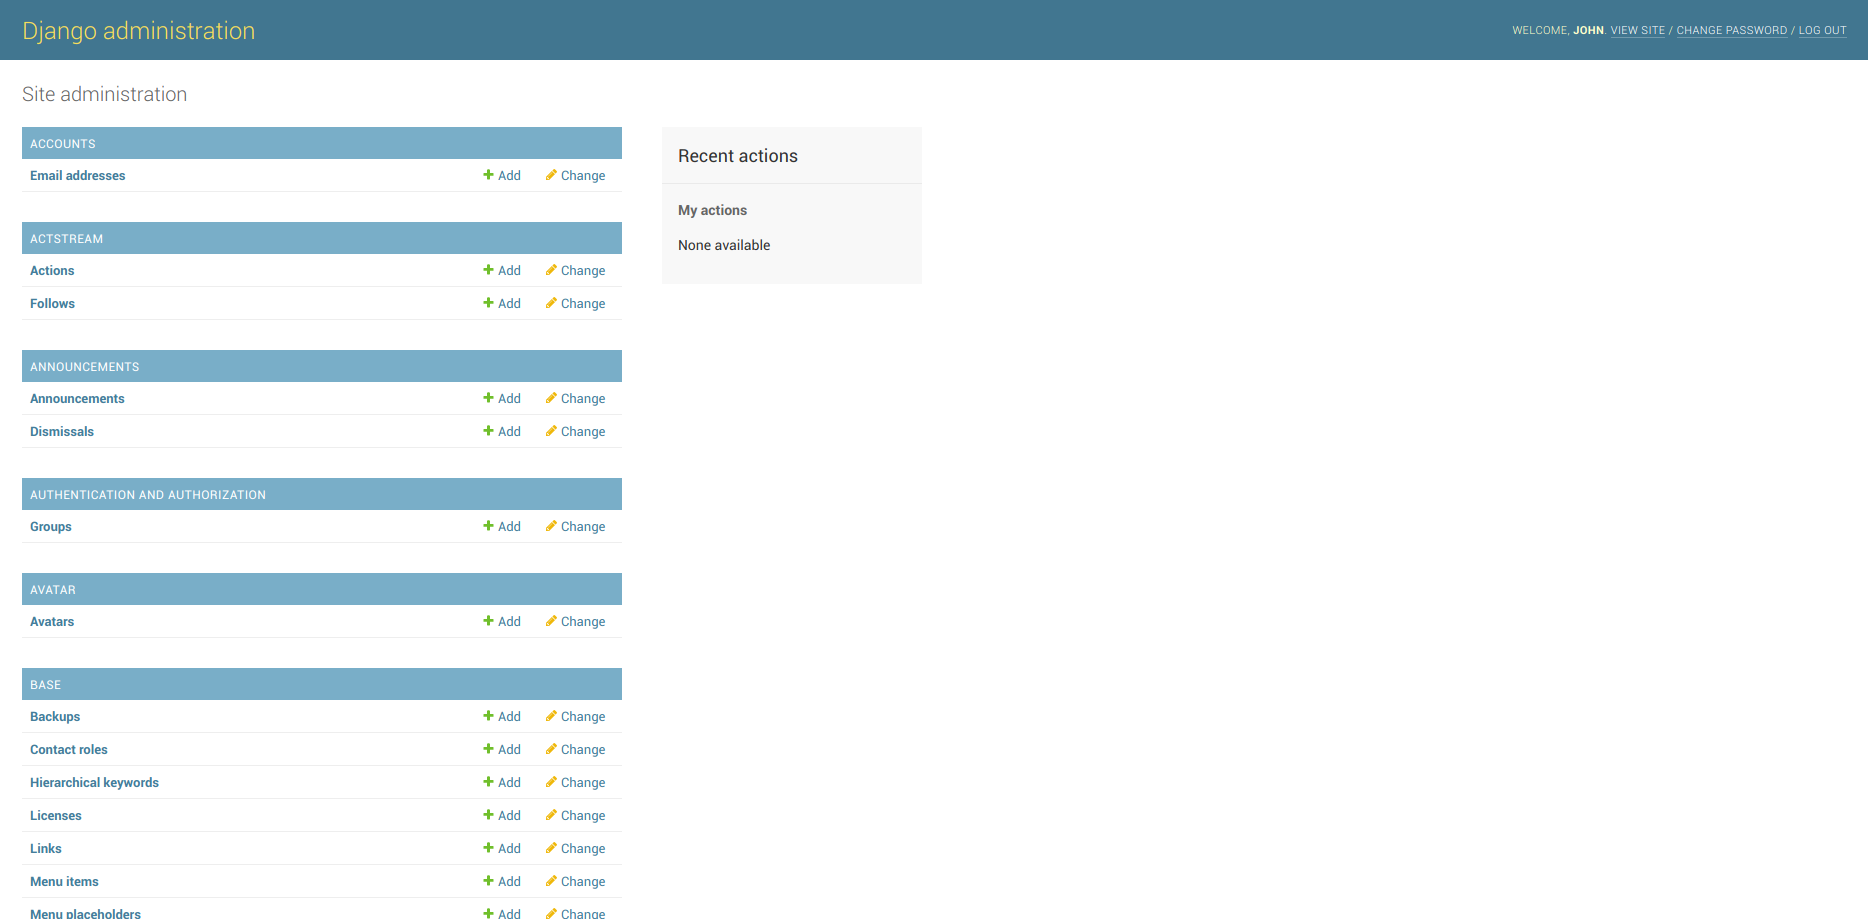
The GeoNode Admin Interface
Reset or Change the admin password
From the Admin Interface you can access the CHANGE PASSWORD link on the right side of the navigation bar.
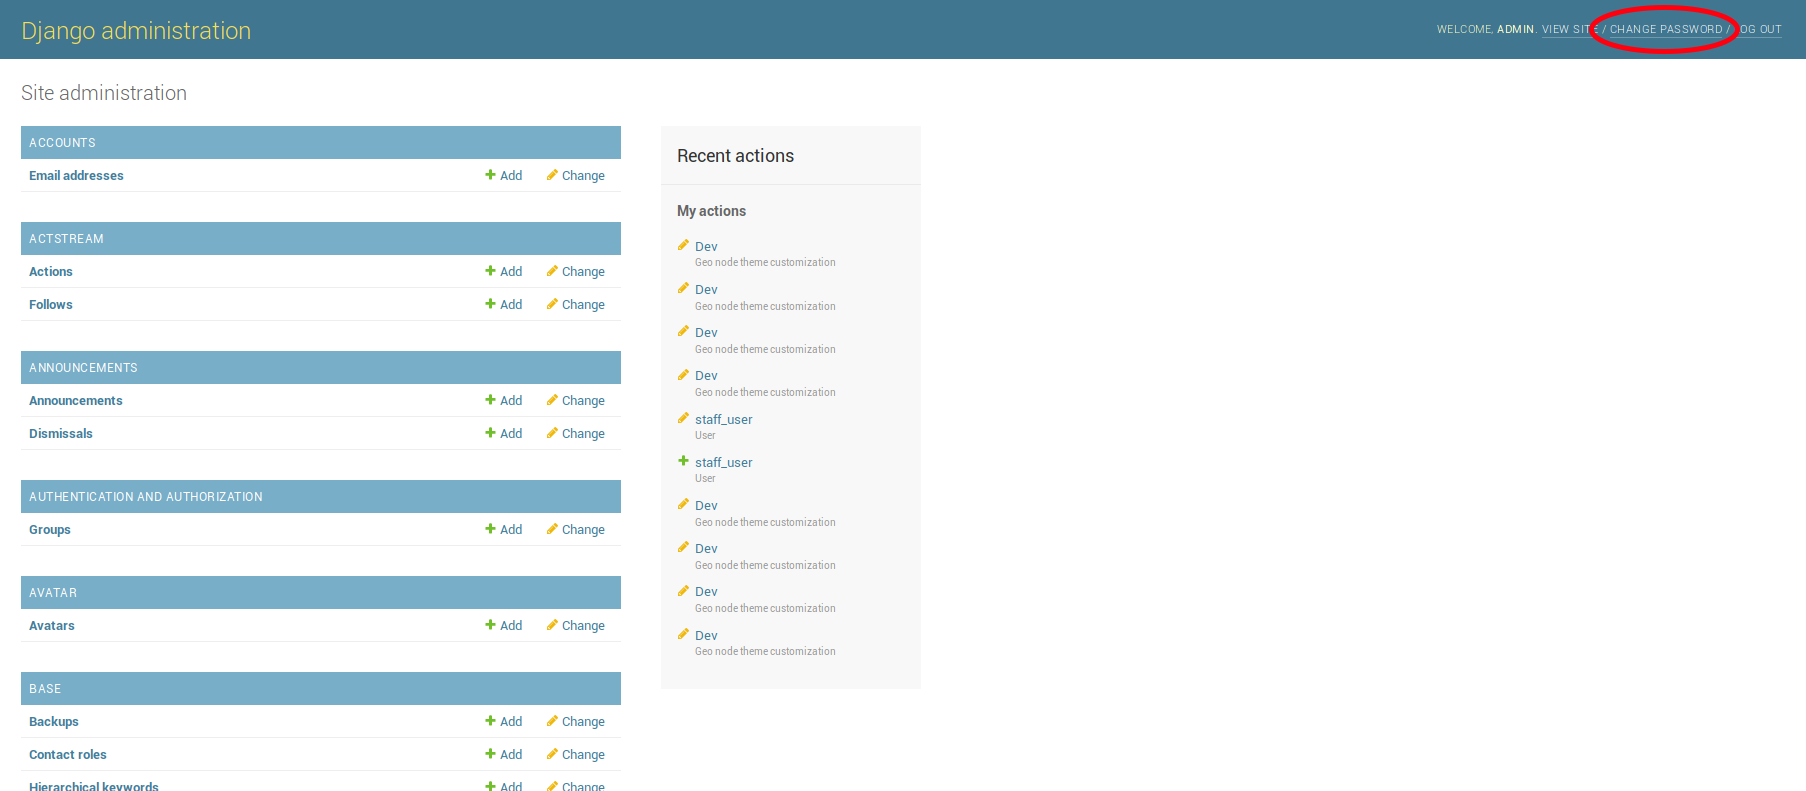
The Change Password Link
It allows you to access the Change Password Form through which you can change your password.
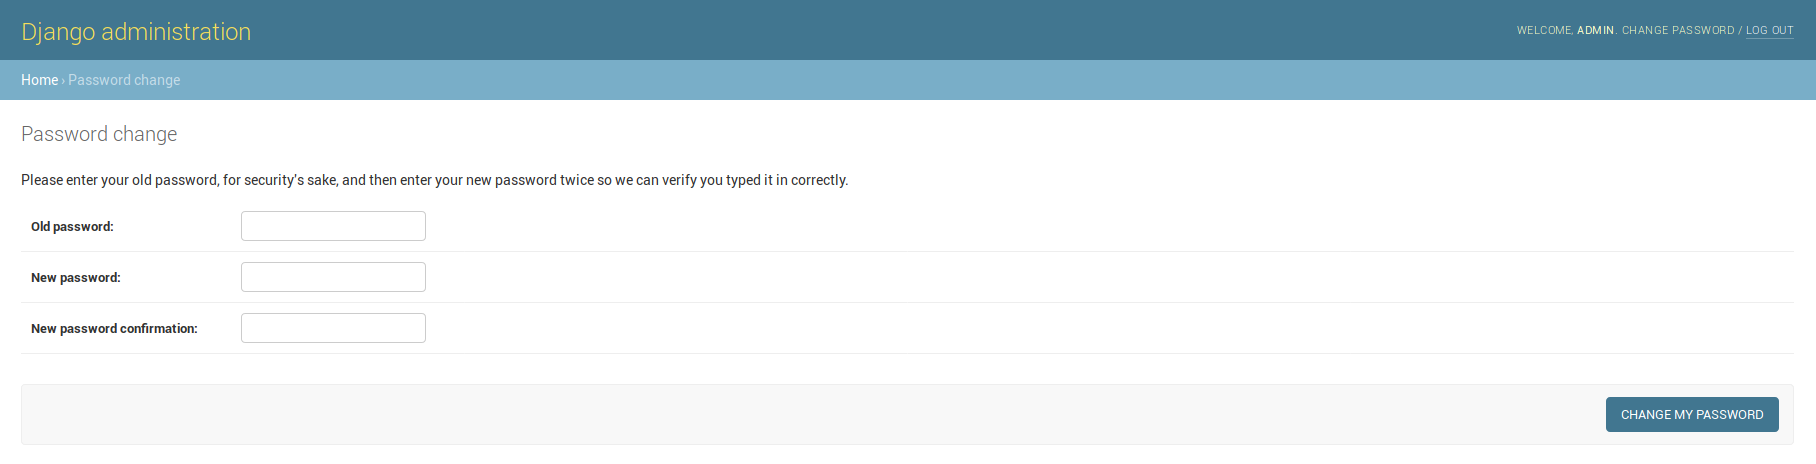
The Change Password Form
Once the fields have been filled out, click on CHANGE MY PASSWORD to perform the change.
Simple Theming
GeoNode provides by default some theming options manageable directly from the Administration panel. Most of the times those options allows you to easily change the GeoNode look and feel without touching a single line of HTML or CSS.
As an administrator go to http://<your_geonode_host>/admin/geonode_themes/geonodethemecustomization/.
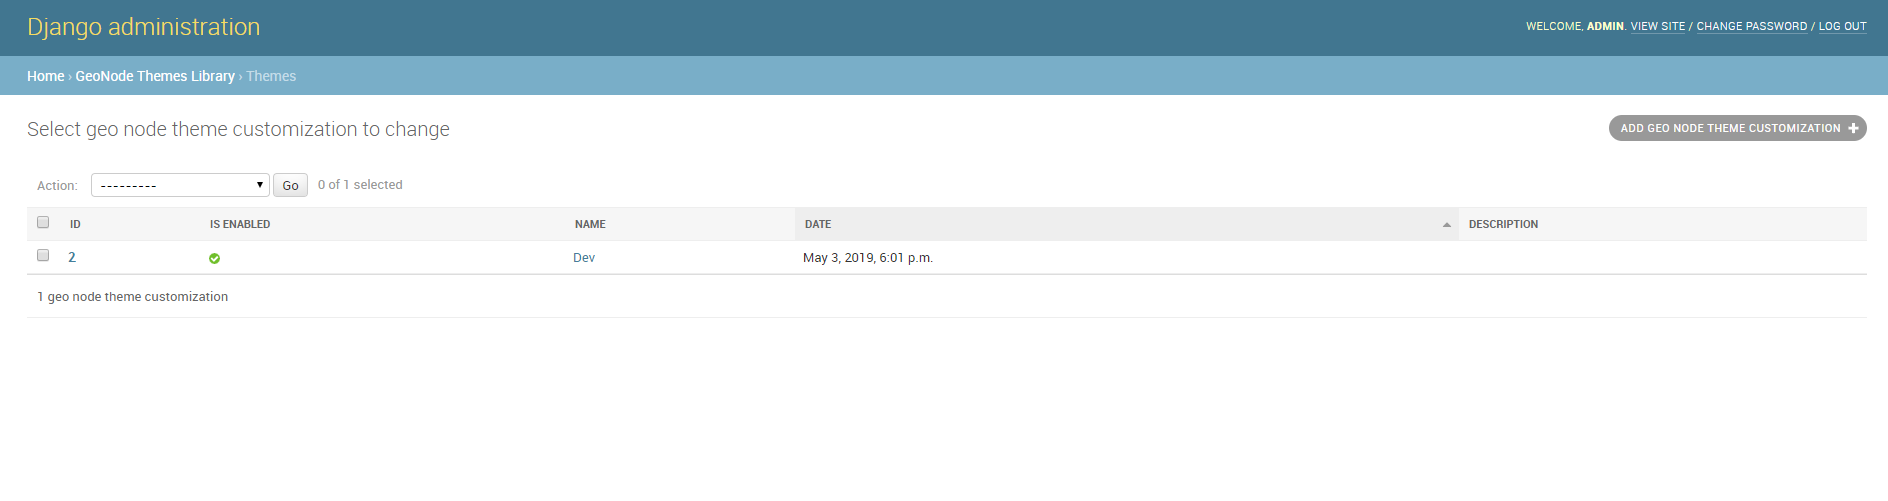
List of available Themes
The panel shows all the available GeoNode themes, if any, and allows you to create new ones.
Warning
Only one theme at a time can be activated (aka enabled). By disabling or deleting all the available themes, GeoNode will turn the gui back to the default one.
Editing or creating a new Theme, will actually allow you to customize several properties.
At least you’ll need to provide a Name for the Theme. Optionally you can specify also a Description, which will allow you to better
identify the type of Theme you created.
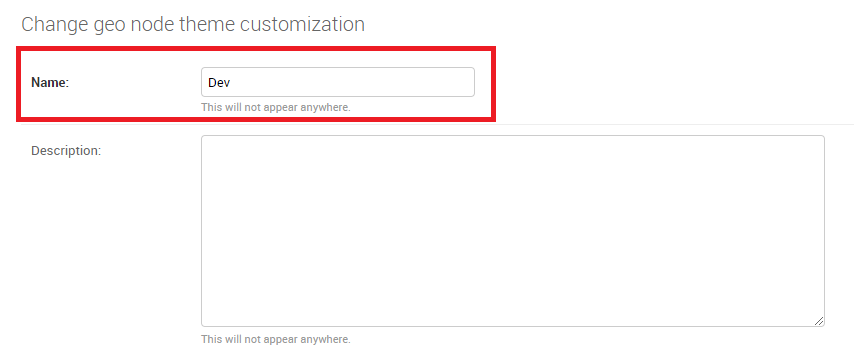
Theme Name and Description
Just below the Description field, you will find the Enabled checkbox, allowing you to toggle the Theme.
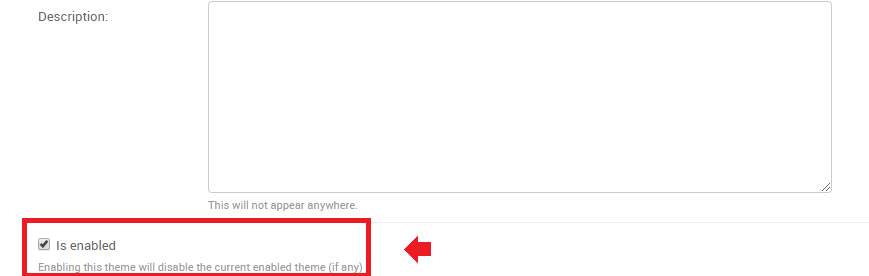
Theme Name and Description
Jumbotron and Get Started link
Note
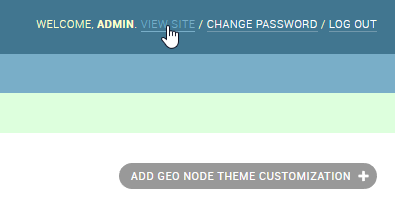
Remember, everytime you want to apply some changes to the Theme, you must save the Theme and reload the GeoNode browser tab.
In order to quickly switch back to the Home page, you can just click the VIEW SITE link on the top-right corner of the Admin dashboard.
The next section, allows you to define the first important Theme properties. This part involves the GeoNode main page sections.
Jumbotron and Logo options
By changing those properties as shown above, you will easily change your default home page from this
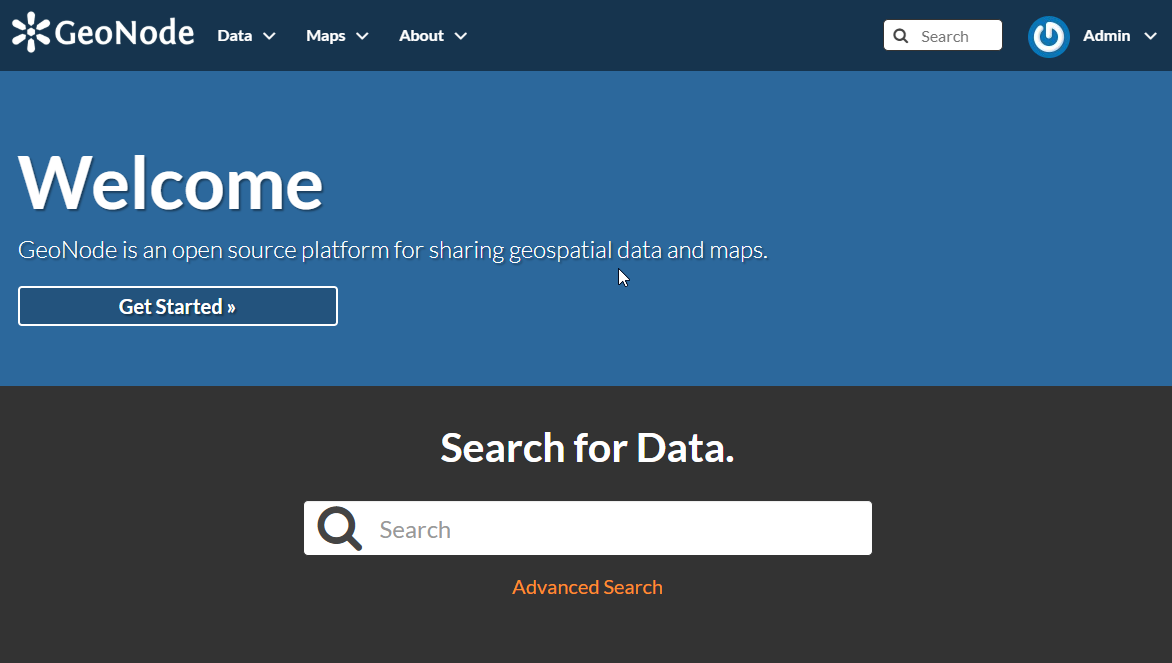
GeoNode Default Home
to this
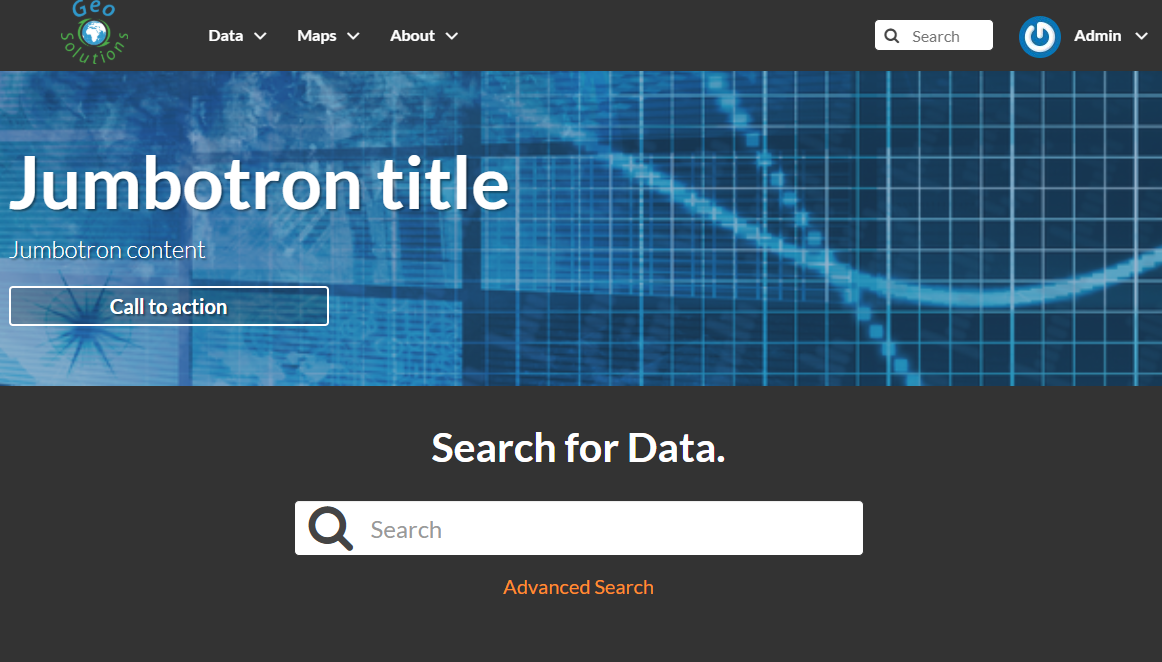
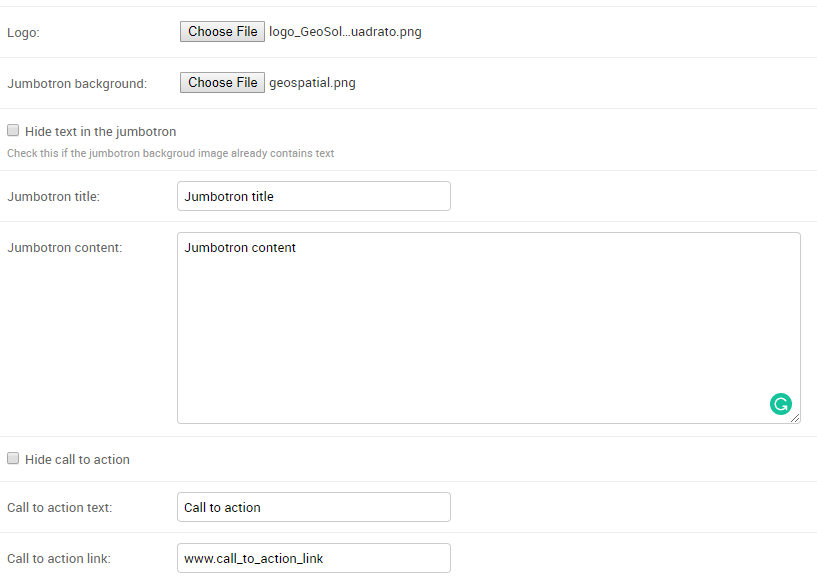
Updating Jumbotron and Logo
It is possible to optionally hide the Jumbotron text and/or the Call to action button
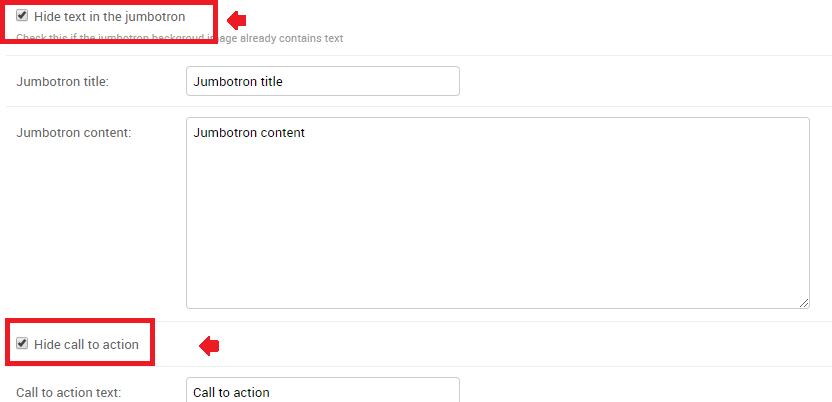
Hide Jumbotron text and Call to action button
Copyright and contact info footer
The default GeoNode footer does not present any type of contact info.
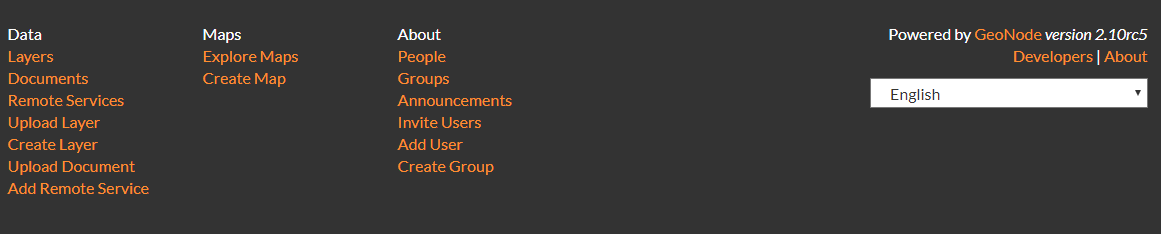
Default GeoNode Footer
By enabling and editing the contact us box fields
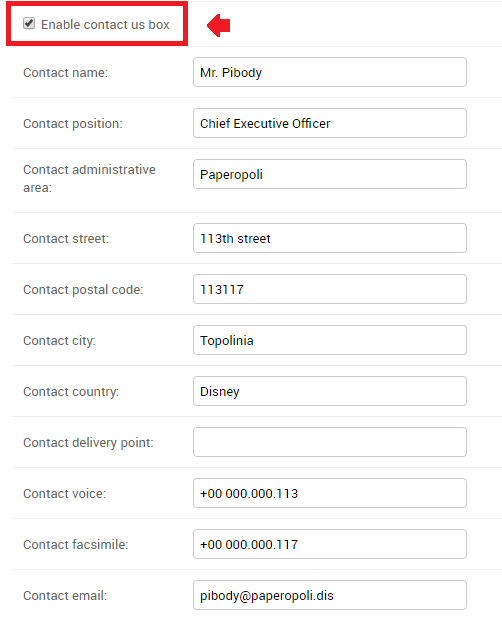
Enable contact us box
it will be possible to show a simple Contact Us info box on the GeoNode footer section.
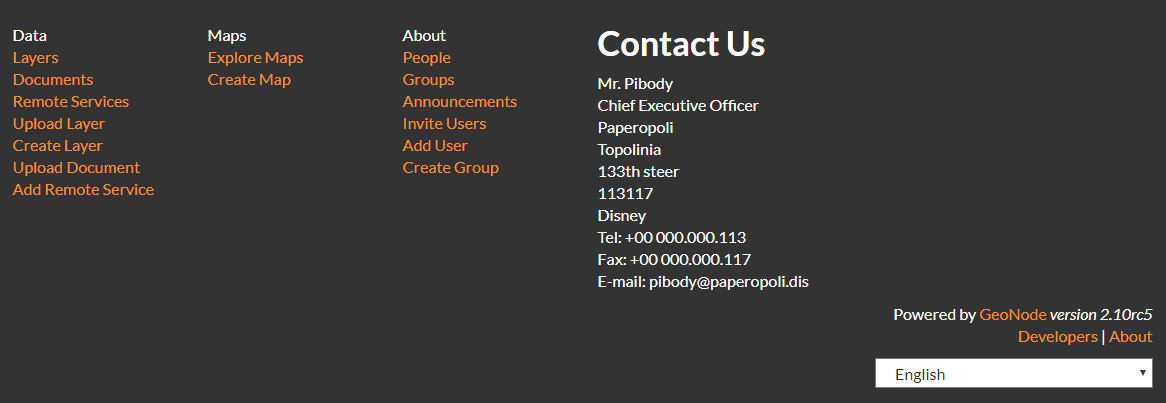
Contact Us Footer
Similarly, by editing the Copyright text box and/or background color
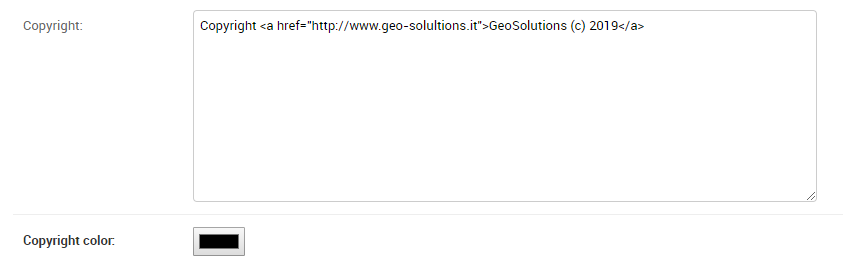
Copyright Text and Color
it will be possible to show the Copyright statement to the bottom of the page
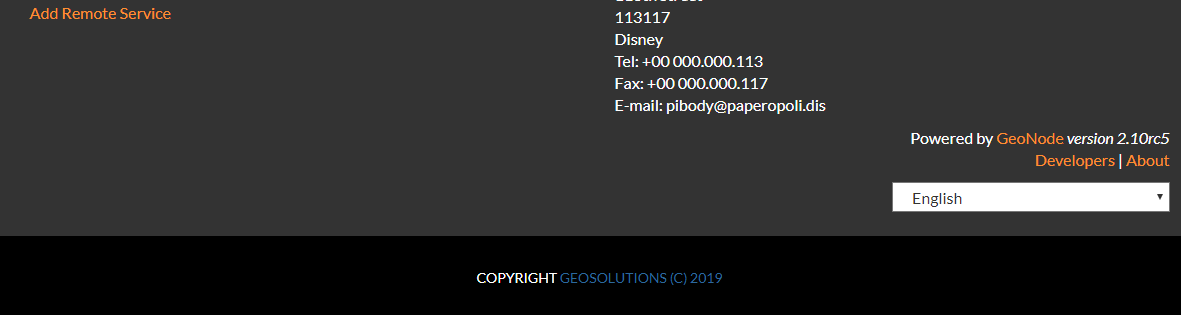
Copyright
Partners
GeoNode simple theming, allows also a Partners section, in order to easily list links to third-party institutions collaborating to the project.
The example below shows the Partners section of WorldBank CHIANG MAI URBAN FLOODING GeoNode instance
made through integrating theming options.
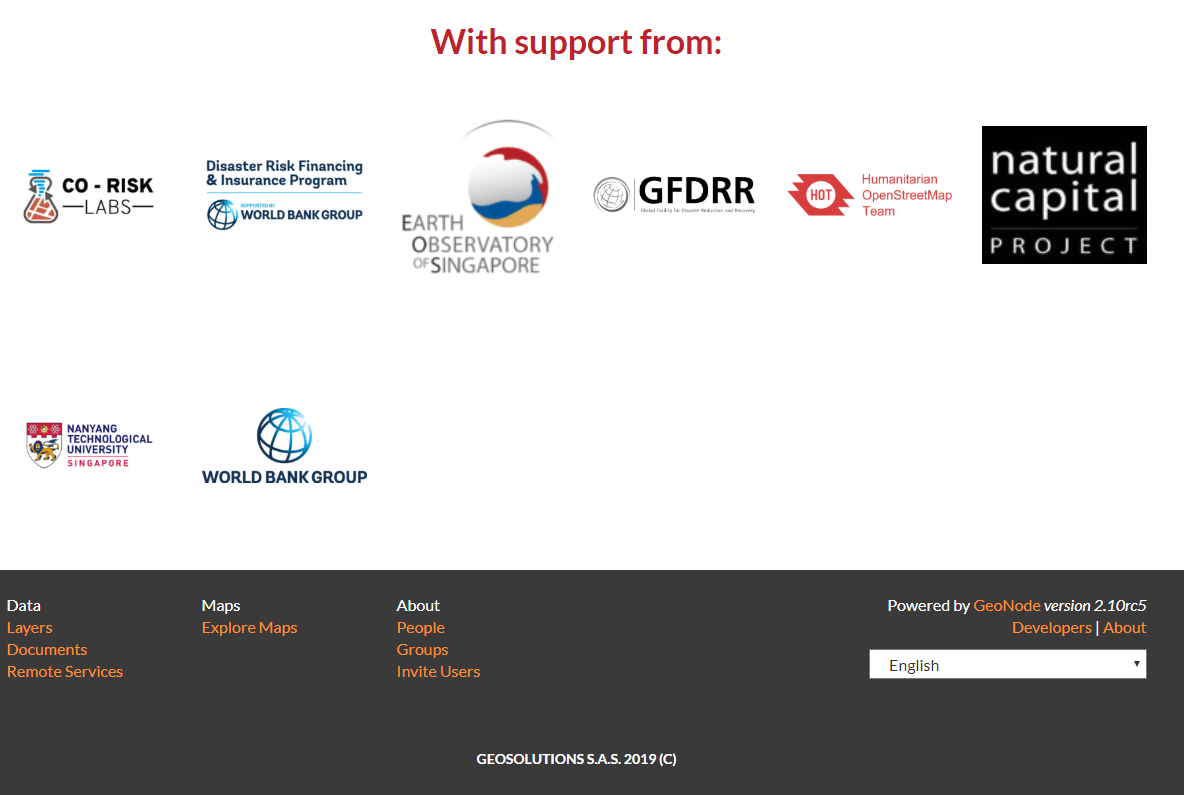
Urbanflooding GeoNode Partners Section
The Partners items can be managed through the http://<your_geonode_host>/admin/geonode_themes/partner/ Admin section
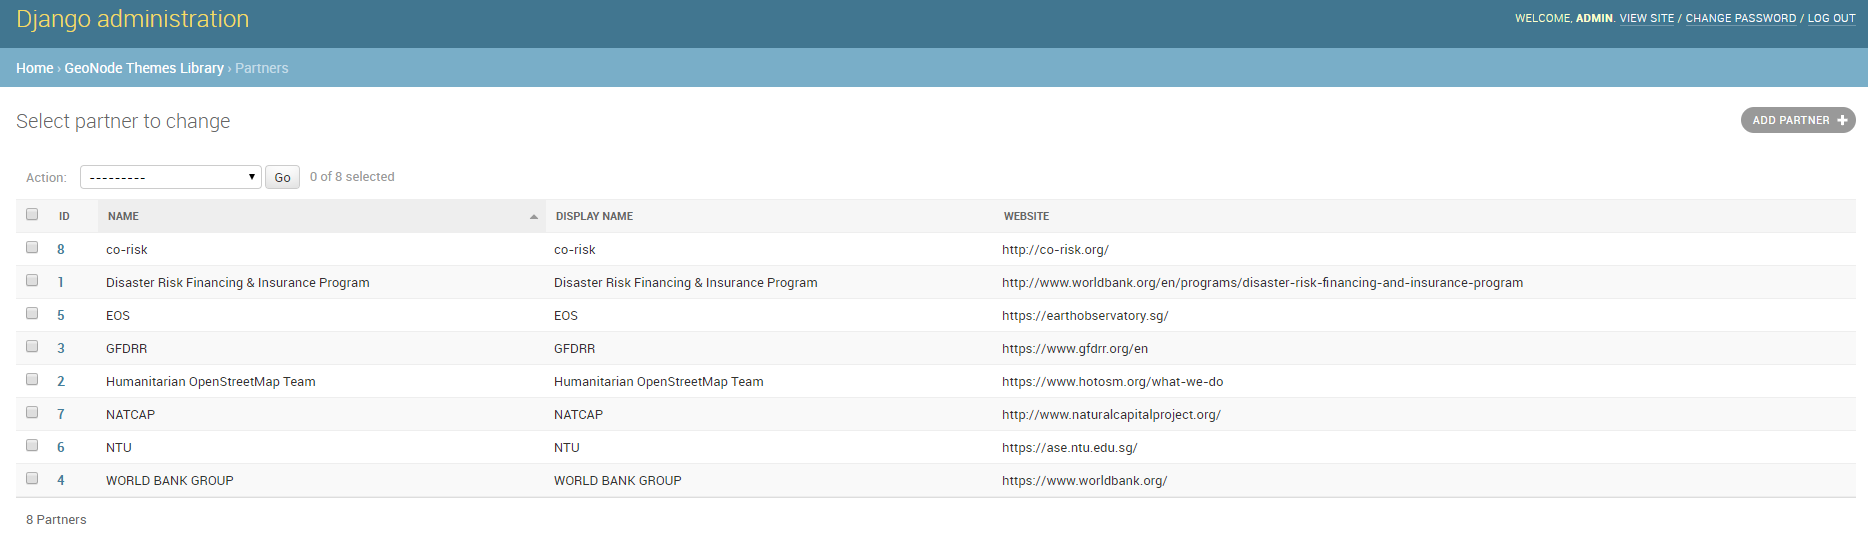
GeoNode Partners Admin Section
From here it is possible to add, modify or delete partners items.
A new partner is defined by few elements, a Logo, a Name, a Display Name and a Website
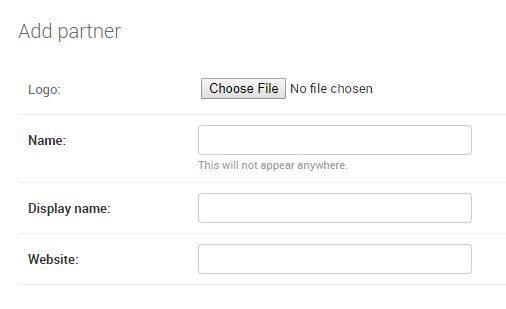
Add a Partner
In order to attach or detach a Partner to an existing Theme on GeoNode, you will need to edit the Theme and go to the Partners section
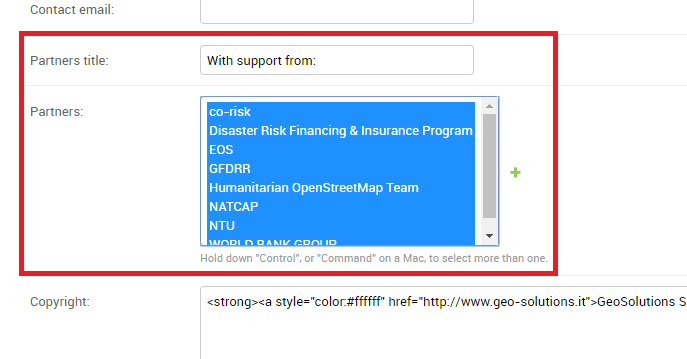
Theme Partners Section
From here you will be able to either to change the Partners title text and/or select/deselect Partners from the multi-select box.
Note
In order to select/deselect elements from the multi-select box, you must use the CTRL+CLICK button combintation.
Privacy Policies and Cookie settings
By enabling the Cookies Law Info Bar checkbox (True by default)
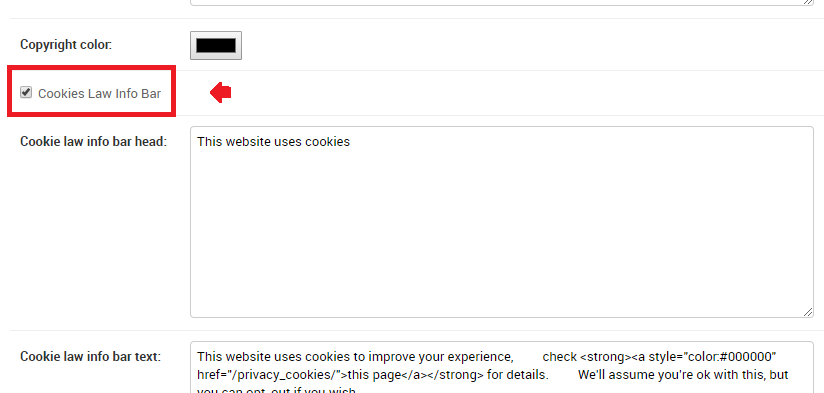
Cookies Law Info Bar checkbox
it will be possible to allow GeoNode presenting the Privacy Policies and Cookie settings pop-ups and links at the bottom of the home page
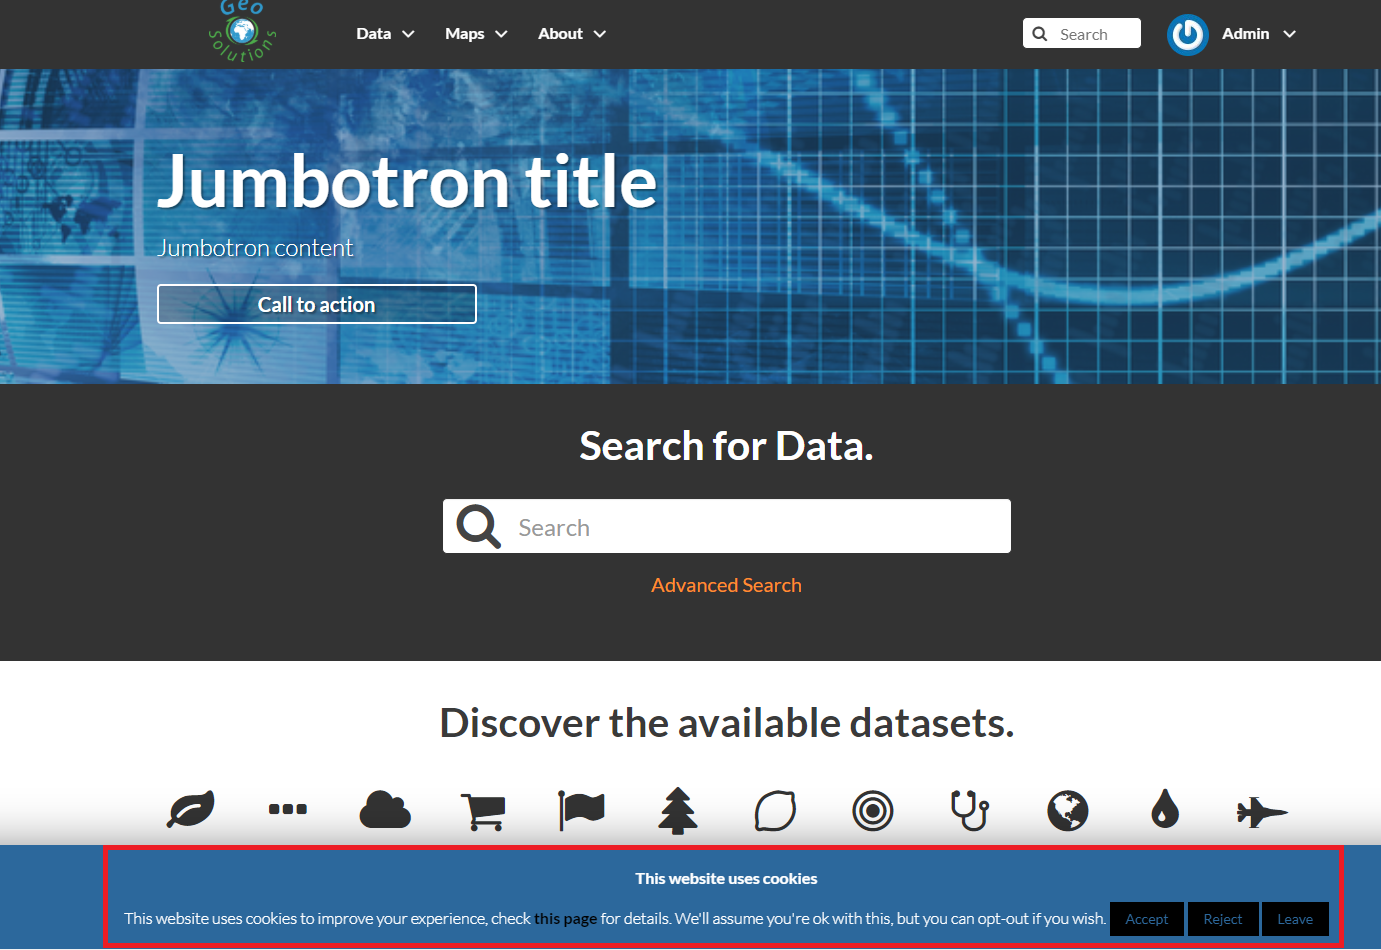
Cookies Law Info Bar
There are plenty of options available, allowing you to customize contact info as long as colors of the bar and page.
One of the most importat to consider it is for sure the Cookie law info bar text
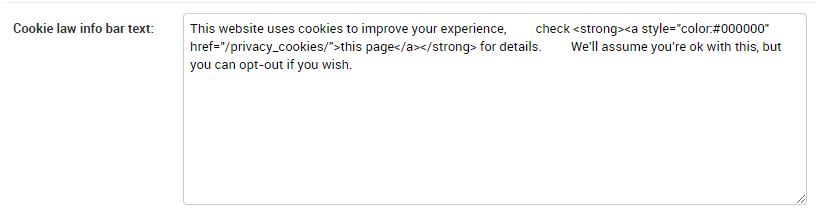
Cookie law info bar text
The default text contained in this section is the following one
This website uses cookies to improve your experience,
check <strong><a style="color:#000000" href="/privacy_cookies/">this page</a></strong> for details.
We'll assume you're ok with this, but you can opt-out if you wish.
The text can be changed and customized, of course. Nevertheless it points by default to the following page
/privacy_cookies/
aka http://<your_geonode_host>/privacy_cookies/
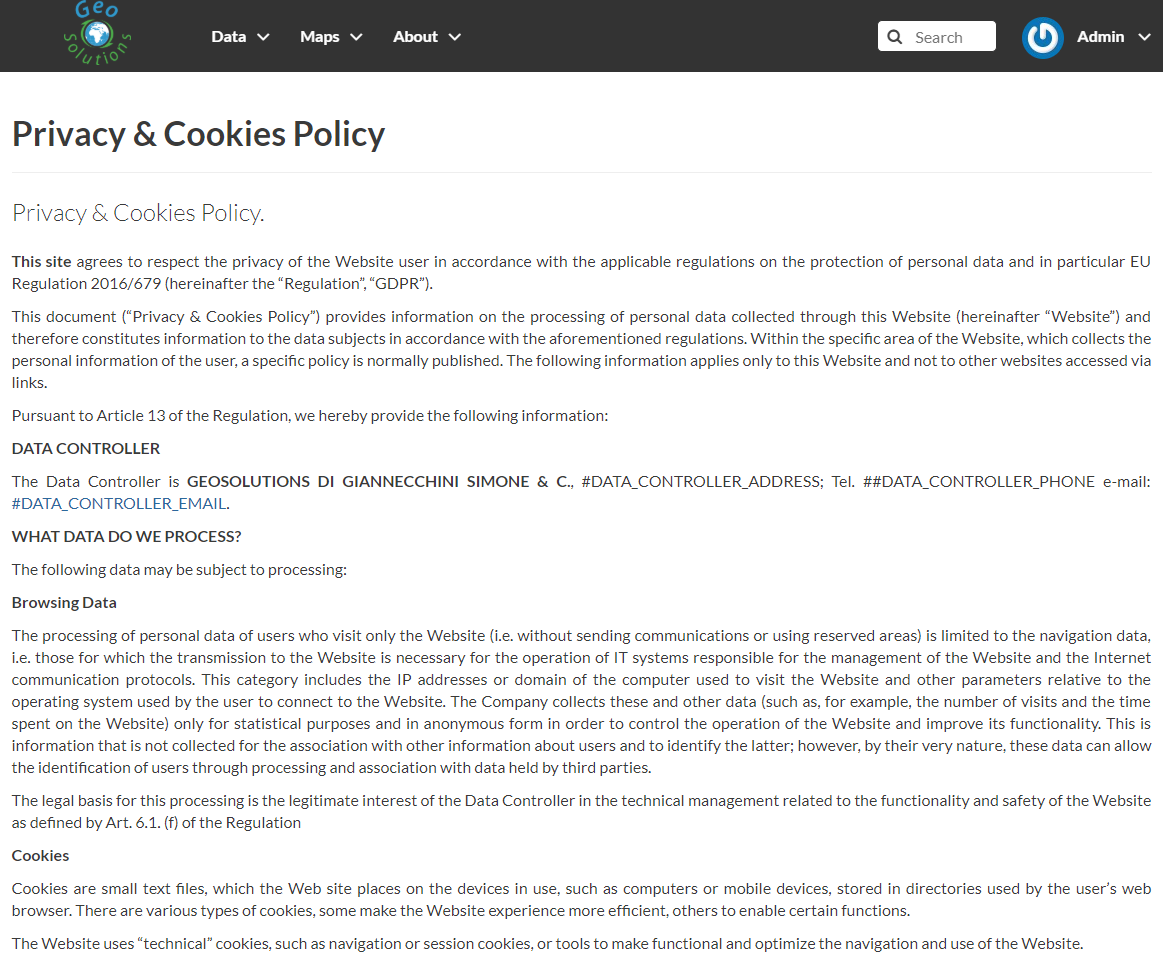
/privacy_cookies/ Default Page
The page contains a default generic text along with some placeholders, which, most probably, won’t feet your needs.
In order to change this you have two options:
- Change the link reported into the
Cookie law info bar textsection, to make it pointing to an external/static page. - Change the contents of
/geonode/templates/privacy-cookies.htmlDjango template accordingly to your needs; this is basically a plainHTMLpage which can be easily customized by using a standard text editor.
Switching between different themes
In the case you have defined more Themes, switching between them is as easy as enabling one and disabling the others.
Remember to save the Themes everytime and refresh the GeoNode home page on the browser to see the changes.
It is also important that there is only one Theme enabled at a time.
In order to go back to the standard GeoNode behavior, just disable or delete all the available Themes.
Add a new user
In GeoNode, administrators can manage other users. For example, they can Add New Users through the following form.
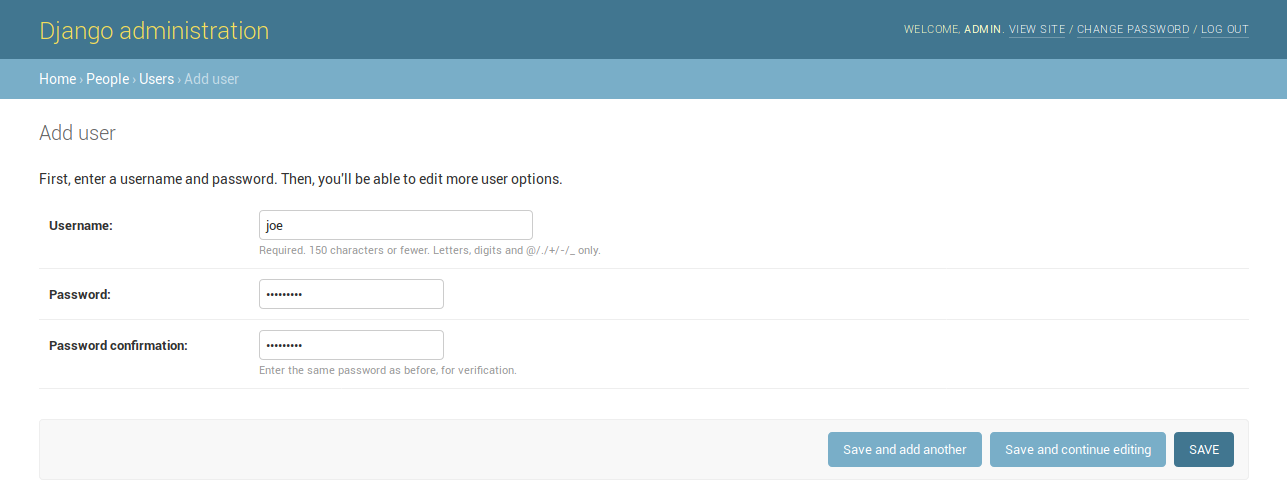
Adding New Users
The form above can be reached from the Admin Panel at the following path: Home > People > Users. Click on ADD USER + to open the form page.
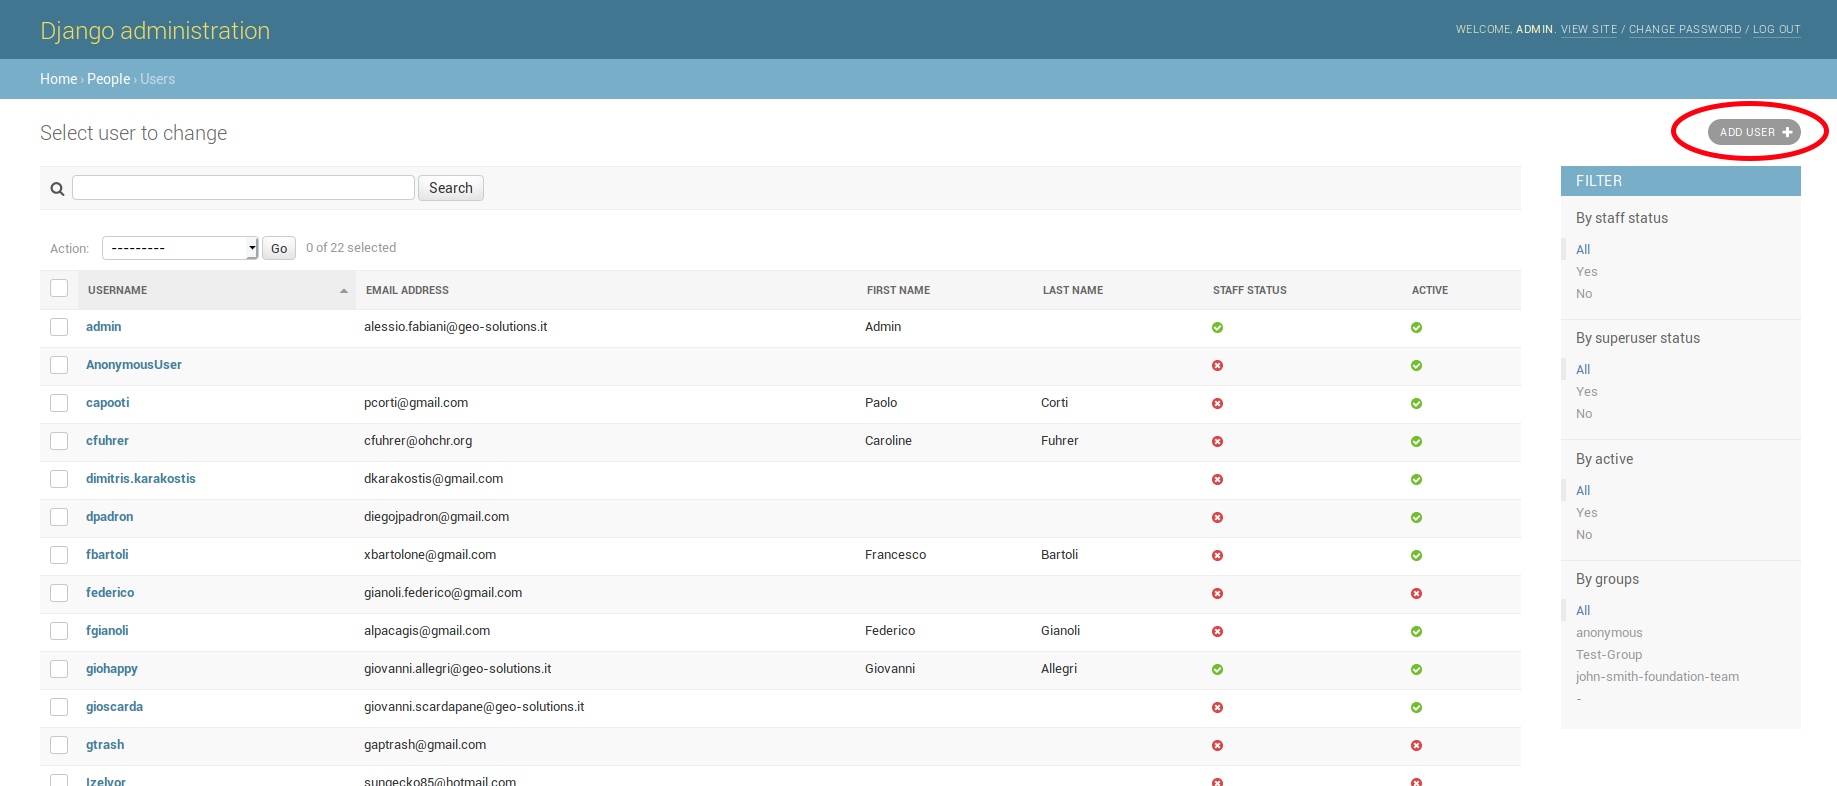
The Add User button in the Users List page
It is also available, in the GeoNode UI, the Add User link of the About menu in the navigation bar.
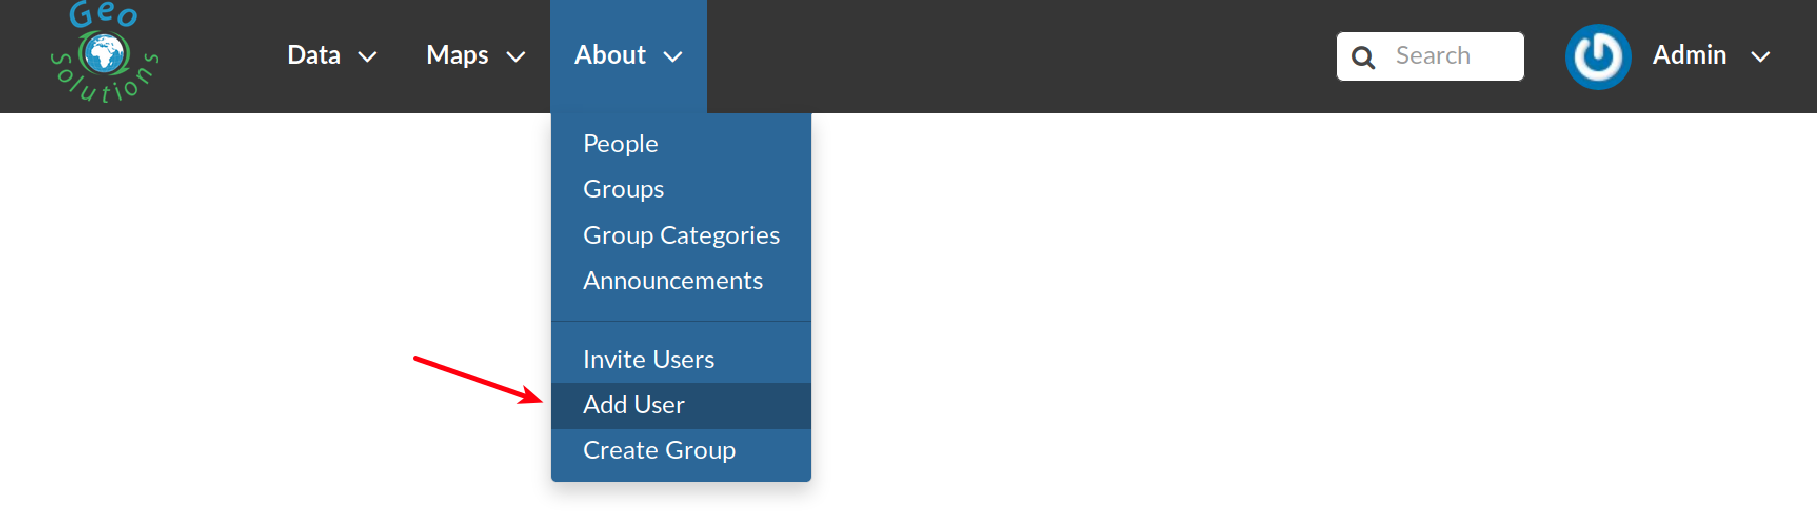
Add User Link
To perform the user creation fill out the required fields (username and password) and click on SAVE. You will be redirected to the User Details Page which allows to insert further information about the user.
The User Details Page
The user will be visible into the Users List Page of the Admin Panel and in the People Page (see Viewing other users information).

The User in the People page
Activate/Disable a User
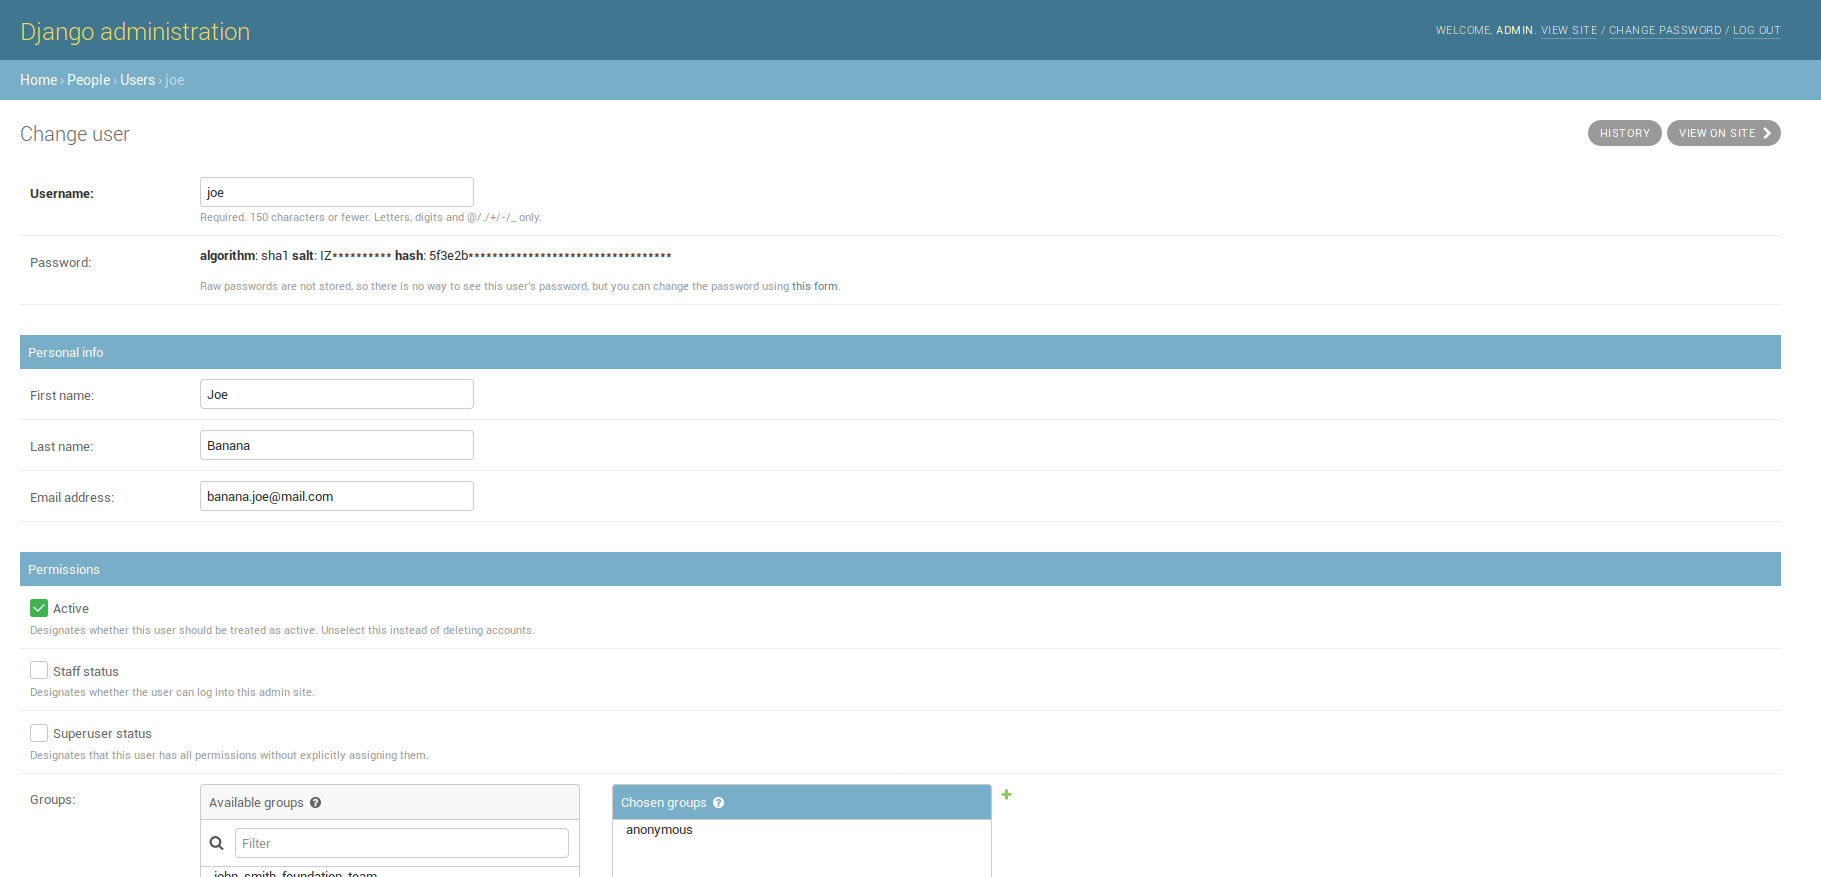
When created, new users are active by default. You can check that in the User Details Page from the Admin Panel (see the picture below).
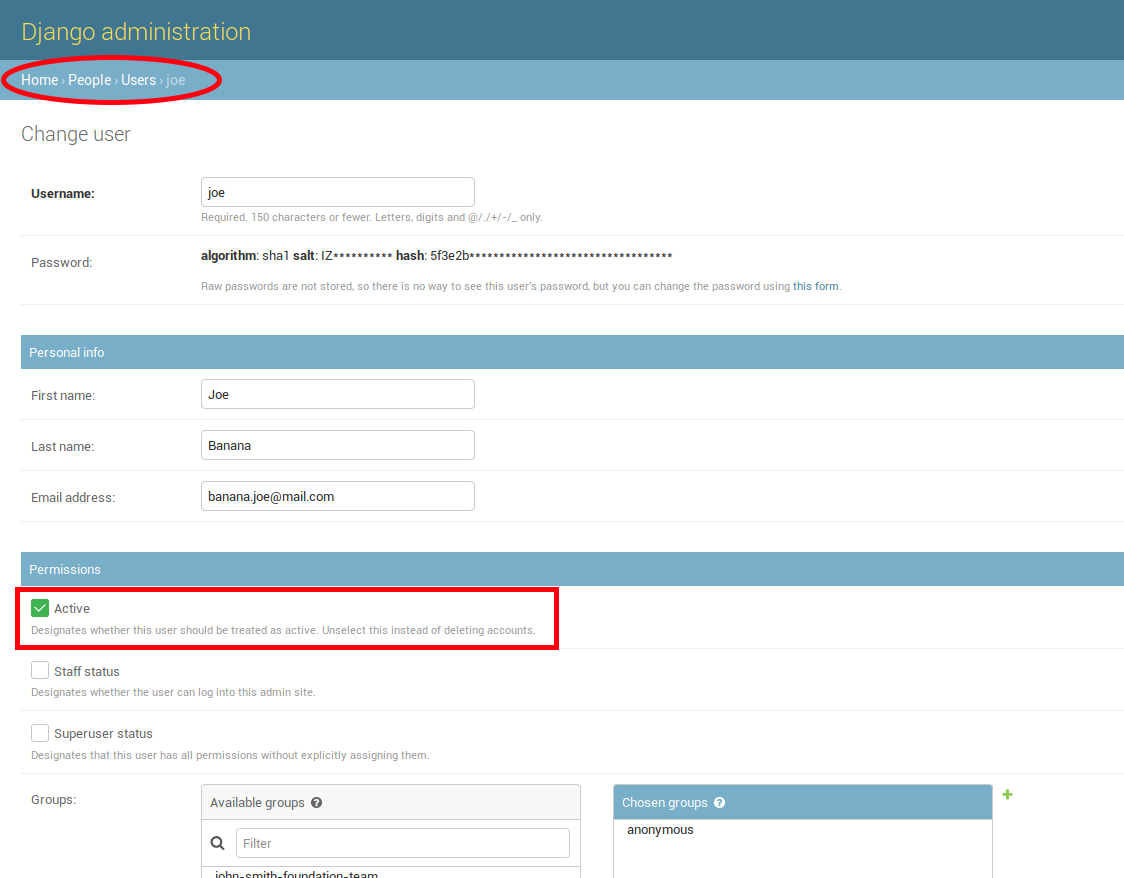
New Users Active by default
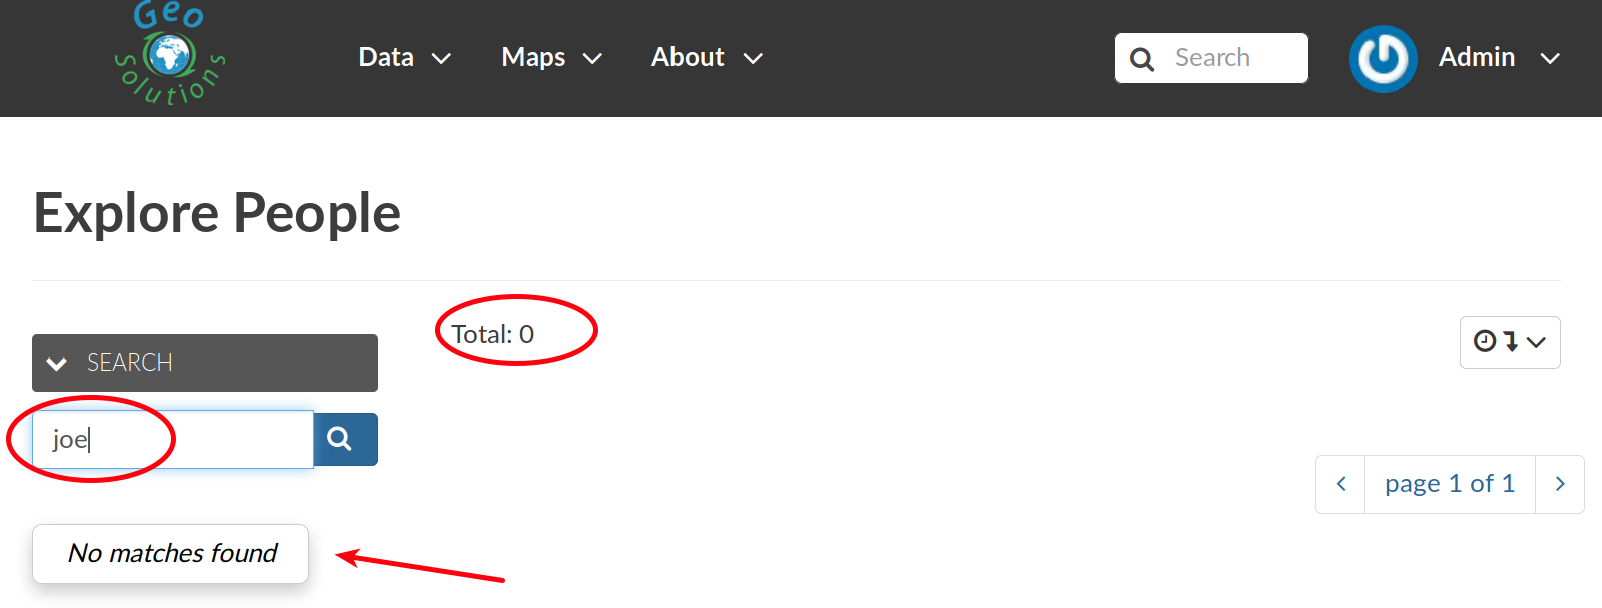
Disabeld Users
Change a User password
GeoNode administrators can also change/reset the password for those users who forget it.
As shown in the picture below, click on this form link from the User Details Page to access the Change Password Form.
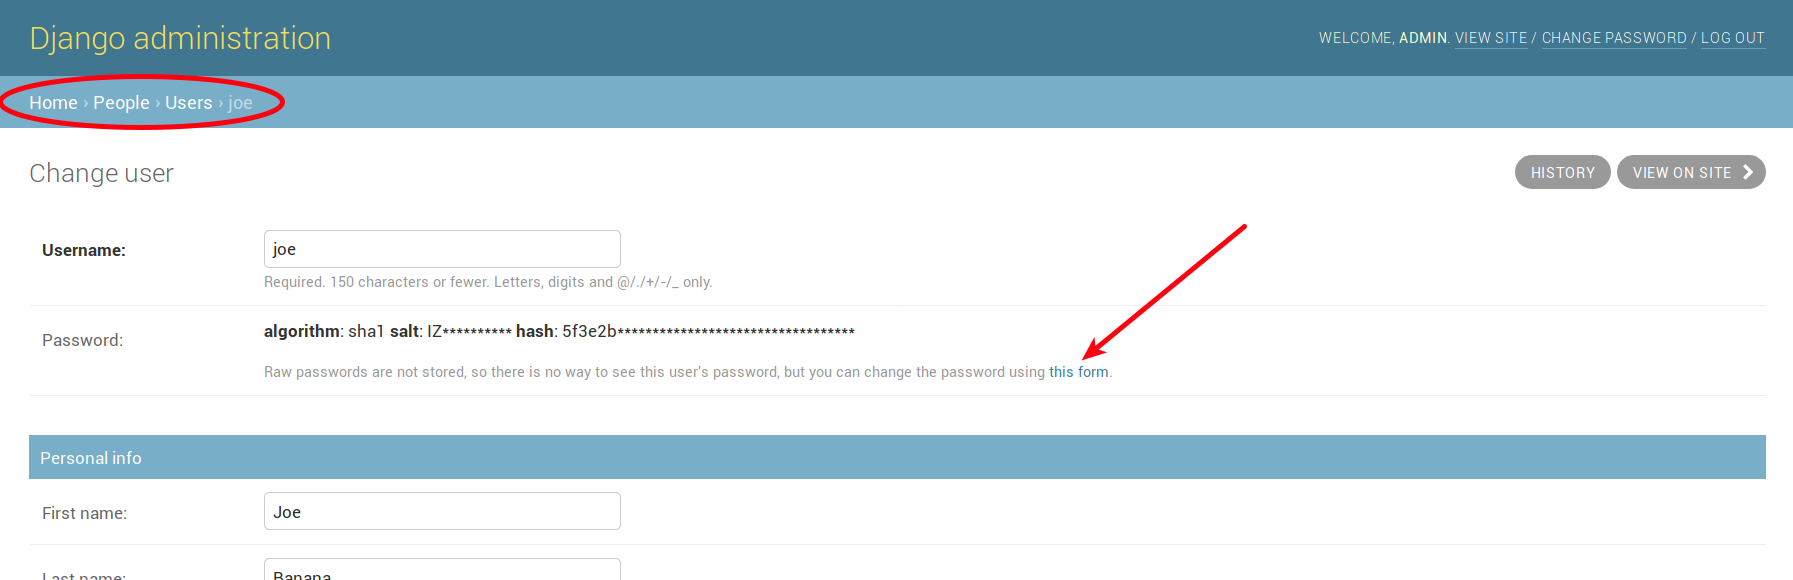
Changing Users Passwords
The Change User Password Form should looks like the following one. Insert the new password two times and click on CHANGE PASSWORD.
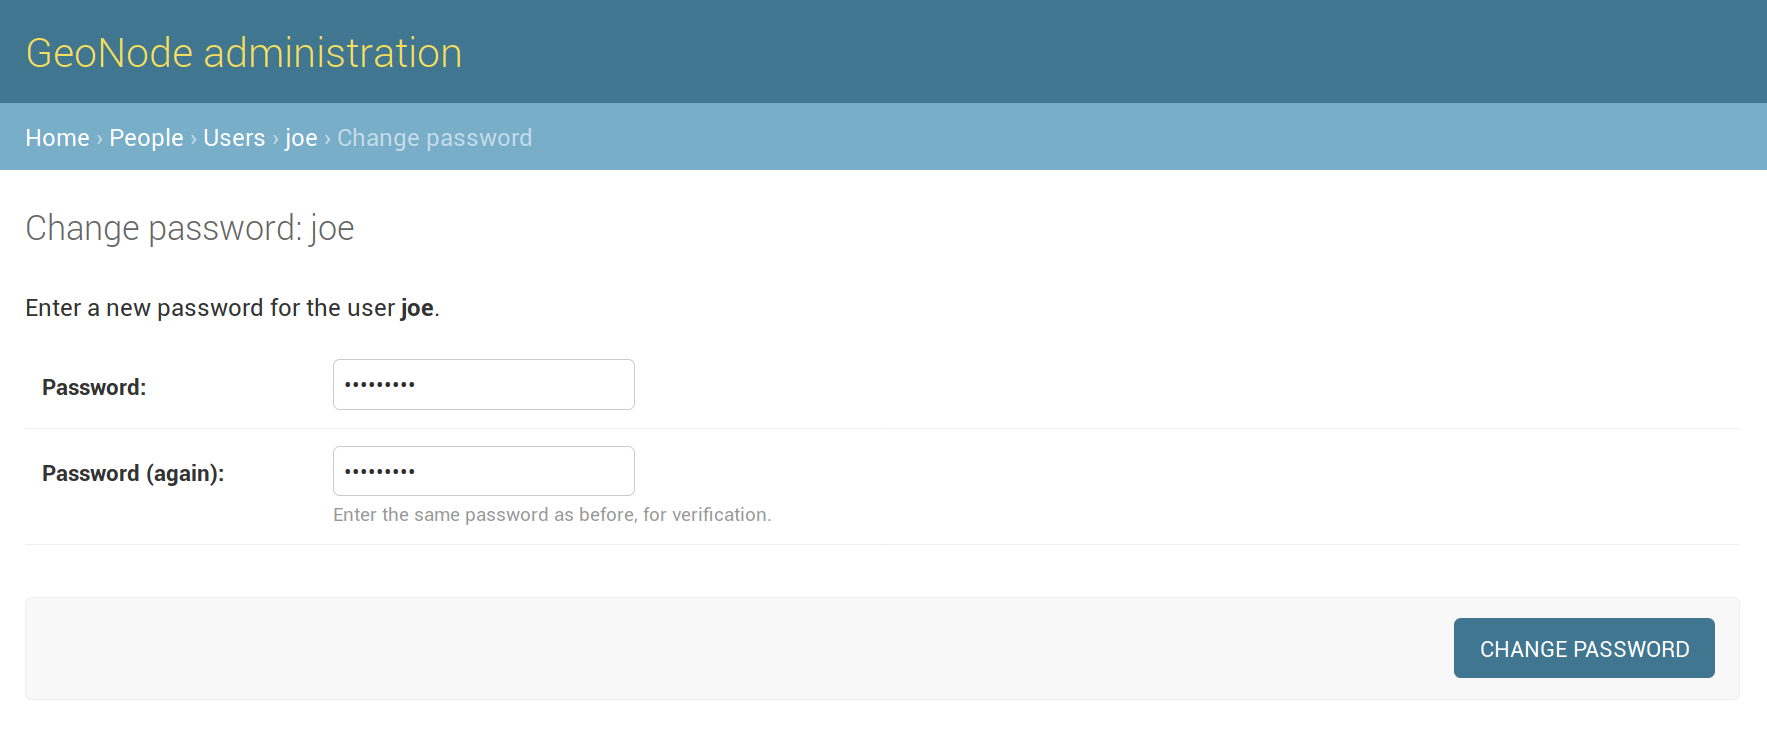
Changing Users Passwords
Promoting a User to Staff member or superuser
Active users have not access to admin tools. GeoNode makes available those tools only to Staff Members who have the needed permissions. Superusers are staff members with full access to admin tools (all permissions are assigned to them).
Administrators can promote a user to Staff Member by ticking the Staff status checkbox in the User Details Page. To make some user a Superuser, the Superuser status checkbox should be ticked. See the picture below.
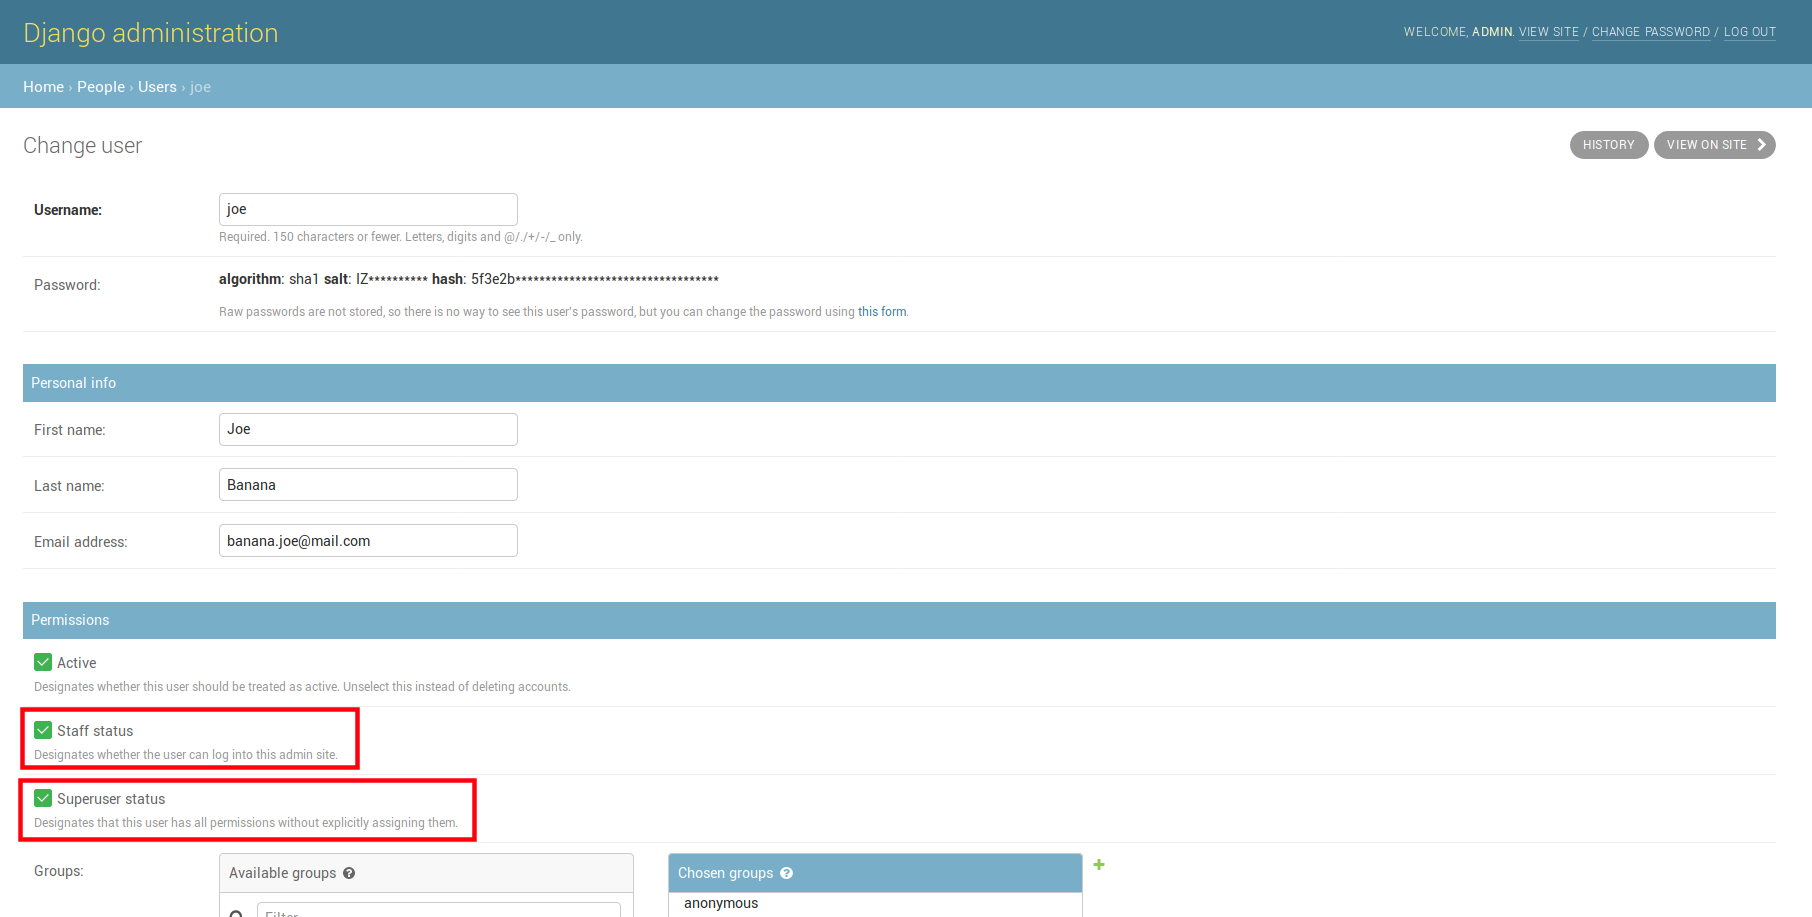
Staff and Superuser permissions
Creating a Group
The Create Groups link of About menu in the navigation bar allows administrators to reach the Group Creation Page.
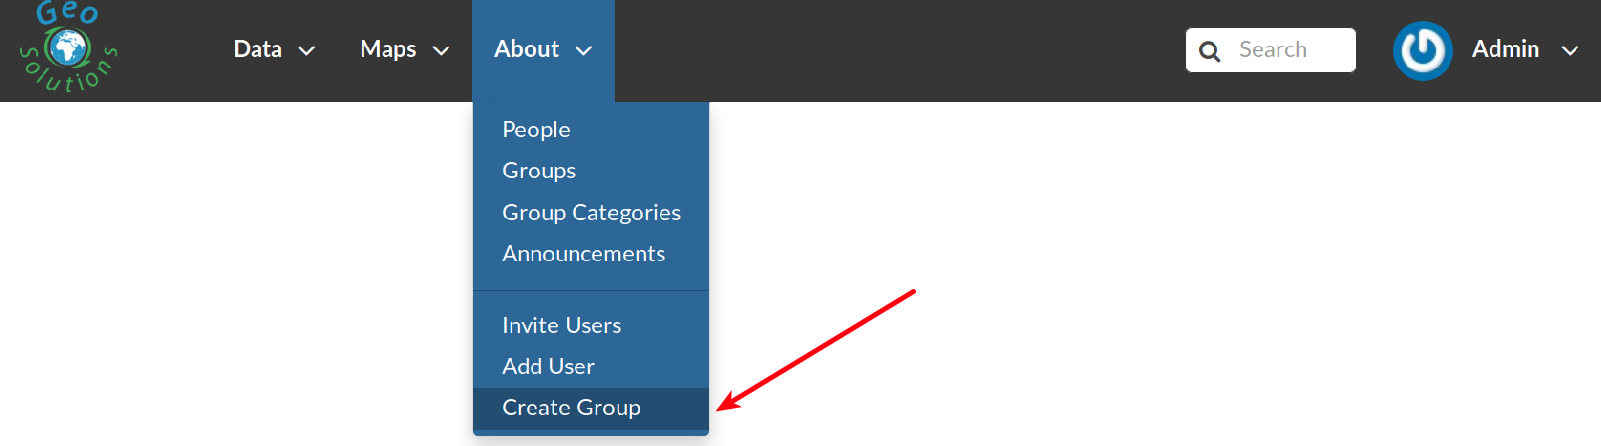
The Create Group Link
The following form will open.

The Group Creation Form
Fill out all the required fields and click Create to create the group. The Group Details Page will open.
The Group Details Page
The new created group will be searchable in the Groups List Page.
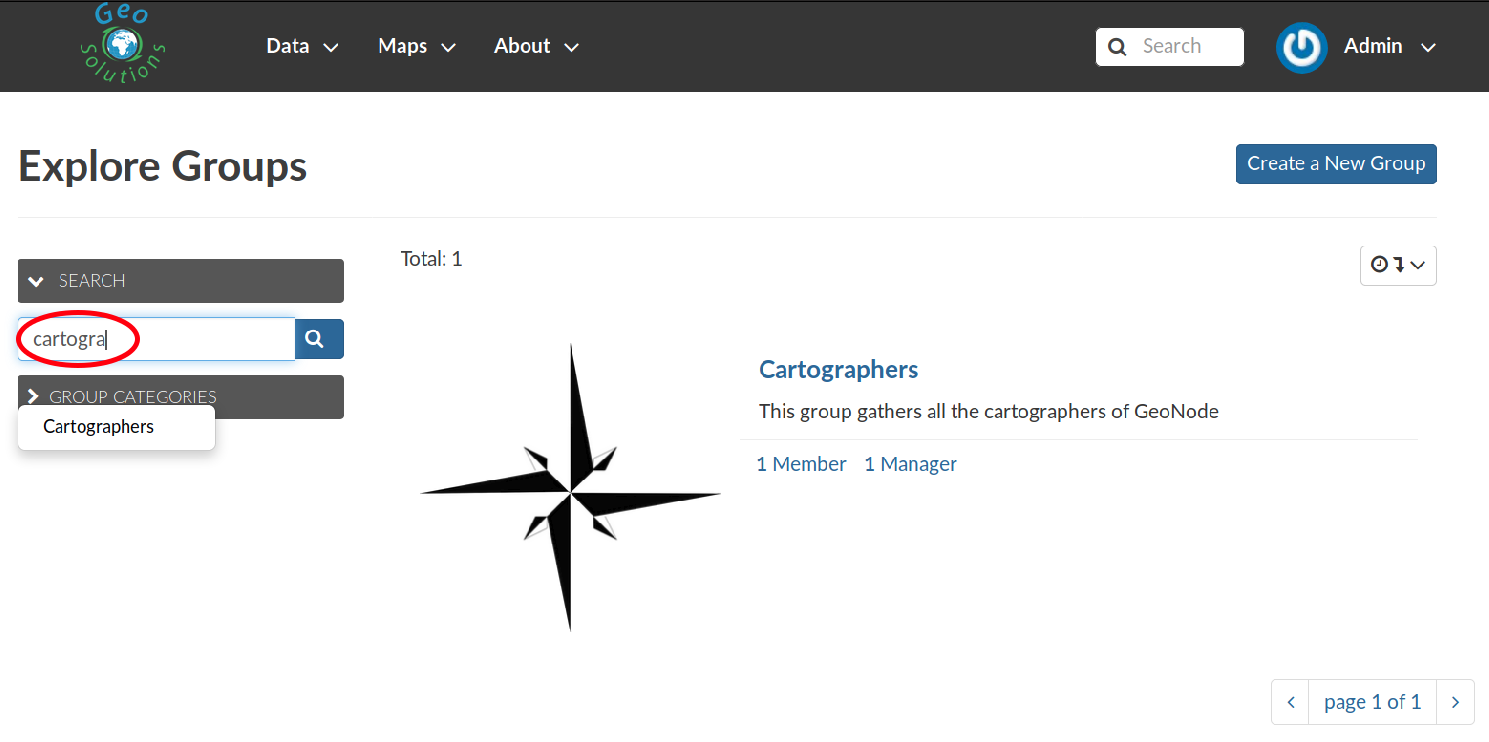
The Groups List Page
Note
The Create a New Group button on the Groups List Page allows to reach the Group Creation Form.

The Groups Section on the Admin Panel
As you can see, GeoNode provides two types of groups. You will learn more about that in the next paragraph.
Types of Groups
In GeoNode users can be grouped through a Group Profile, an enhanced Django group which can be enriched with some further information such as a description, a logo, an email address, some keywords, etc. It also possible to define some Group Categories based on which those group profiles can be divided and filtered.
A new Group Profile can be created as follow:
click on the Group Profile + Add button
fill out all the required fields (see the picture below), Group Profiles can be explicitly related to group categories
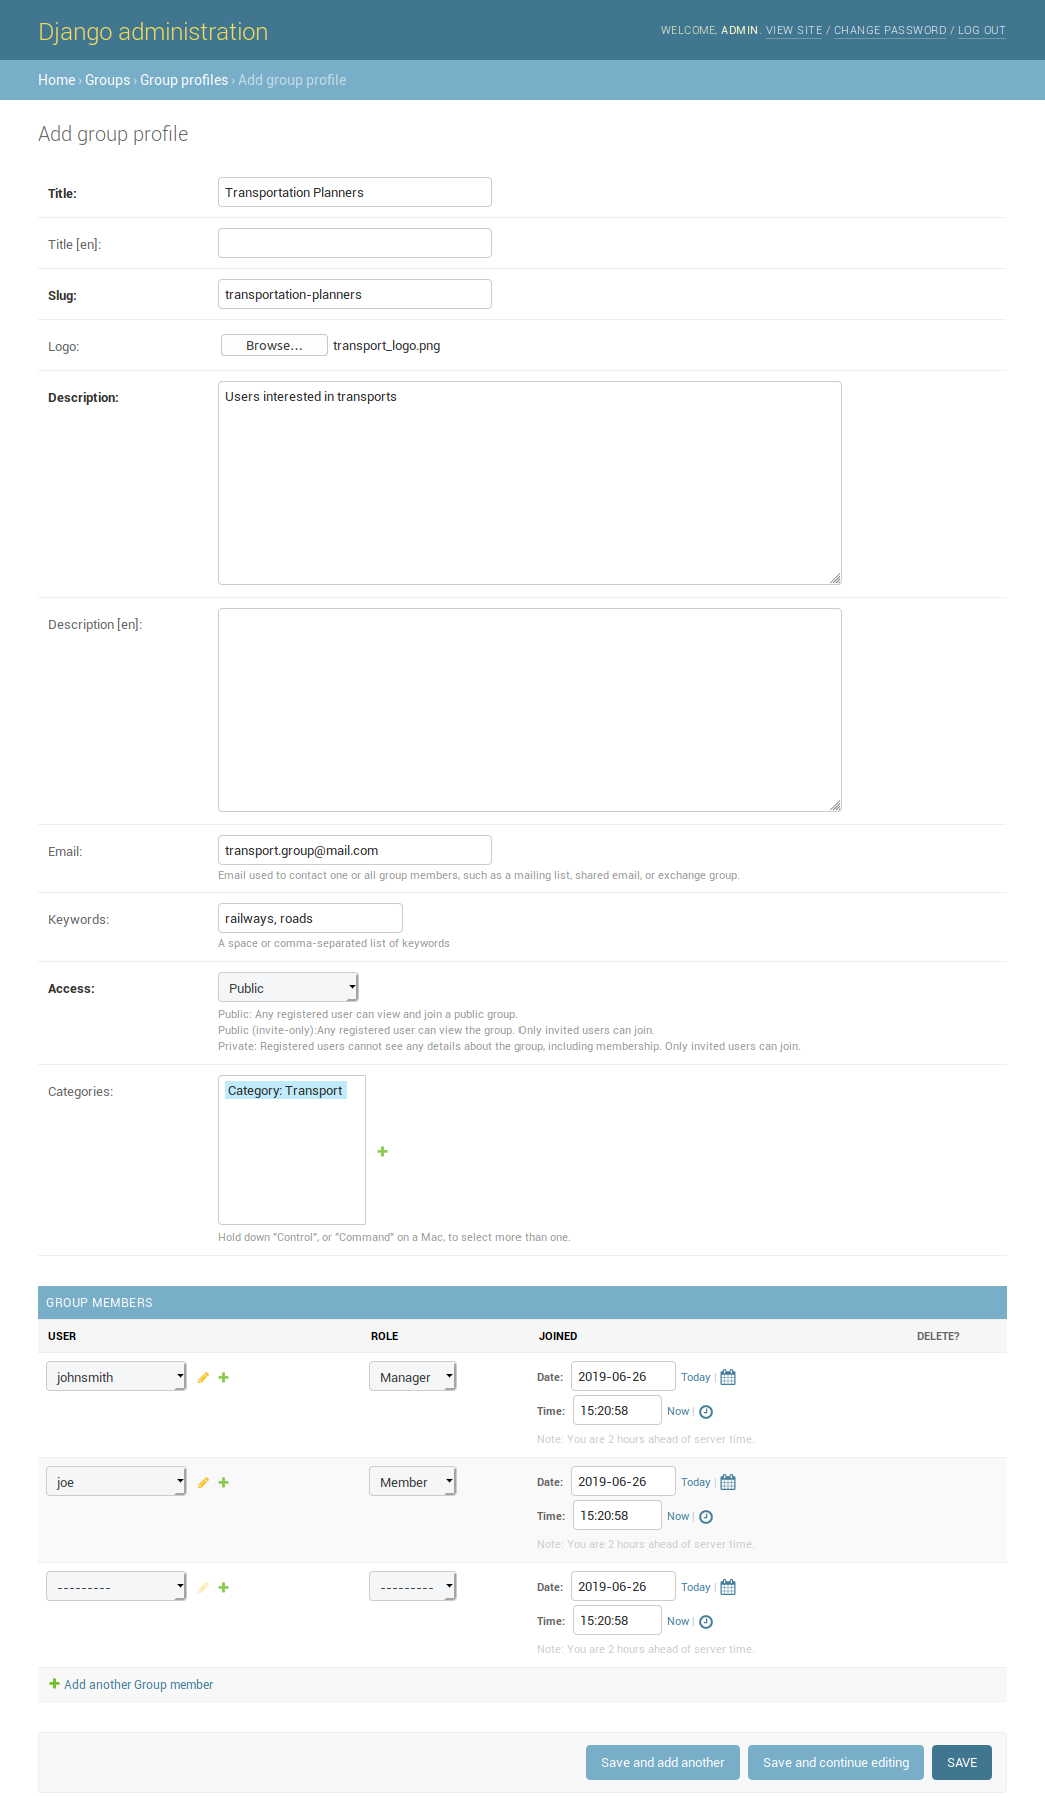
A new Group Profile
click on SAVE to perform the creation, the new created group profile will be visible in the Group Profiles List
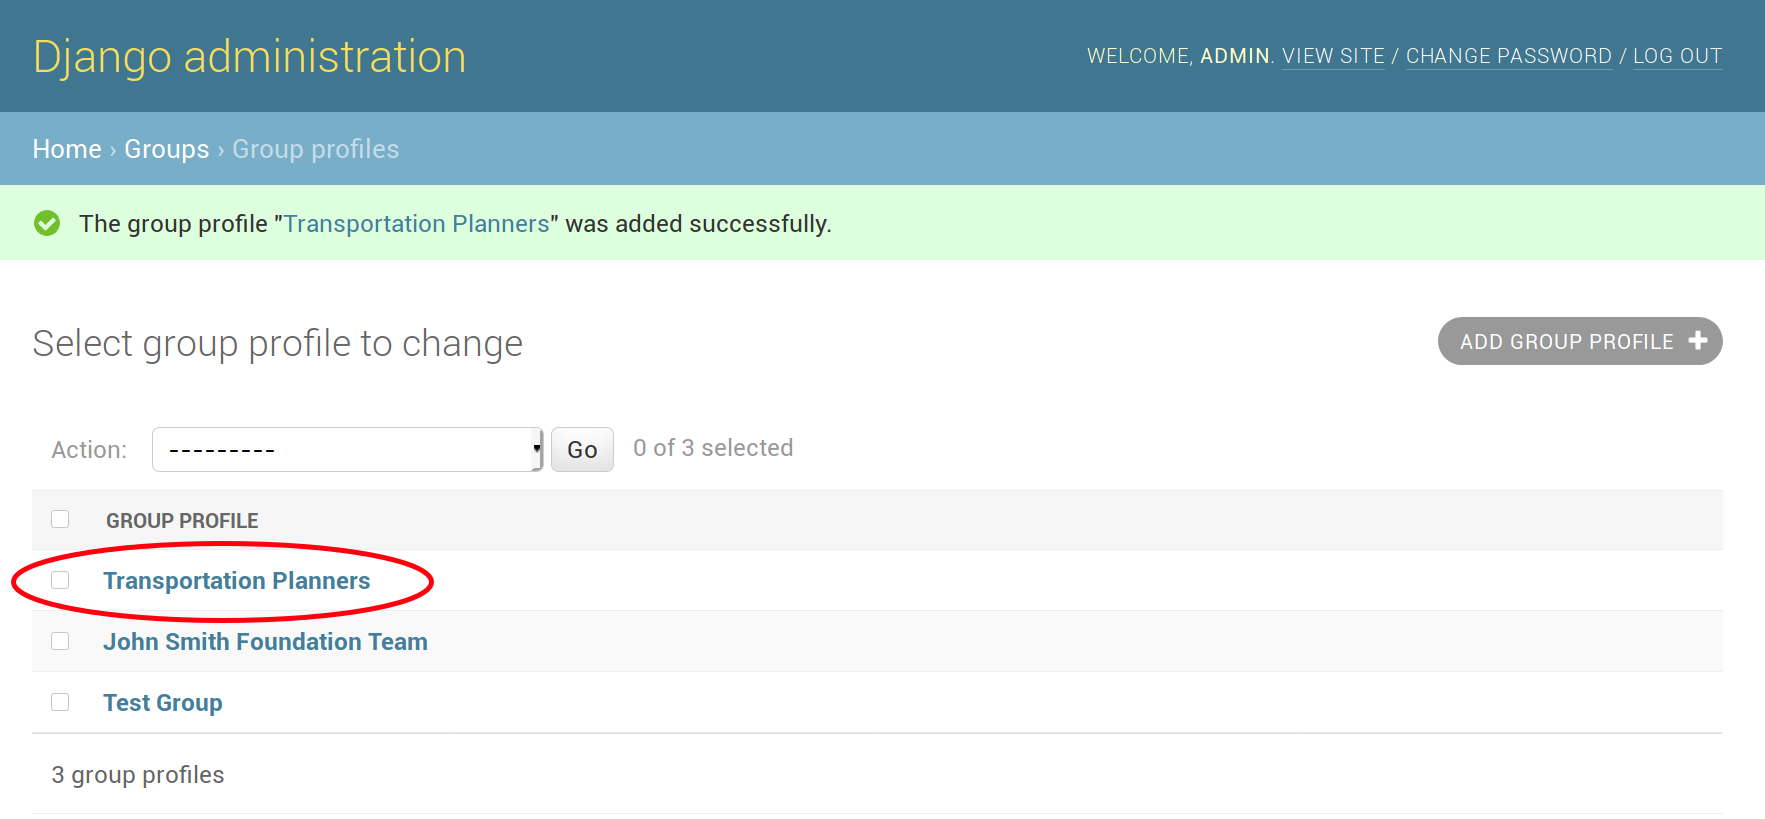
The Group Profiles List
Group Categories
Group Profiles can also be related to Group Categories which represents common topics between groups. In order to add a new Group Category follow these steps:
click on the Group Categories + Add button
fill out the creation form (type name and description)

A new Group Category
click on SAVE to perform the creation, the new created category will be visible in the Group Categories List
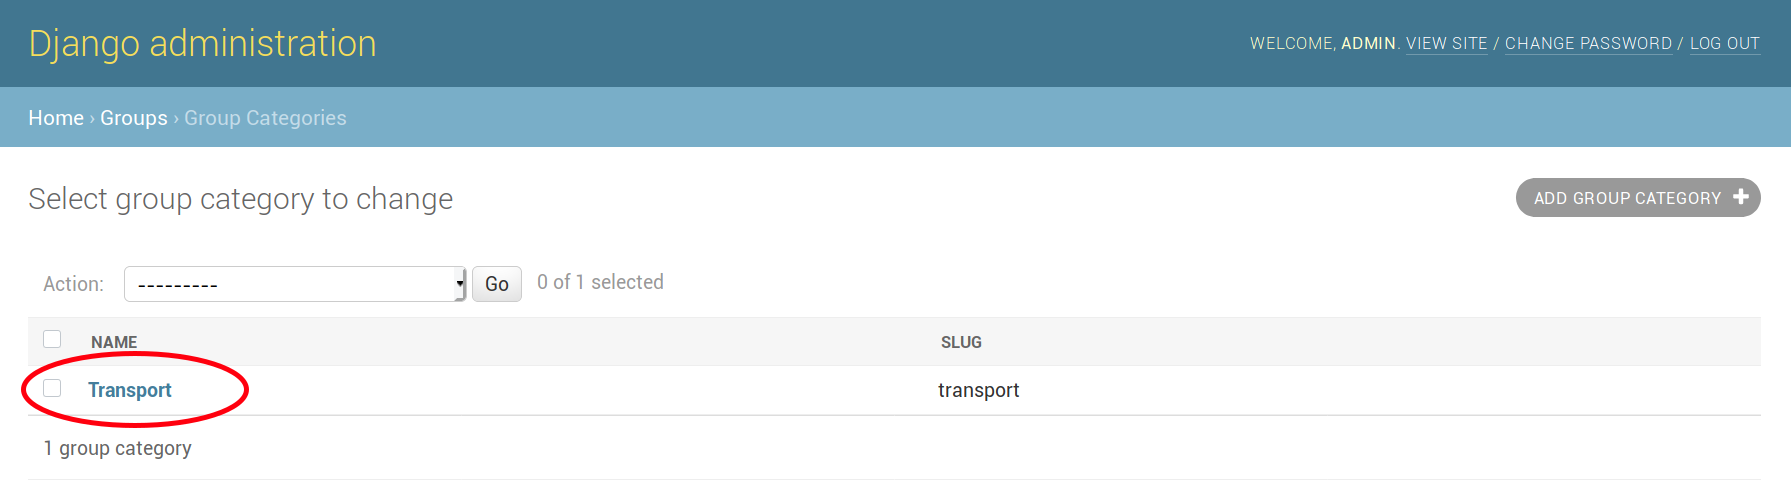
The Group Categories List
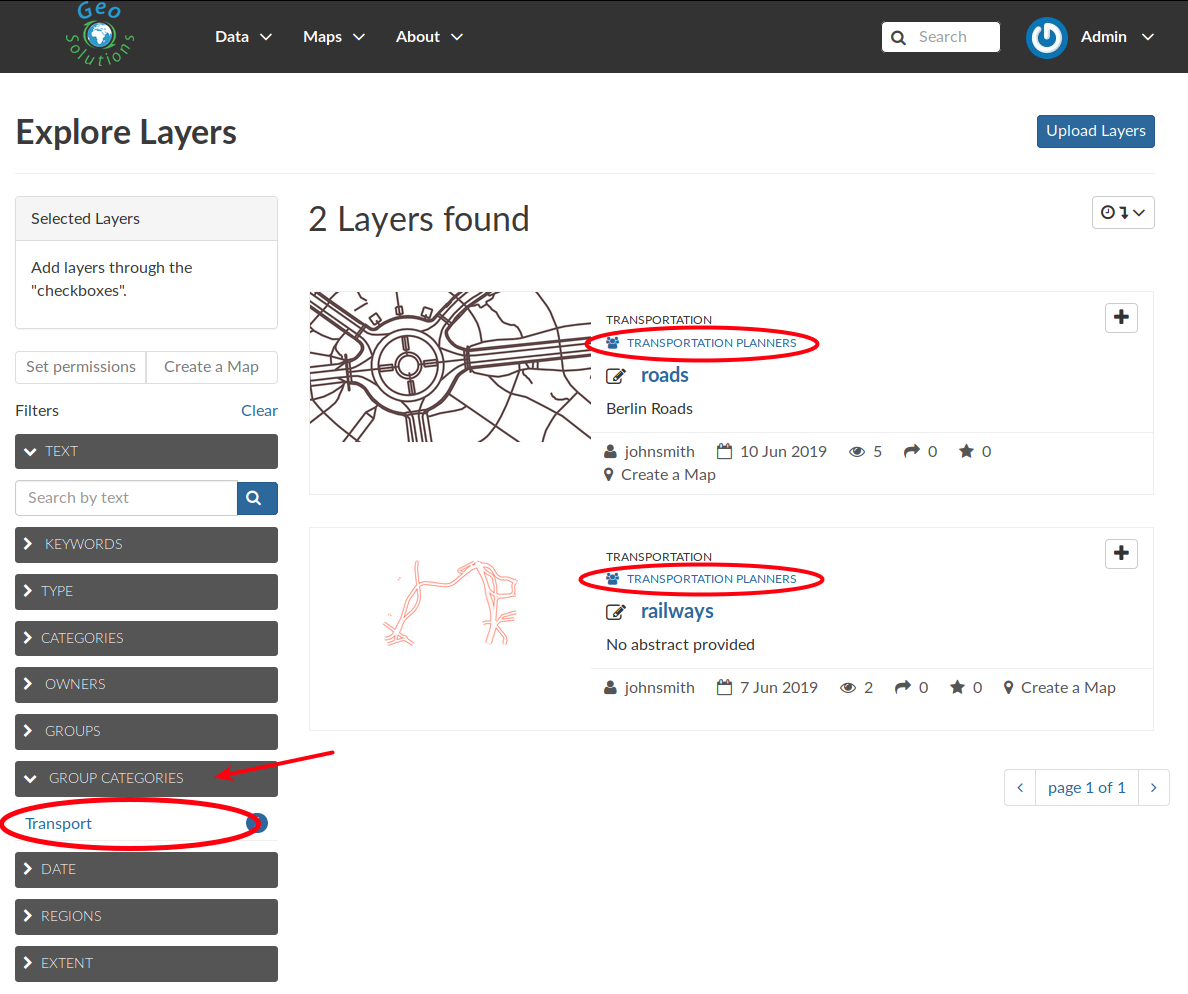
Filtering Layers by Group Category
Managing a Group
Through the Groups link of About menu in the navigation bar, administrators can reach the Groups List Page.
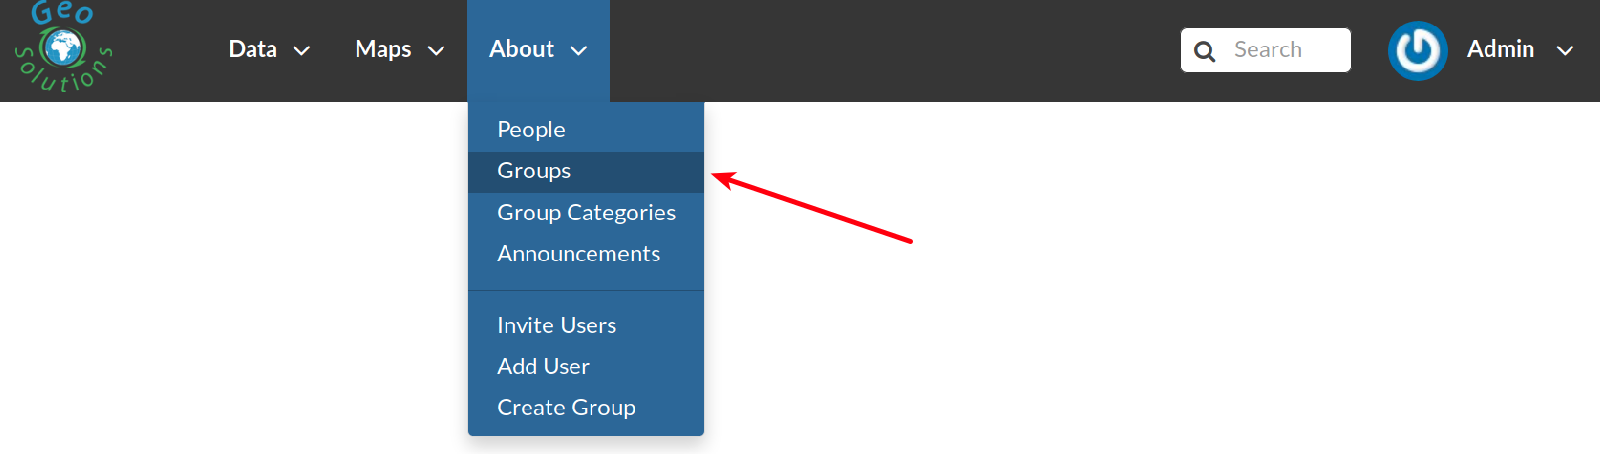
The Groups Link in the navigation bar
In that page all the GeoNode Group Profiles are listed.
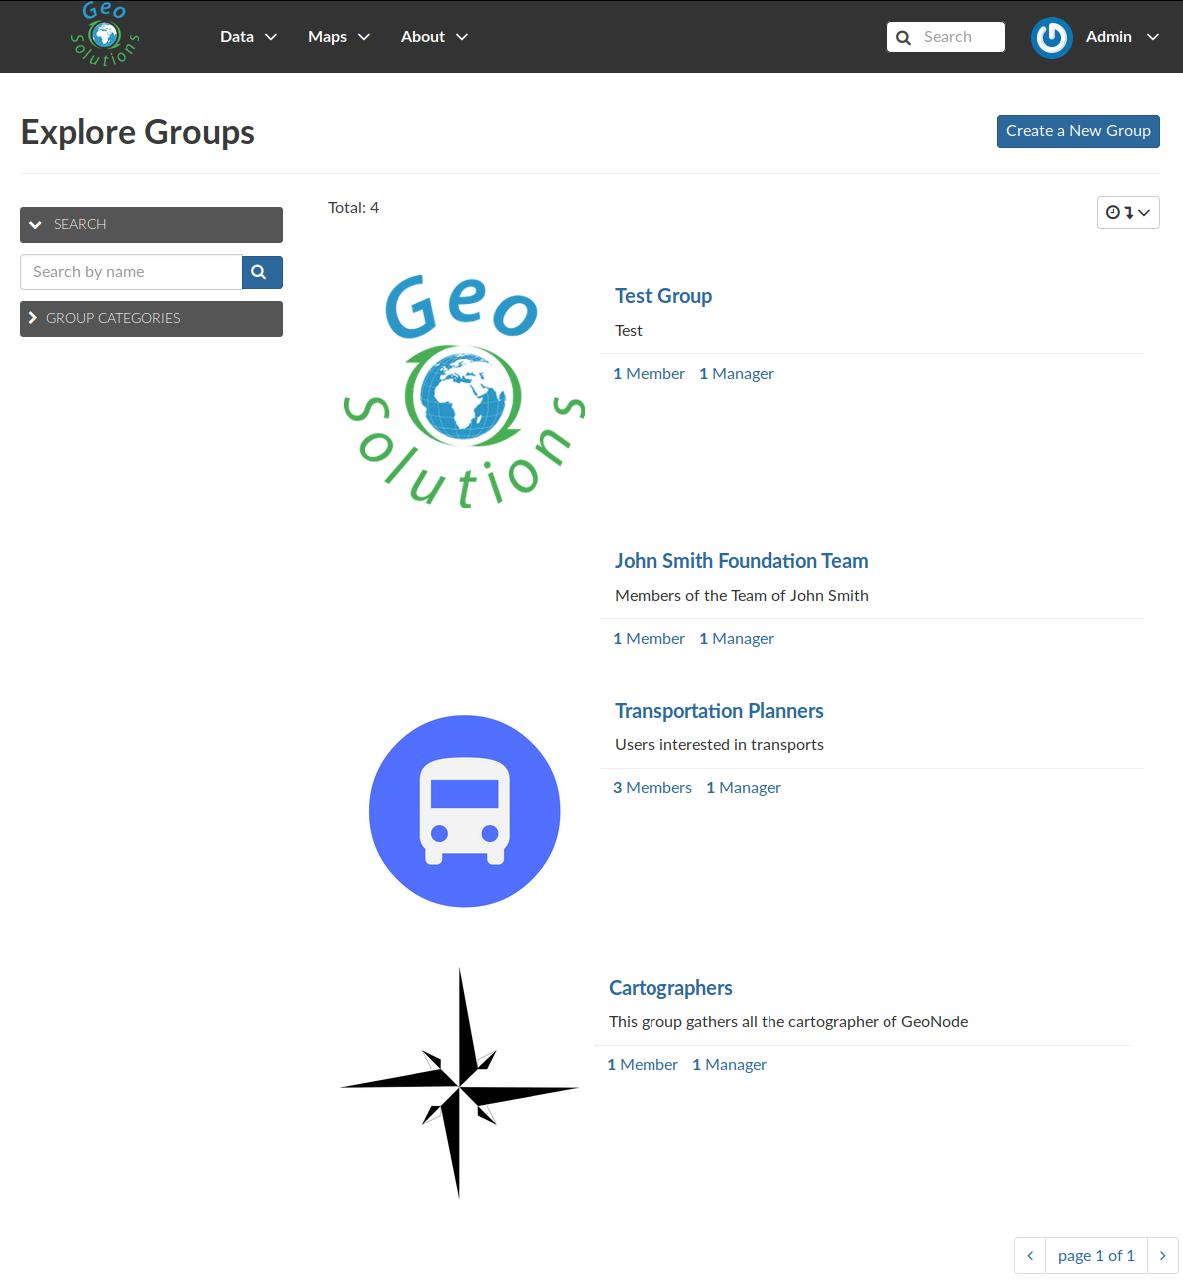
Group Profiles List Page
For each group some summary information (such as the title, the description, the number of members and managers) are displayed near the Group Logo.
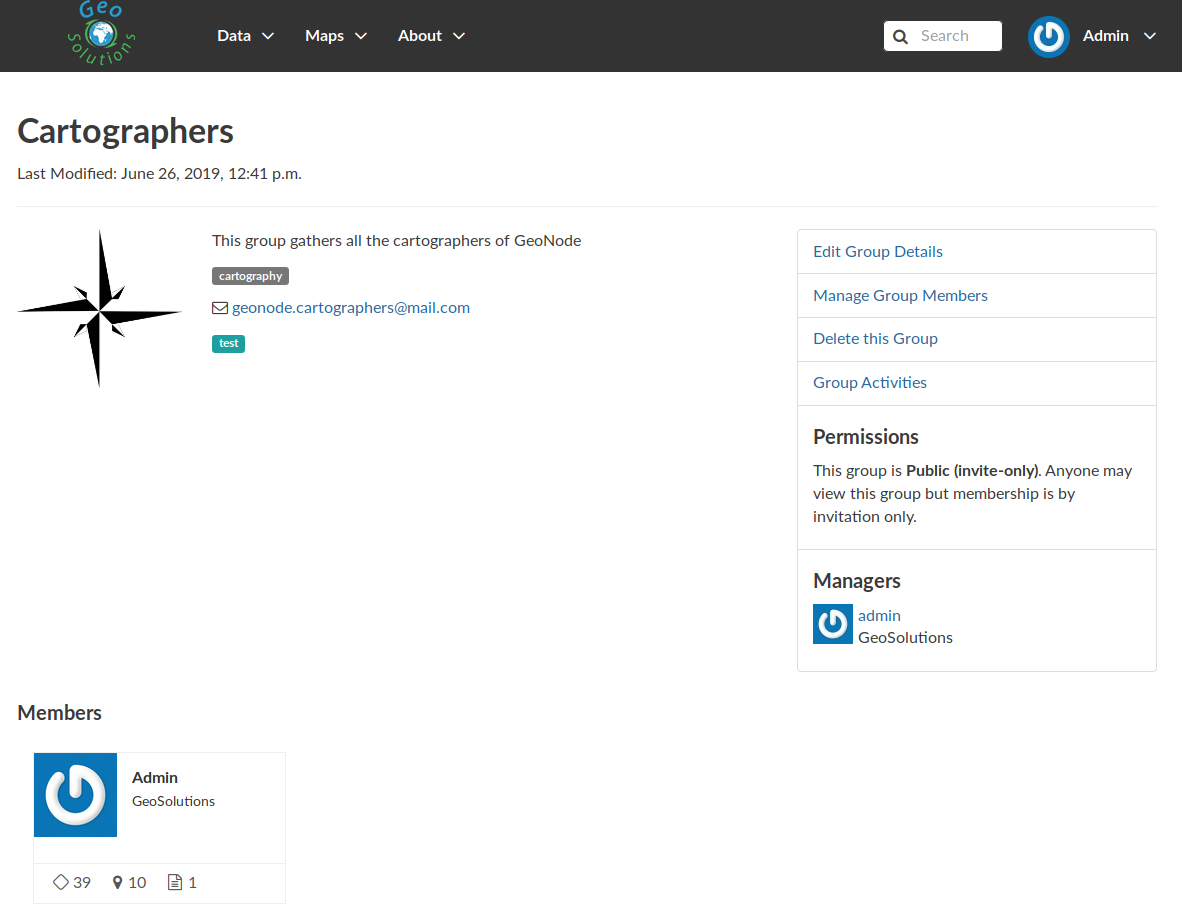
Administrators can manage a group from the Group Profile Details Page which is reachable by clicking on the title of the group.
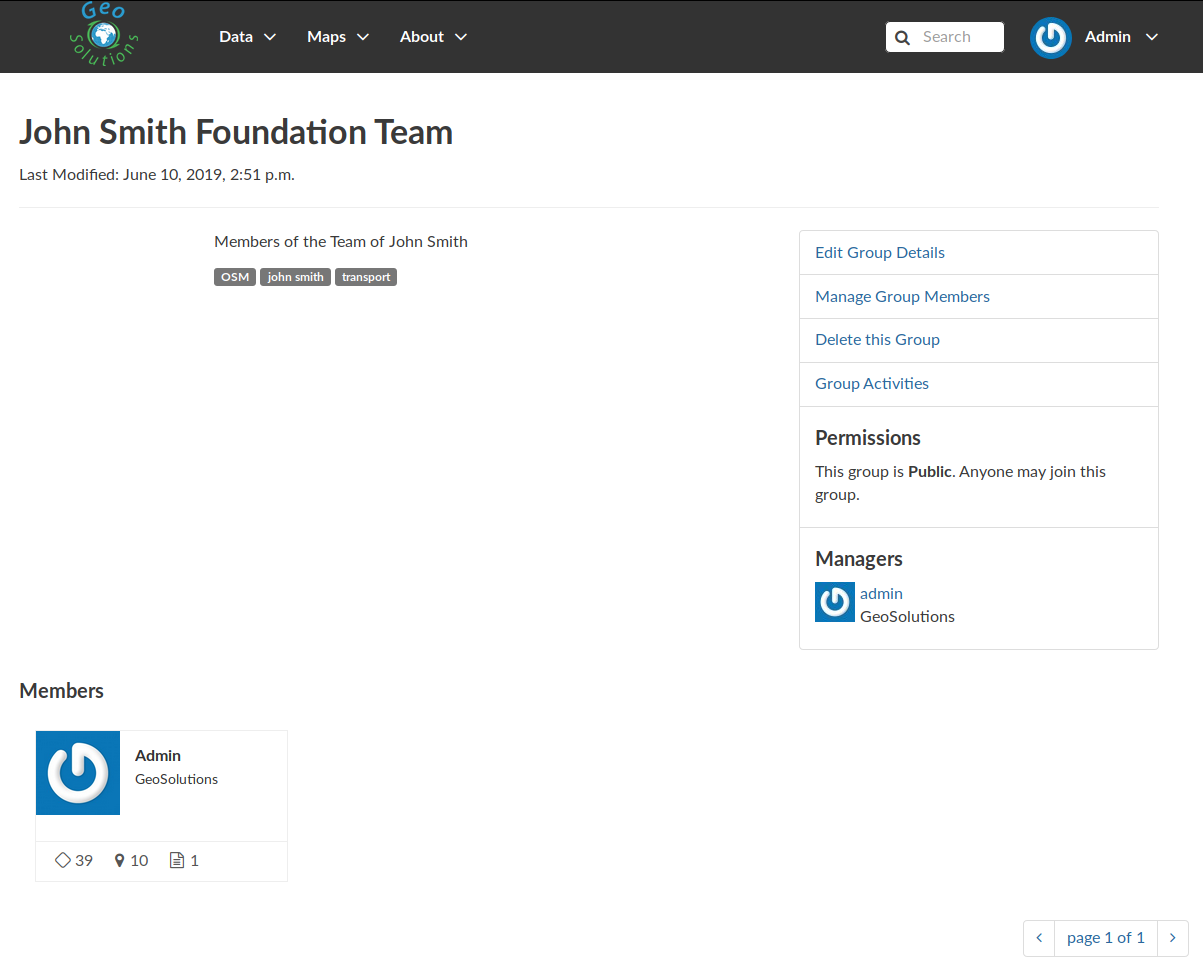
Group Profile Details Page
As shown in the picture above, all information about the group are available on that page:
- the group Title;
- the Last Editing Date which shows a timestamp corresponding to the last editing of the group properties;
- the Keywords associated with the group;
- Permissions on the group (Public, Public(invite-only), Private);
- Members who join the group;
- Managers who manage the group.
There are also four links:
The Edit Group Details link opens the Group Profile Form through which the following properties can be changed:
- Title.
- Logo (see next paragraphs).
- Description.
- Email, to contact one or all group members.
- Keywords, a comma-separated list of keywords.
- Access, which regulates permissions:
- Public: any registered user can view and join a public group.
- Public (invite-only): only invited users can join, any registered user can view the group.
- Private: only invited users can join the group, registered users cannot see any details about the group, including membership.
- Categories, the group categories the group belongs to.
Group Profile Details Page
Managing Group Members (see next paragraphs).
the Delete this Group, click on it to delete the Group Profile. GeoNode requires you to confirm this action.

Confirm Group Deletion
the Group Activities drives you to the Group Activites Page where you can see all layers, maps and documents associated with the group. There is also a Comments tab which shows comments on those resources.
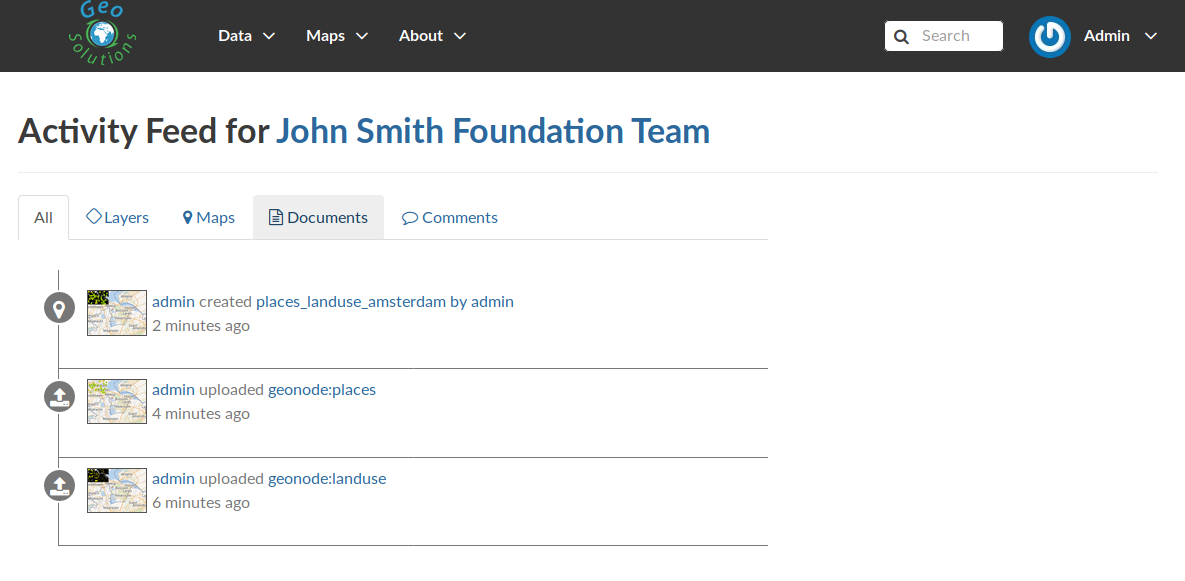
Group Activities
Group Logo
Each group represents something in common between its members. So each group should have a Logo which graphically represents the idea that identify the group.
On the Group Profile Form page you can insert a logo from your disk by click on Browse….
Editing the Group Logo
The Group Logo
Managing Group members
The Manage Group Members link opens the Group Members Page which shows Group Members and Group Managers. Managers can edit group details, can delete the group, can see the group activities and can manage memberships. Other Members can only see the group activities.
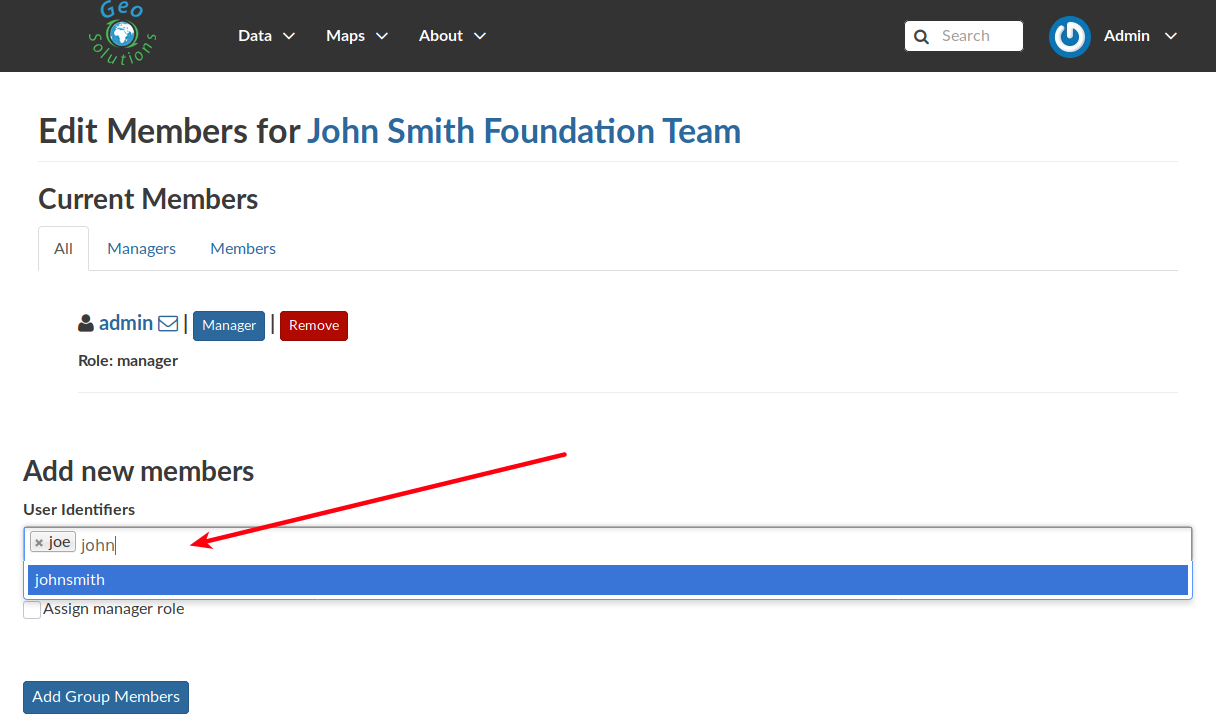
Adding a new Member to the Group
The following picture shows you the results.
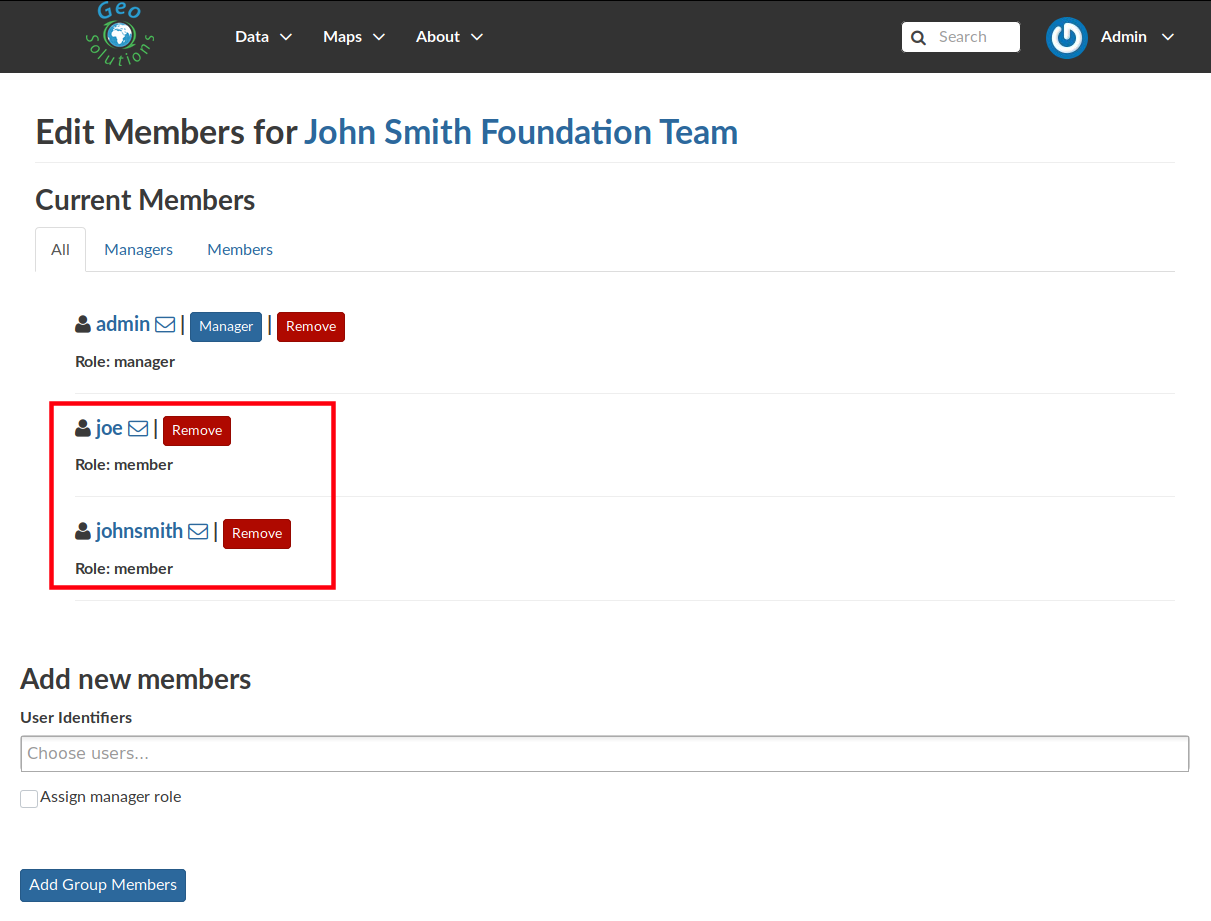
New Members of the Group
Group based advanced data workflow
By default GeoNode is configured to make every resource (Layer, Document or Map) suddenly available to everyone, i.e. publicly accessible even from anonymous/non-logged in users.
It is actually possible to change few configuration settings in order to allow GeoNode to enable an advanced publication workflow.
With the advanced workflow enabled, your layer, document or map won’t be automatically published (i.e. made visible and accessible for all, contributors or simple users).
For now, your item is only visible by yourself, the manager of the group to which the layer, document or map is linked (this information is filled in the metadata), the members of this group, and the GeoNode Administrators.
Before being published, the layer, document or map will follow a two-stage review process, which is described below:

From upload to publication: the review process on GeoNode
How to enable the advanced workflow
You have to tweak the GeoNode settings accordingly.
Please see the details of the following GeoNode Settings:
The group Manager approval
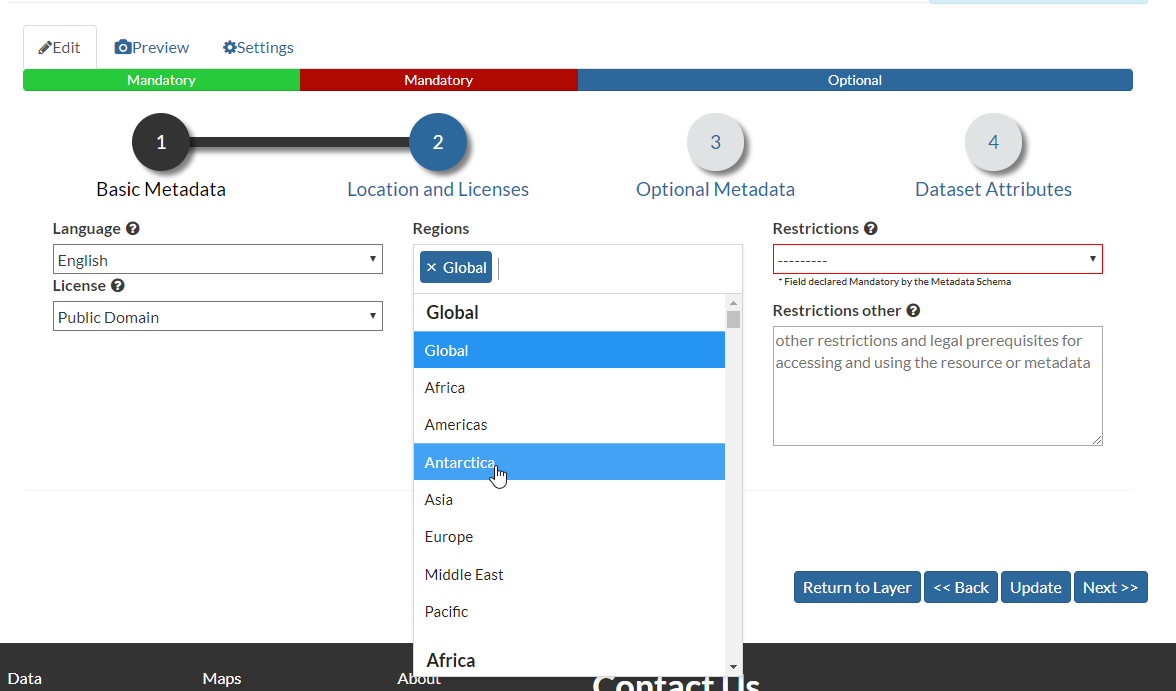
Here, the role of the Manager of the group to which your layer, document or map is linked is to check that the uploaded item is correct. Particularly, in the case of a layer or a map, it consists of checking that the chosen cartographic representation and the style are fitting but also that the discretization is appropriate.
The Manager must also check that the metadata are properly completed and that the mandatory information (Title, Abstract, Edition, Keywords, Category, Group, Region) are filled.
If needed, the Manager can contact the contributor responsible of the layer, document or map in order to report potential comments or request clarifications.
Members of the group can also take part in the reviewing process and give some potential inputs to the responsible of the layer, document or map.
When the Manager considers that the layer, document or map is ready to be published, he should approve it. To do so, the Manager goes to the layer, document or map page, then opens the Wizard in order to edit the metadata. In the Settings tab, the manager checks the Approved box, and then updates the metadata and saves the changes:
The approbation process of an item by a Manager
Following this approval, the GeoNode Administrators receive a notification informing them that an item is now waiting for publication
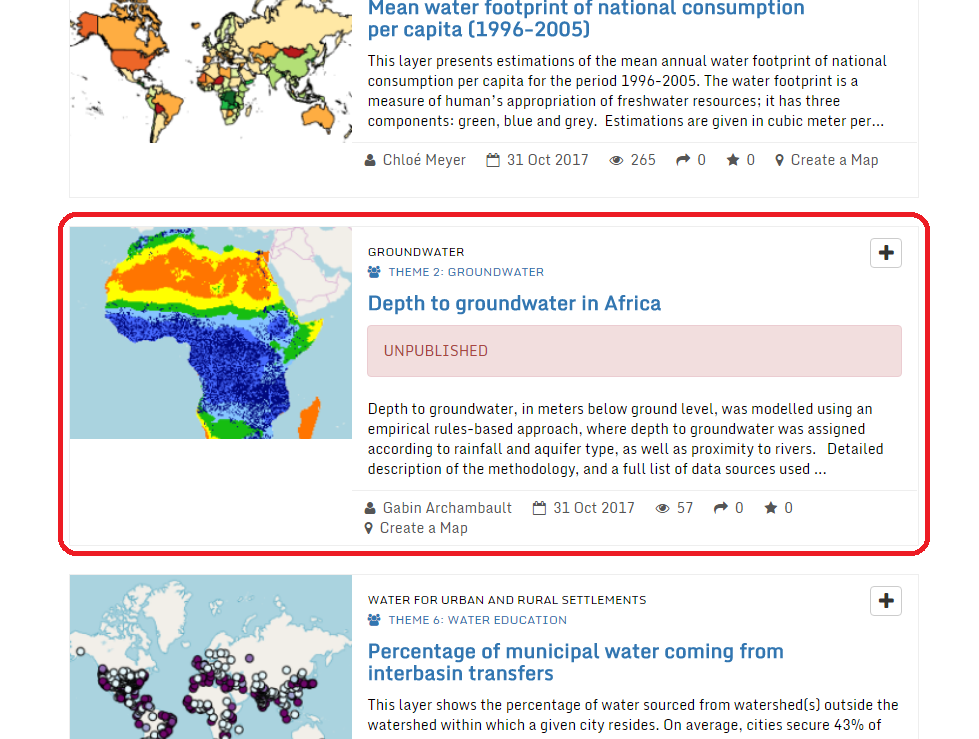
An approved layer, waiting for publication by the GeoNode administrators
The publication by the GeoNode Administrator
Prior to the public release of an approved layer, a document or a map, the Administrator of the platform performs a final validation of the item and its metadata, notably to check that it is in line with licence policies.
If needed, the GeoNode Administrator can contact the Manager who has approved the layer, document or map, as well as its responsible.
Once the layer, document or map is validated, the item is made public by the Administrator.
It can now be viewed, accessed, and downloaded in accordance with the Permissions set by the responsible contributor.
Manage profiles using the admin panel
So far GeoNode implements two distinct roles, that can be assigned to resources such as layers, maps or documents:
- party who authored the resource
- party who can be contacted for acquiring knowledge about or acquisition of the resource
These two profiles can be set in the GeoNode interface by accessing the metadata page and setting the Point of Contact and Metadata Author fields respectively.
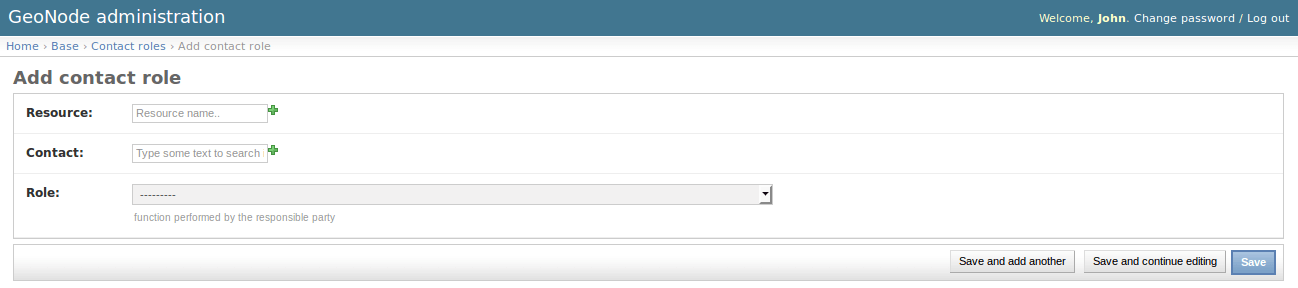
Is possible for an administrator to add new roles if needed, by clicking on the Add Role button in the Base -> Contact Roles section:
Clicking on the People section (see figure) will open a web for with some personal information plus a section called Users.

Is important that this last section is not modified here unless the administrator is very confident in that operation.

Manage layers using the admin panel
Some of the Layers information can be edited directly through the admin interface although the best place is in the Layer -> Metadata Edit in GeoNode.
Clicking on the Admin > Layers link will show the list of available layers.
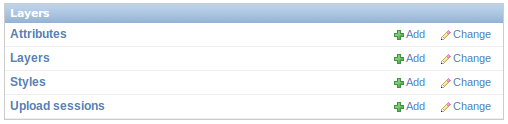
Warning
It is not recommended to modify the Layers’ Attributes or Styles directly from the Admin dashboard unless you are aware of your actions.
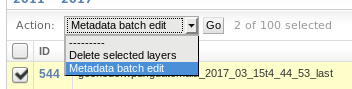
The Metadata information can be changed for multiple Layers at once throguh the Metadata batch edit action.
By clicking over one Layer link, it will show a detail page allowing you to modify some of the resource info like the metadata, the keywords, the title, etc.
Note
It is strongly recommended to always use the GeoNode Metadata Wizard or Metadata Advanced tools in order to edit the metadata info.
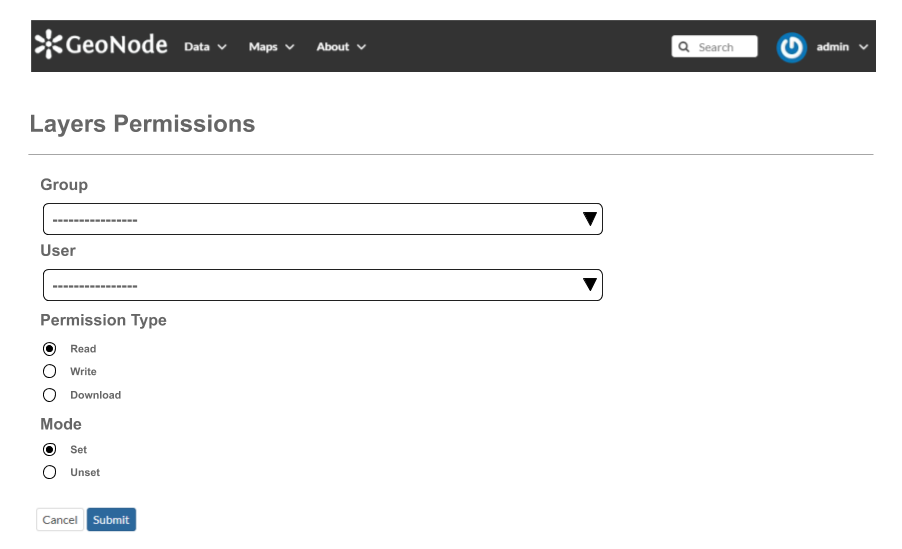
The Permissions can be changed also for multiple Layers at once throguh the Set layers permissions action.
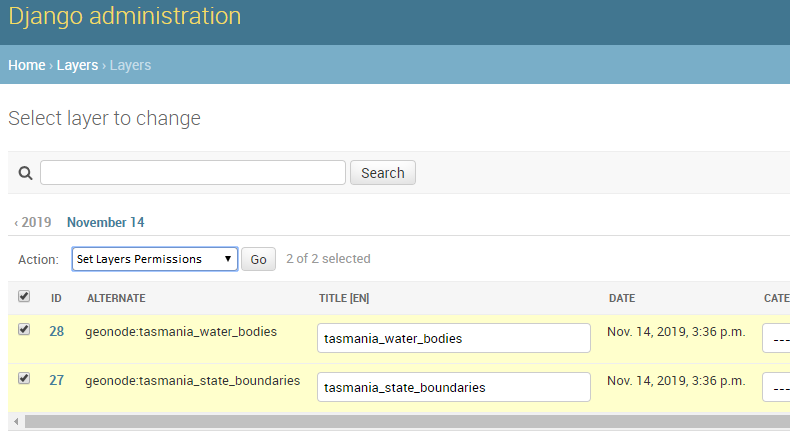
By clicking over one Layer link, it will show a detail page allowing you to modify the permissions for the selected resources.
Manage the maps using the admin panel
Similarly to the Layers, it is possible to manage the available GeoNode Maps through the Admin panel also.
Move to Admin > Maps to access the Maps list.

The Metadata information can be changed for multiple Maps at once throguh the Metadata batch edit action.
By clicking over one Map link, it will show a detail page allowing you to modify some of the resource info like the metadata, the keywords, the title, etc.
Note
It is strongly recommended to always use the GeoNode Metadata Wizard or Metadata Advanced tools in order to edit the metadata info.
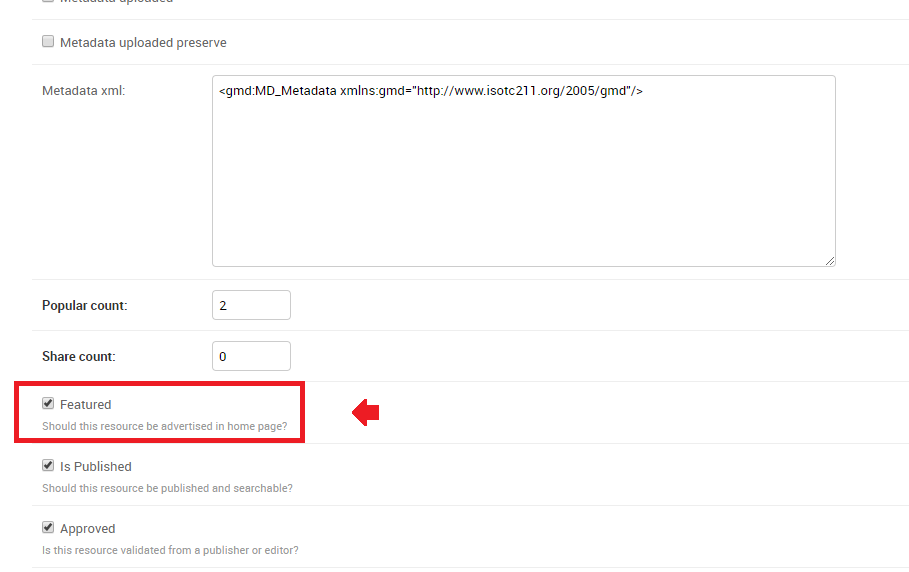
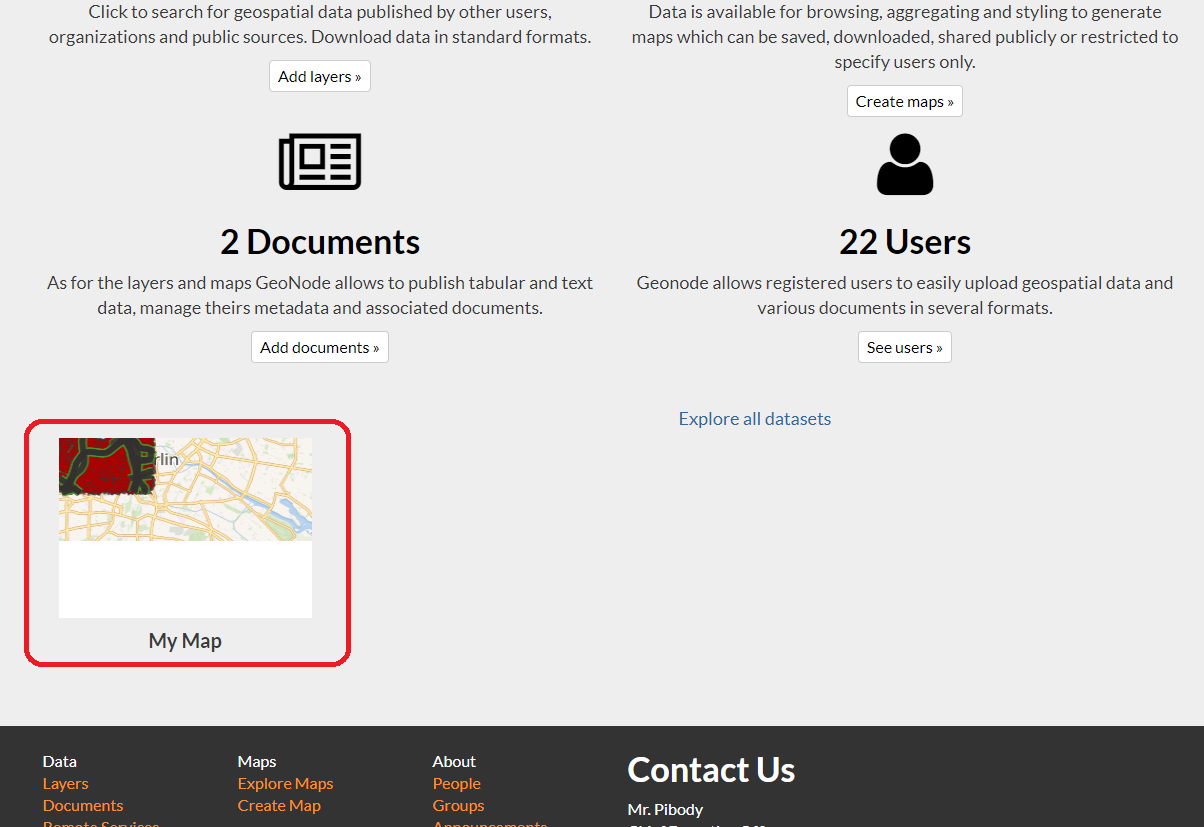
Notice that by enabling the Featured option here, will allow GeoNode to show the Map thumbnail and the Map detail link on the Home Page
Manage the documents using the admin panel
Similarly to the Layers and Maps, it is possible to manage the available GeoNode Documents through the Admin panel also.
Move to Admin > Documents to access the Documents list.

The Metadata information can be changed for multiple Documents at once throguh the Metadata batch edit action.
By clicking over one Document link, it will show a detail page allowing you to modify some of the resource info like the metadata, the keywords, the title, etc.
Note
It is strongly recommended to always use the GeoNode Metadata Wizard or Metadata Advanced tools in order to edit the metadata info.
Manage the base metadata choices using the admin panel
Admin > Base contains almost all the objects you need to populate the resources metadata choices.
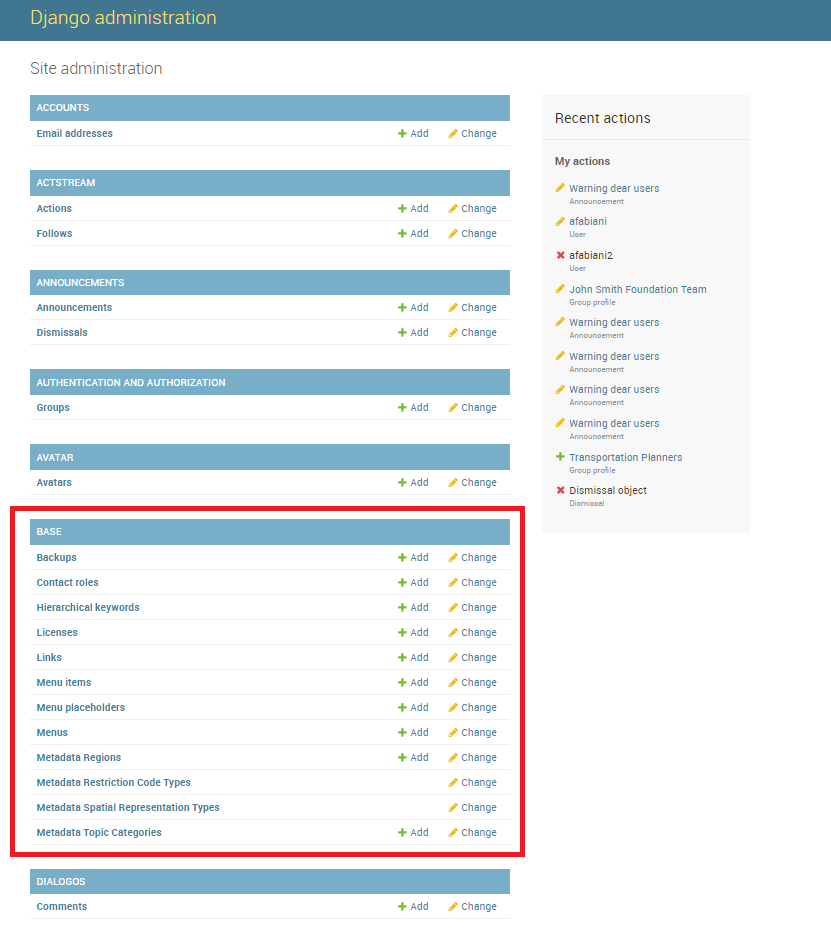
Admin dashboard Base Panel
In other words the options available from the select-boxes of the Metadata Wizard and Metadata Advanced panels.
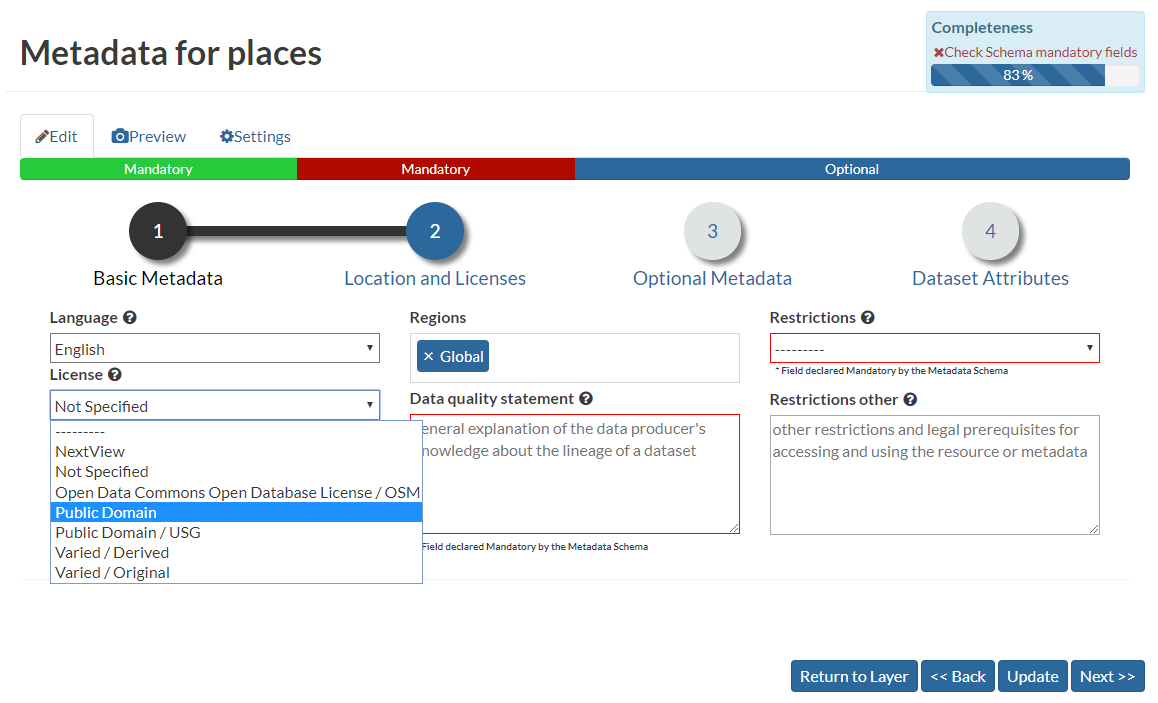
Metadata Wizard Panel
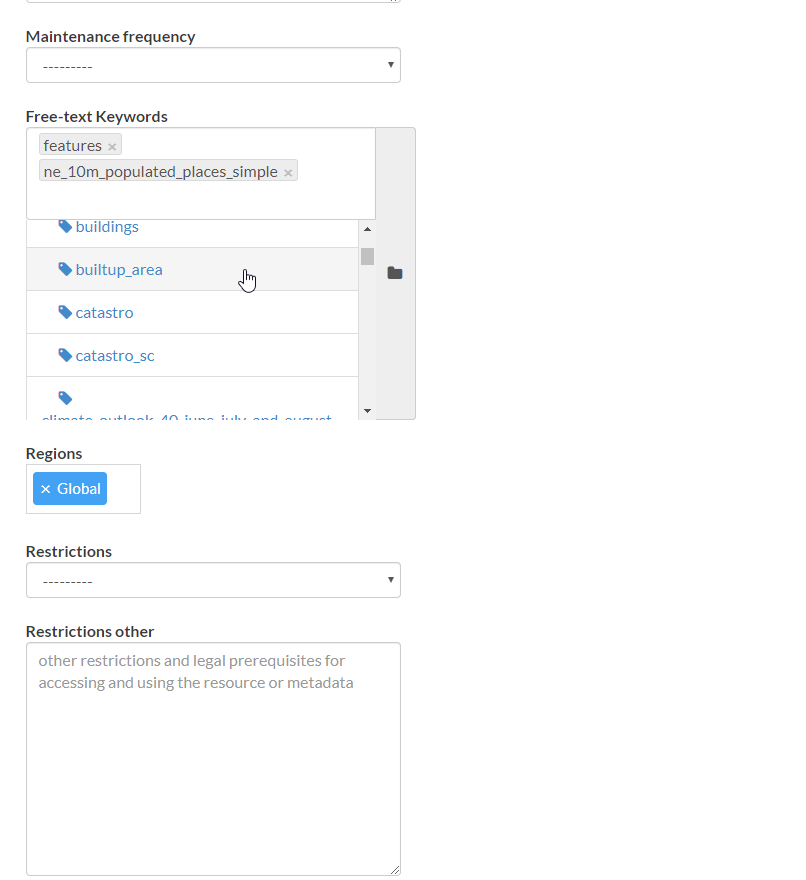
Metadata Advanced Panel
Note
When editing the resource metadata throguh the Metadata Wizard, some fields are marked as mandatory and by filling those information
the Completeness progress will advance accordingly.
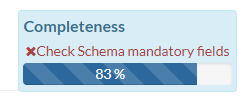
Metadata Completeness
Even if not all the fields have been filled, the system won’t prevent you to update the metadata; this is why the Mandatory fields are
mandatory to be fully compliant with an ISO 19115 metadata schema, but are only recommended to be compliant with GeoNode.
Also the Completeness indicates how far the metadata is to be compliant with an ISO 19115 metadata schema.
Of course, it is highly recommended to always fill as much as possible at least all the metadata fields marked as Mandatory.
This will improve not only the quality of the data stored into the system, but will help the users to easily search for them on GeoNode.
All the Search & Filter panels and options of GeoNode are, in fact, based on the resources metadata fields. Too much generic descriptions and
too empty metadata fields, will give highly un-precise and very wide search results to the users.
Hierarchical keywords
Through the Admin > Base > Hierarchical keywords panel it will be possible to manage all the keywords associated to the resources.
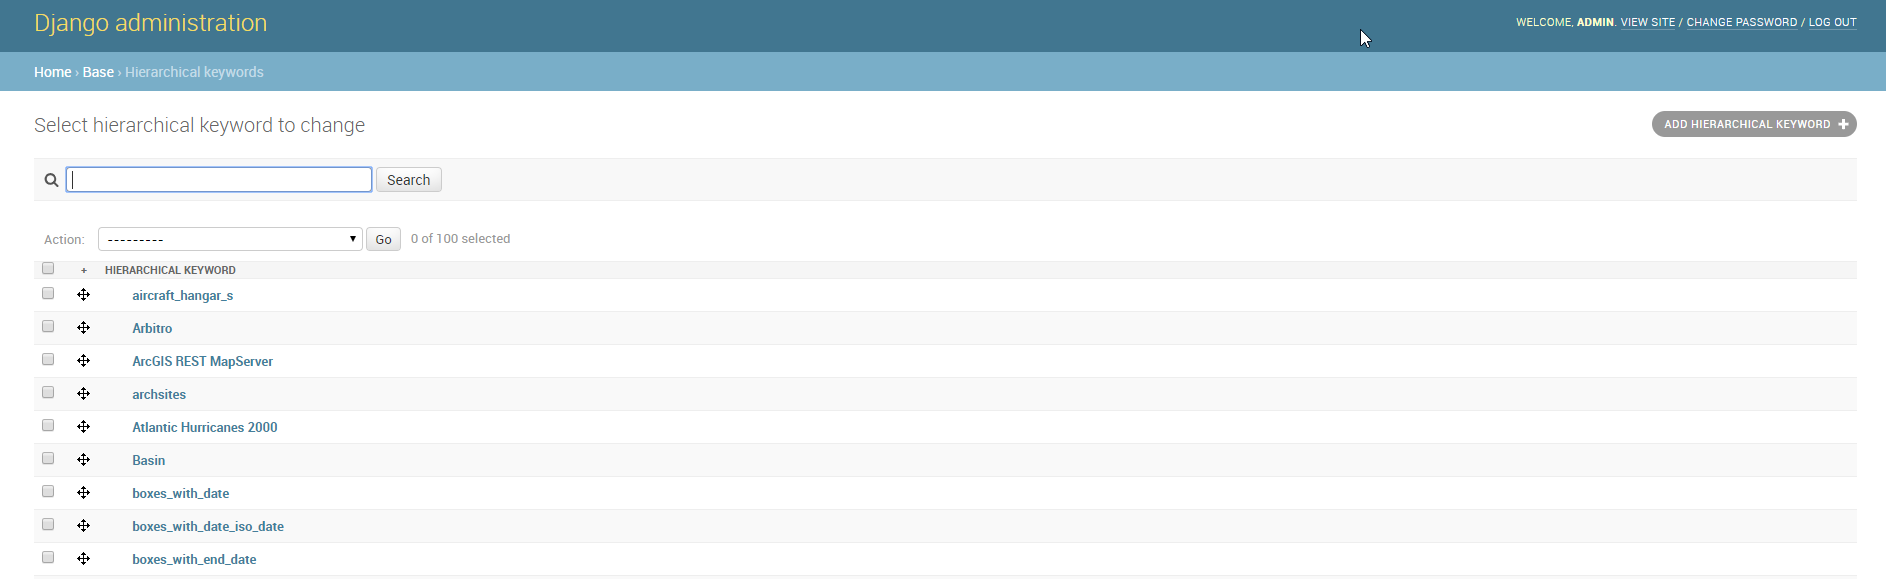
Hierarchical keywords list
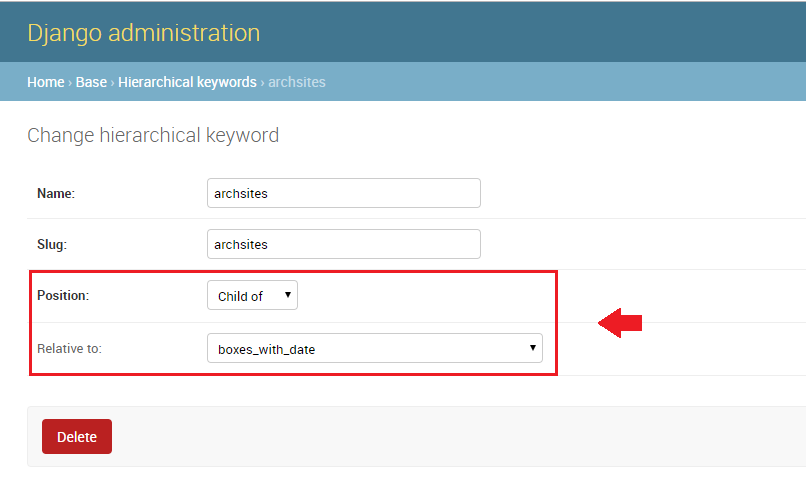
Hierarchical keywords edit
- The Name is the human readable text of the keyword, what users will see.
- The Slug is a unique label used by the system to identify the keyword; most of the times it is equal to the name.
Notice that through the Position and Relative to selectors, it is possible to establish a hierarchy between the available keywords.
By default each user with editing metadata rights on any resource, will be able to insert new keywords into the system by simply typing a free text on the keywords metadata field.
It is possible to force the user to select from a fixed list of keywords throug the FREETEXT_KEYWORDS_READONLY setting.
When set to True keywords won’t be writable from users anymore. Only admins can will be able to manage them through the Admin > Base > Hierarchical keywords panel.
Licenses
Through the Admin > Base > Licenses panel it will be possible to manage all the licenses associated to the resources.
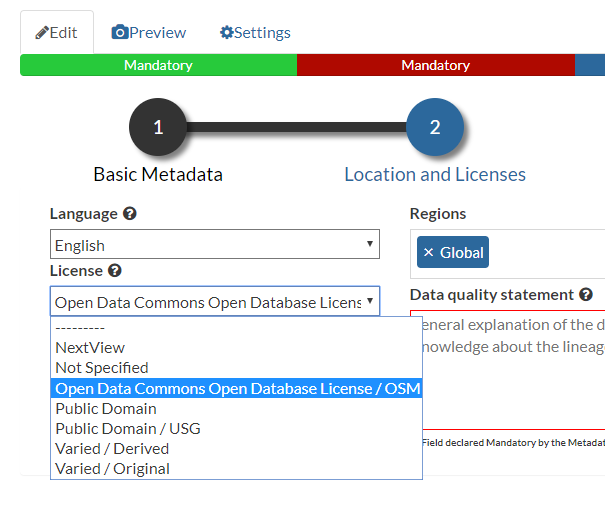
Metadata editor Licenses
The licence description and the info URL will be shown on the resource detail page.

Resource detail License
The licence text will be shown on the catalogue metadata XML documents.

Resource Metadata ISO License
Warning
It is strongly recommended to not publish resources without an appropriate licence. Always make sure the data provider specifies the correct licence and that all the restrictions have been honored.
Metadata Regions
Through the Admin > Base > Metadata Regions panel it will be possible to manage all the admin areas associated to the resources.
Resource Metadata Regions
Notice that those regions are used by GeoNode to filter search results also through the resource list view.
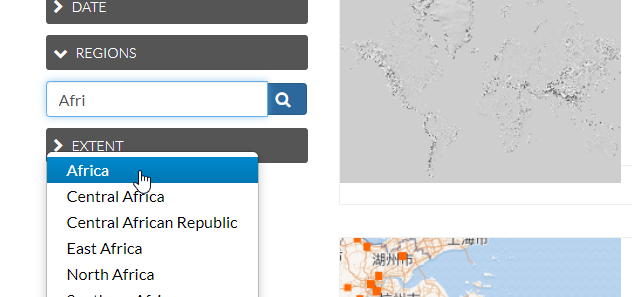
GeoNode fitlering by Metadata Regions
Note
GeoNode tries to guess the Regions intersecting the data bounding boxes when uploading a new layer. Those should be refined by the user layer on anyway.
Metadata Restriction Code Types and Spatial Representation Types
Through the Admin > Base > Metadata Restriction Code Types and Admin > Base > Metadata Spatial Representation Types panels, it will be possible to update only the metadata descriptions for restrictions and spatial representation types.
Such lists are read-only by default since they have been associated to the specific codes of the ISO 19115 metadata schema.
Changing them would require the system to provide a custom dictionary throguh the metadata catalog too. Such functionality is not supported actually by GeoNode.
Metadata Topic Categories
Through the Admin > Base > Metadata Topic Categories panel it will be possible to manage all the resource metadata categories avaialble into the system.
Notice that by default, GeoNode provides the standard topic categories avaialble with the ISO 19115 metadata schema. Changing them means that the system won’t be
compliant with the standard ISO 19115 metadata schema anymore. ISO 19115 metadata schema extensions are not currently supported natively by GeoNode.
It is worth notice that GeoNode allows you to associate Font Awesome Icons to each topic category through their fa-icon code.
Those icons will be used by GeoNode to represent the topic category on both the Search & Filter menus and Metadata panels.
Warning
The list of the Metadata Topic Categories on the home page is currently fixed. To change it you will need to update or override the GeoNode index.html HTML template.
By default the Metadata Topic Categories are writable. Meaning that they can be removed or created by the Admin panel.
It is possible to make them fixed (it will be possible to update their descriptions and icons only) through the MODIFY_TOPICCATEGORY setting.
Announcements
As an Administrator you might need to broadcast announcements to the world about your portal or simply to the internal contributors.
GeoNode Announcements allow actually to do that; an admin has the possibility to create thre types of messages, accordingly to their severity,
decide their validity in terms of time period (start date and expiring date of the announcement), who can view them or not (everyone or just the
registerd members) and whenever a user can hide the message or not and how long.
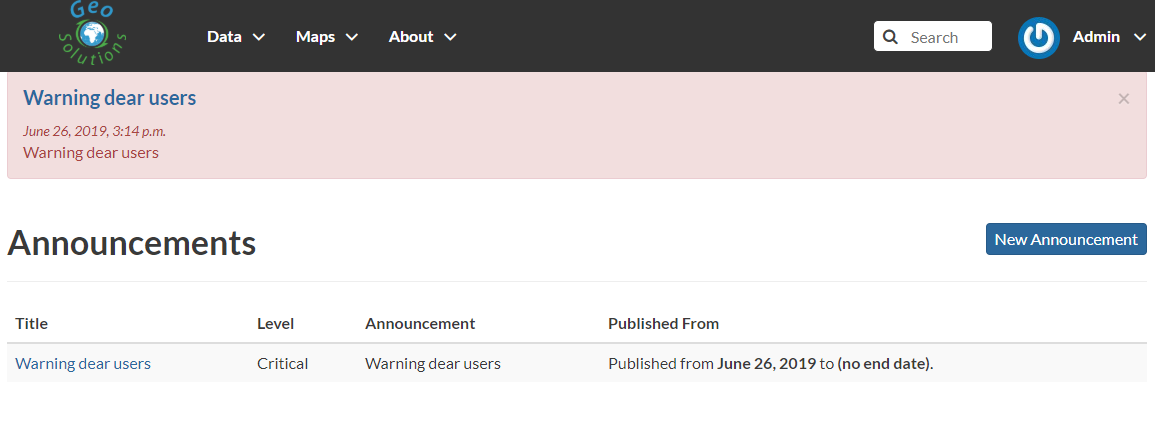
A GeoNode announcement actually looks like this:
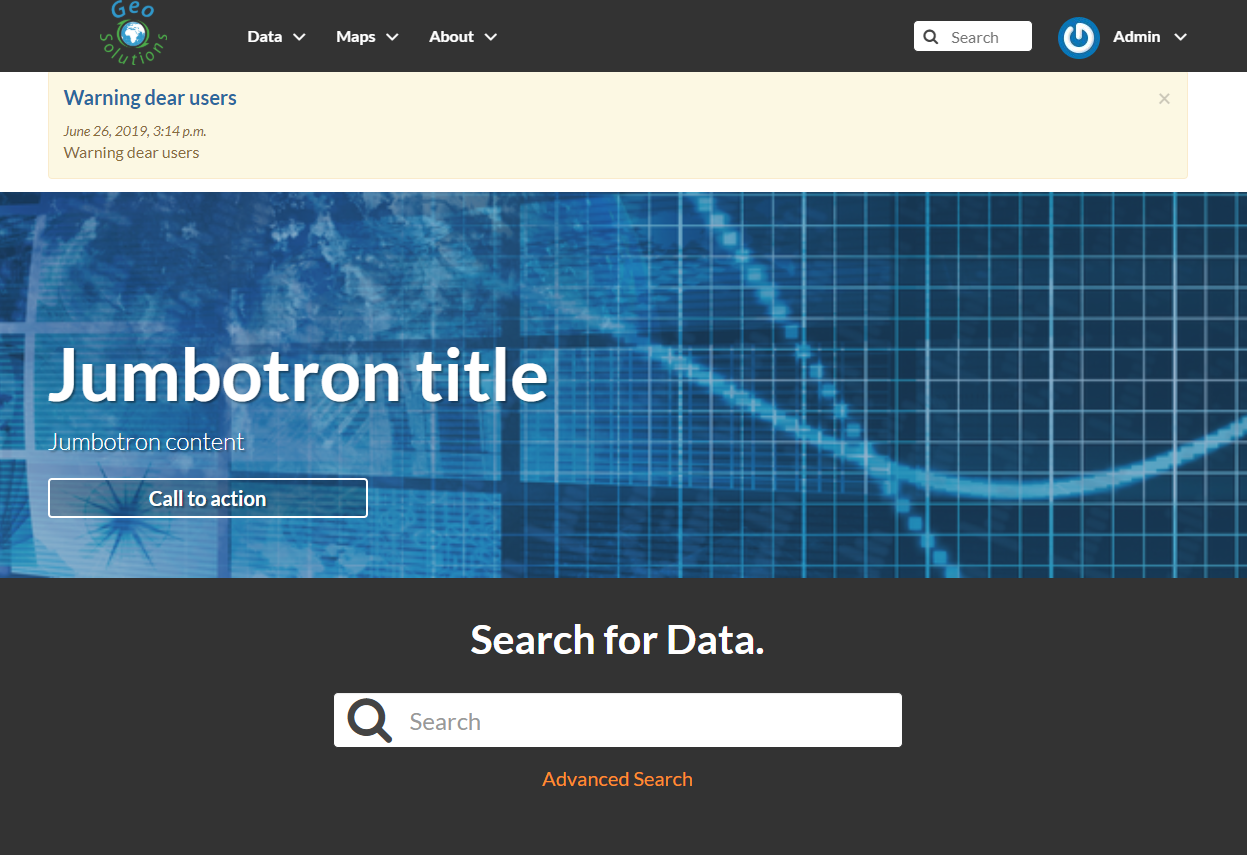
A sample Warning Announcement
There are three types of announcements accordingly to their severity level: General, Warning and Critical
The difference is mainly the color of the announcement box.

General Announcement
Warning Announcement
Critical Announcement
Only administrators and staff members can create and manage announcements.
Currently there two ways to access and manage the announcements list:
Via the GeoNode interface, from the Profile panel
Note
Those are accessible by both admins and staff members.

Announcements from the Profile panel
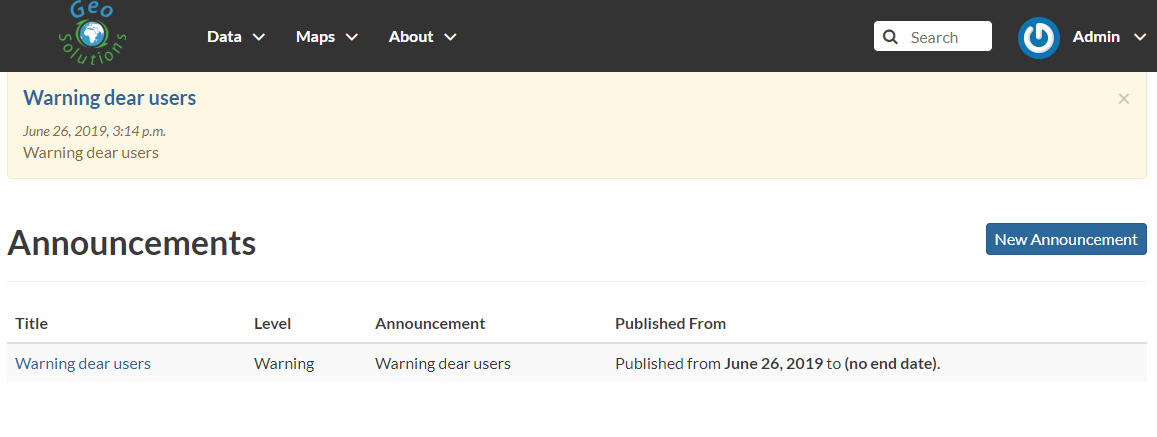
Via the GeoNode Admin panel
Note
Those are accessible by admins only.
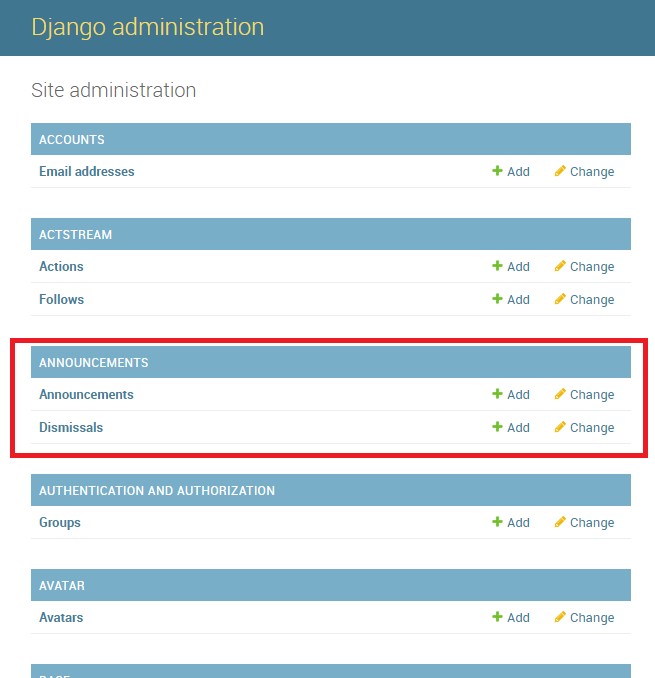
Announcements from the Admin panel
The functionalities are almost the same for both the interfaces, except that from the Admin panel it is possible to manage the dismissals too.
Dismissals are basically records of members that have read the announcement and closed the message box. An announcement can have one
dismissal type among the three below:
- No Dismissal Allowed it won’t be possible to close the announcement’s message box at all.
- Session Only Dismissal (*) the default one, it will be possible to close the announcement’s message box for the current browser session. It will show up again at next access.
- Permanent Dismissal Allowed once the announcement’s message box is closed, it won’t appear again for the current member.
How to create and manage Announcements
From the Profile panel, click on Announcements link
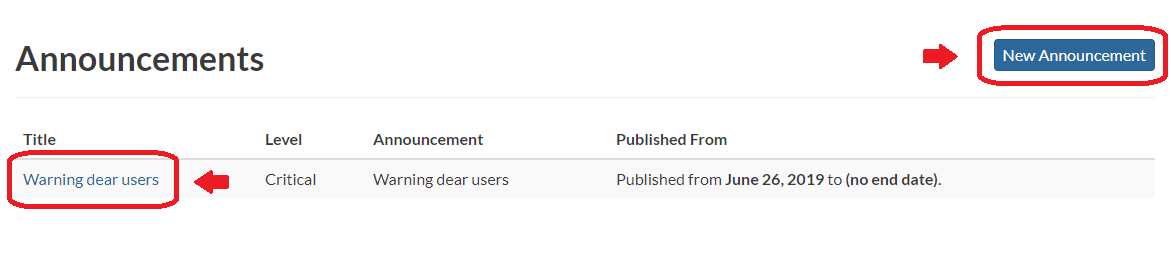
Announcements List from the Profile panel
Click either on New Announcement to create a new one or over a title of an existing one to manage its contents.
Create a new announcement is quite straight; you have to fill the fields provided by the form.
Warning
In order to be visible, you will need to check the Site wide option in any case. You might want to hide the message to anonymous users by enabling the Members only option too.
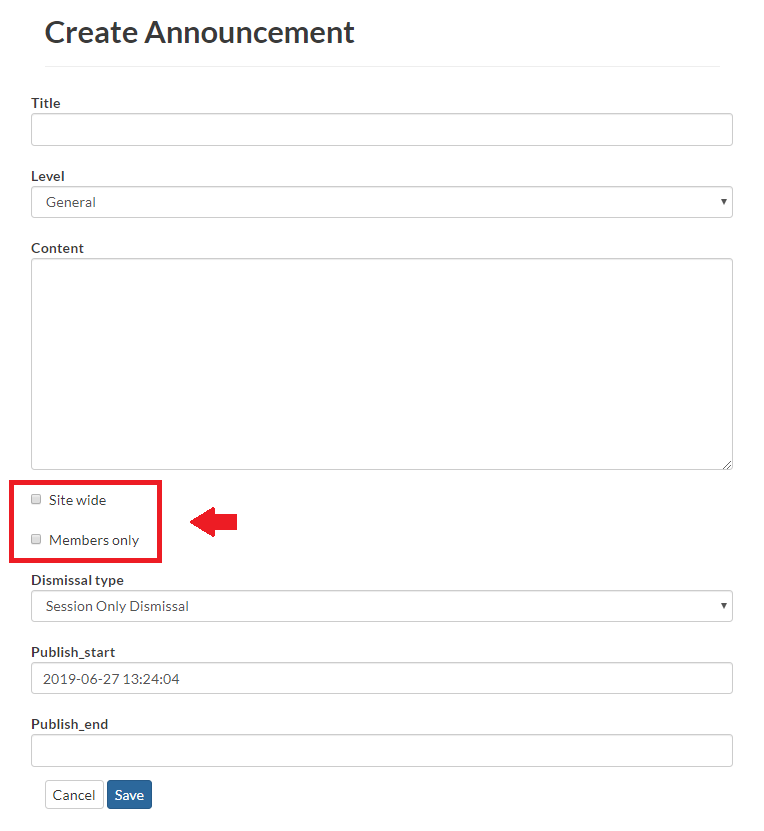
Create Announcement from the Profile panel
Managing announcements form the Admin panel, is basically the same; the fields for the form will be exactly the same.
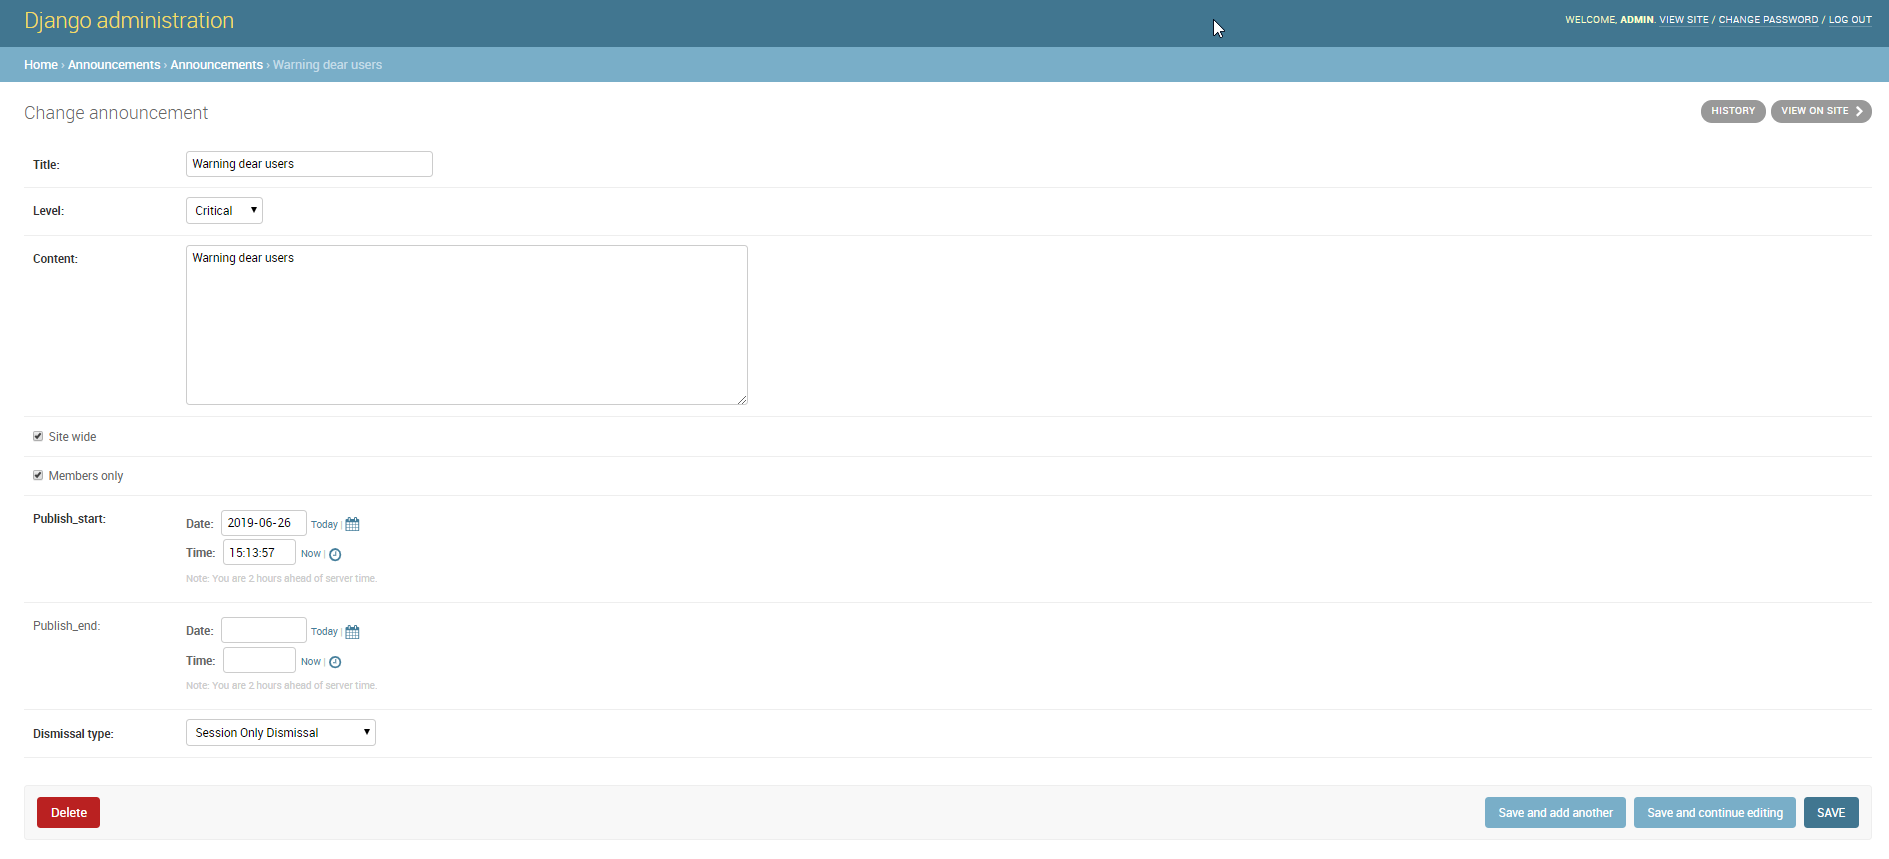
Create Announcement from the Admin panel
Accessing announcements options from the Admin panel, allows you to manage dismissals also. Through this interface you will be able to selectively decide members which can or cannot view a specific announcement, or force them to visualize the messages again by deleting the dismissals accordingly.
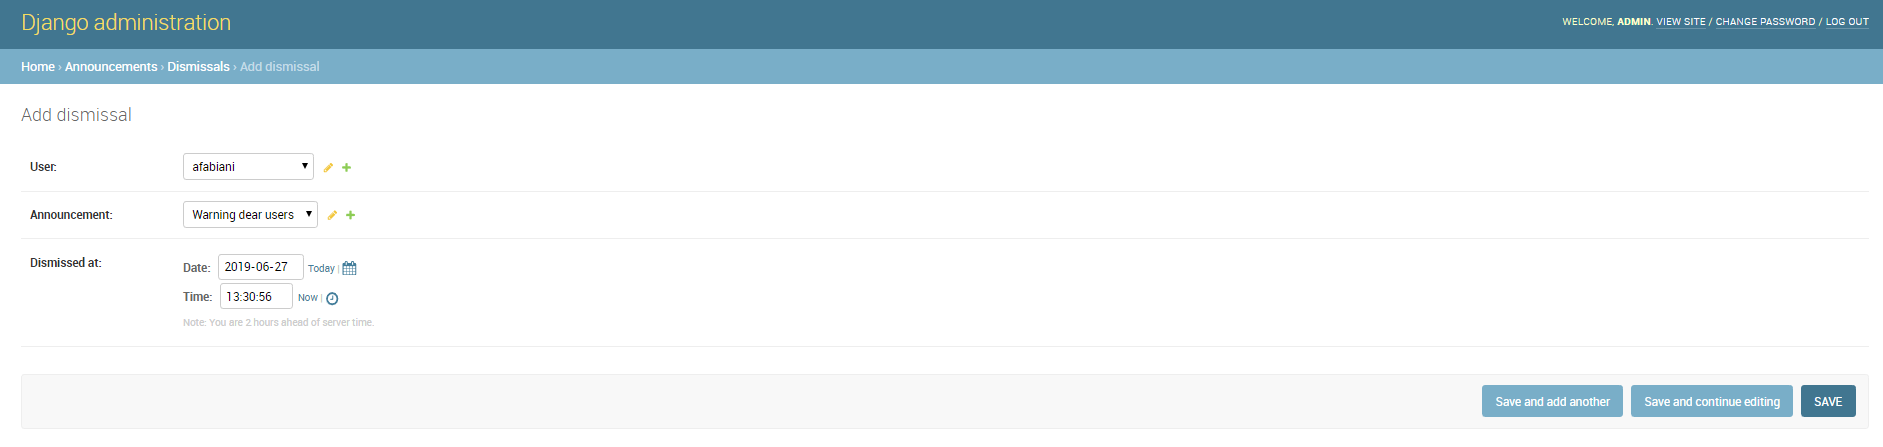
Create Dismissal from the Admin panel
Menus, Items and Placeholders
GeoNode provides some integrated functionalities allowing you to quickly and easily customize the top-bar menu (see the example below).
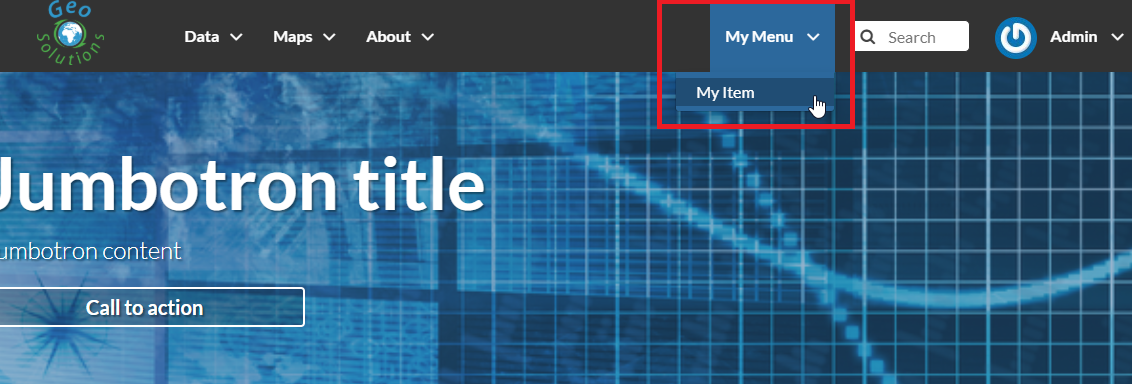
GeoNode Top-Bar Menu customization
With minor changes of the basic.html template, potentially, it could be possible to use the same approach for a more complex customization.
Let’s start with the simple one.
By default GeoNode provides a custom placeholder already defined into the basic.html template, called TOPBAR_MENU
...
<ul class="nav navbar-nav navbar-right">

    {% block my_extra_right_tab %}

        {% render_nav_menu 'TOPBAR_MENU' %}

    {% endblock my_extra_right_tab %}

    <li>
        <div class="search">
        <form id="search" action="{% url "search" %}" >
            <span class="fa fa-search"></span>
            {% if HAYSTACK_SEARCH %}
            <input id="search_input" type="text" placeholder="{% trans 'Search' %}" name="q">
            {% else %}
            <input id="search_input" type="text" placeholder="{% trans 'Search' %}" name="title__icontains">
            {% endif %}
        </form>
        </div>
    </li>
...
From the Admin > Base panel, it is possible to access to the Menu, Menu Items and Menu Placeholder options.
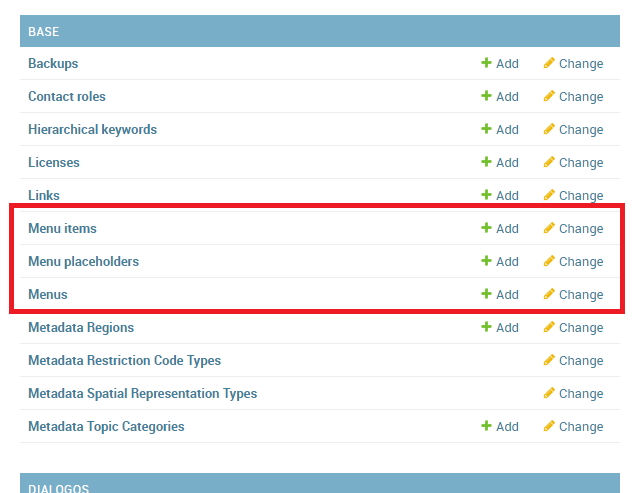
Menu, Menu Items and Menu Placeholder options on the Admin panel
The hierarchical structure of a custom Menu is the following one:
Menu Placeholder; first of all you need to define a placeholder both into the Admin > Base panel and thebasic.htmltemplate, using the same keyword.By default GeoNode provides an already defined one called
TOPBAR_MENU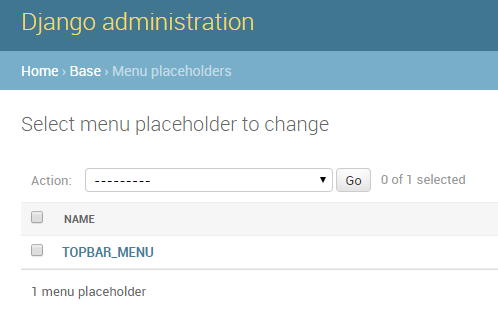
The default ``TOPBAR_MENU`` Menu Placeholder on the Admin panel
Menu; second thing to do is to create a new menu associated to the corresponding placeholder.This is still possible from the Admin > Base panel
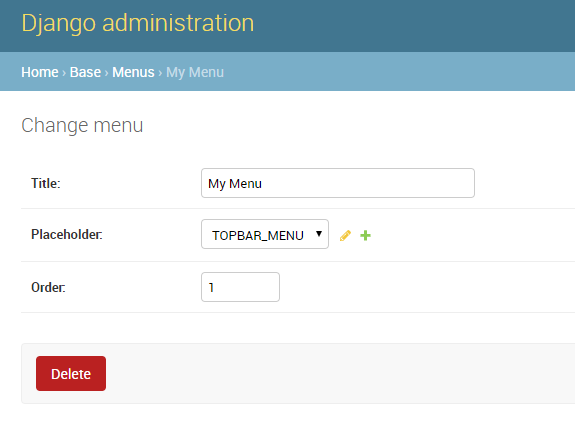
Create a new Menu from the Admin panel
You will need to provide:
A
Title, representing the name of theMenuvisible by the usersWarning
By using this approach, internationalization won’t be supported. For the time being GeoNode does not support this for menus created from the Admin > Base panel.
A
Menu Placeholderfrom the existing ones.A
Orderin the case you’ll create more menus associated to the same placeholder.
Menu Item; finally you will need to create voices belonging to the menu. For the time being, GeoNode allows you to create onlyhreflinks.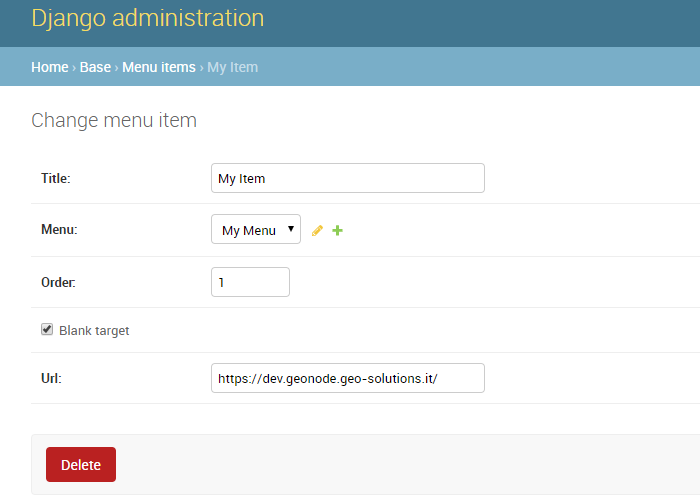
Create a new Menu Item from the Admin panel
Warning
The
Menuwon’t be visible until you add at least oneMenu Item
OAuth2 Access Tokens
This small section won’t cover entirely the GeoNode OAuth2 security integration, this is explained in detail in other sections of the documentation (refer to OAuth2 Fixtures Update and Base URL Migration and OAuth2 Tokens and Sessions).
Here we will focus mainly on the Admin > DJANGO/GEONODE OAUTH TOOLKIT panel items with a specific attention to the Access tokens management.
The Admin > DJANGO/GEONODE OAUTH TOOLKIT panel (as shown in the figure below) allows an admin to manage everything related to GeoNode OAuth2 grants and permissions.
As better explained in other sections of the documentation, this is needed to correctly handle the communication between GeoNode and GeoServer.
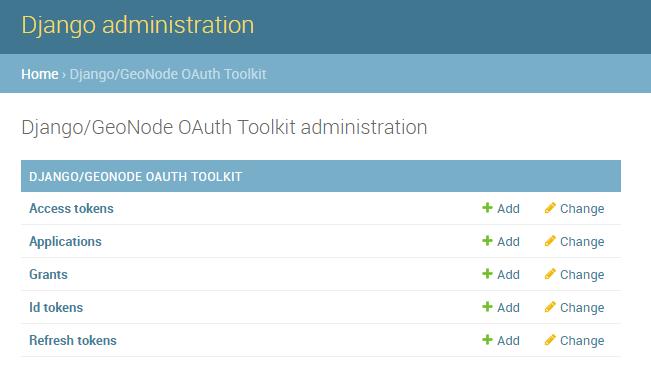
DJANGO/GEONODE OAUTH TOOLKIT Admin panel
Specifically from this panel an admin can create, delete or extend OAuth2 Access tokens.
The section OAuth2 Tokens and Sessions better explains the concepts behind OAuth2 sessions; we want just to refresh the mind here about the basic concepts:
- If the SESSION_EXPIRED_CONTROL_ENABLED setting is set to True (by default it is set to True)
a registered user cannot login to neither GeoNode nor GeoServer without a valid
Access token. - When logging-in into GeoNode through the sign-up form, GeoNode checks if a valid
Access tokenexists and it creates a new one if not, or extends the existing one if expired. - New
Access tokensexpire automatically after ACCESS_TOKEN_EXPIRE_SECONDS setting (by default 86400) - When an
Access tokenexpires, the user will be kicked out from the session and forced to login again
Create a new token or extend an existing one
It is possible from the Admin > DJANGO/GEONODE OAUTH TOOLKIT panel to create a new Access token for a user.
In order to do that, just click on the Add button beside Access tokens topic
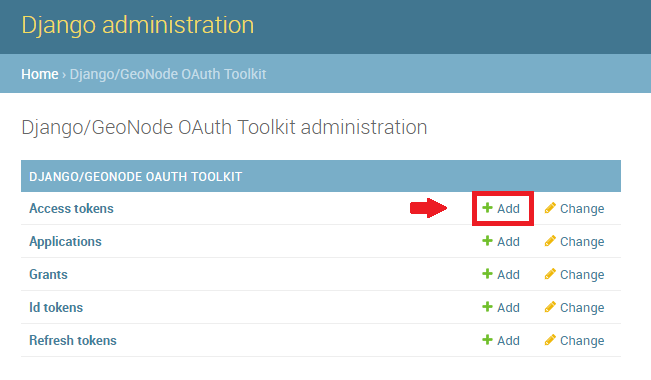
Add a new ``Access token``
On the new form
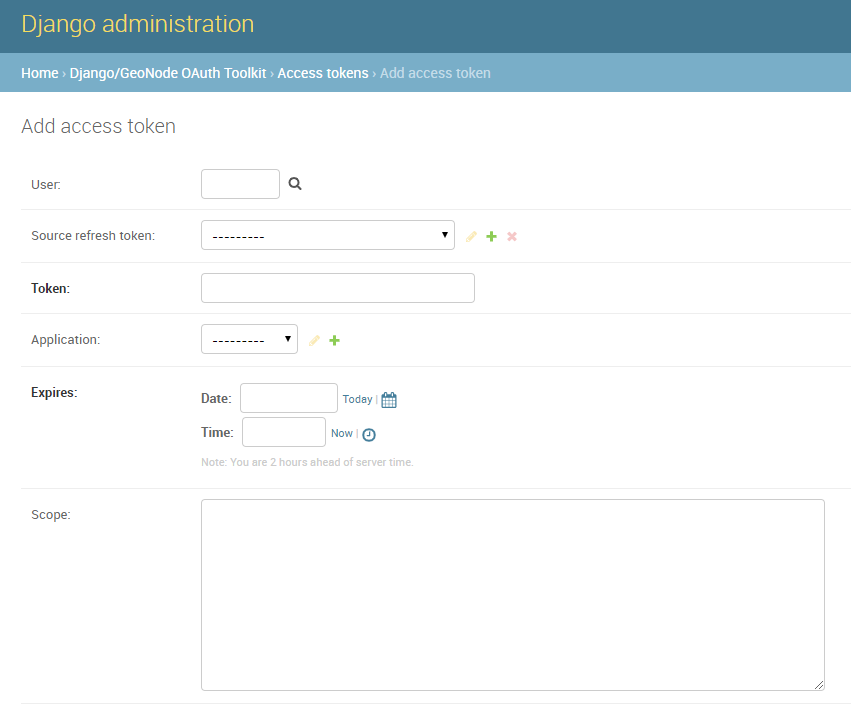
Create an ``Access token``
select the followings:
User; use the search tool in order to select the correct user. The form want the user PK, which is a number, and not the username. The search tool will do everything for you.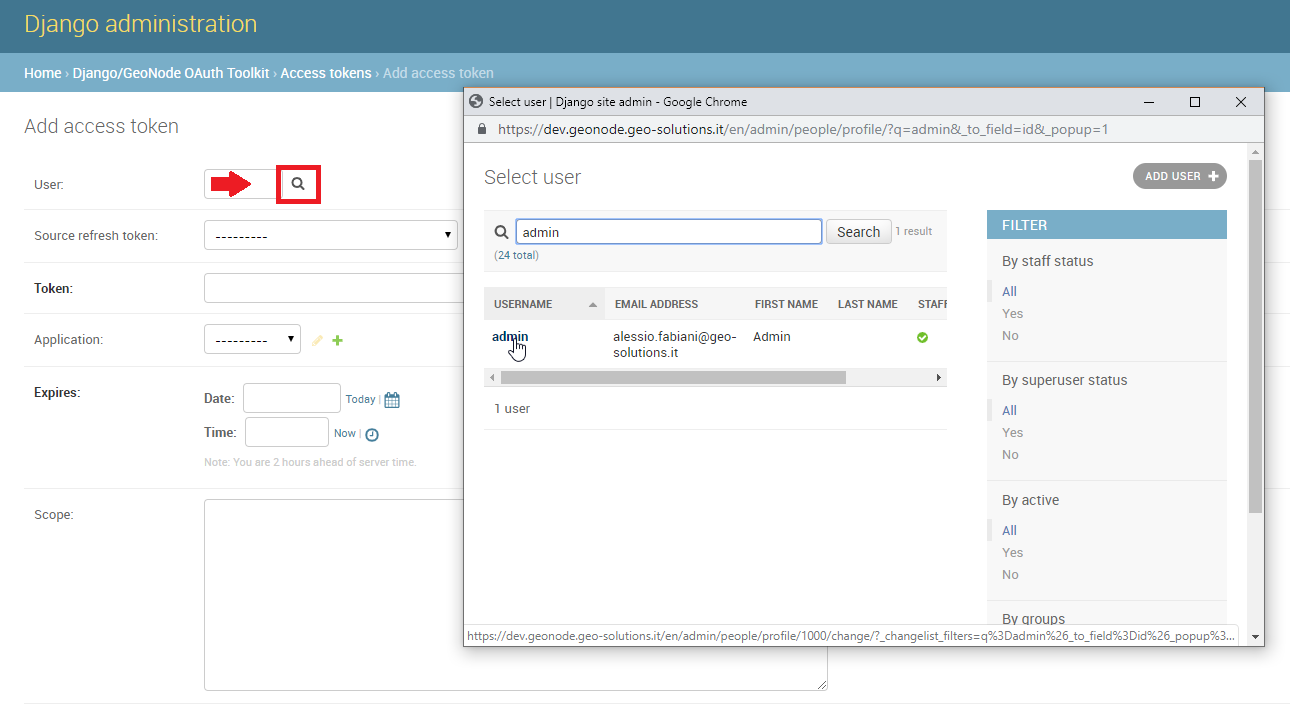
Select a User
Source refresh token; this is not mandatory, leave it blank.Token; write here any alphanumeric string. This will be theaccess_tokenthat the member can use to access the OWS services. We suggest to use a service like https://passwordsgenerator.net/ in order to generate a strong token string.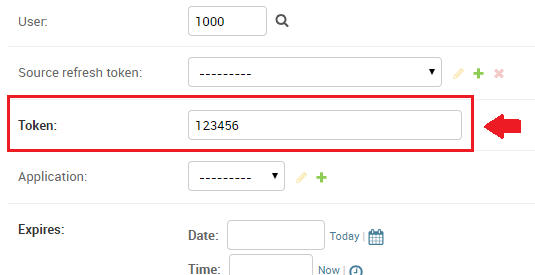
Select a Token
Application; select GeoServer, this is mandatory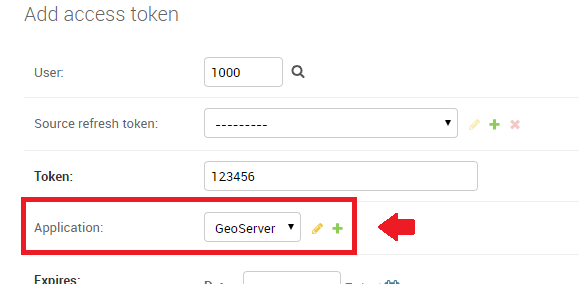
Select the GeoServer Application
Expires; select an expiration date by uwing the date-time widgets.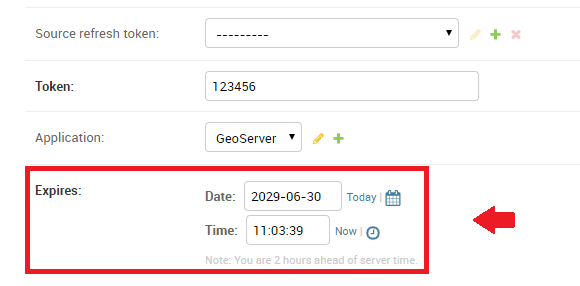
Select the Token Expiration
Scope; select write, this is mandatory.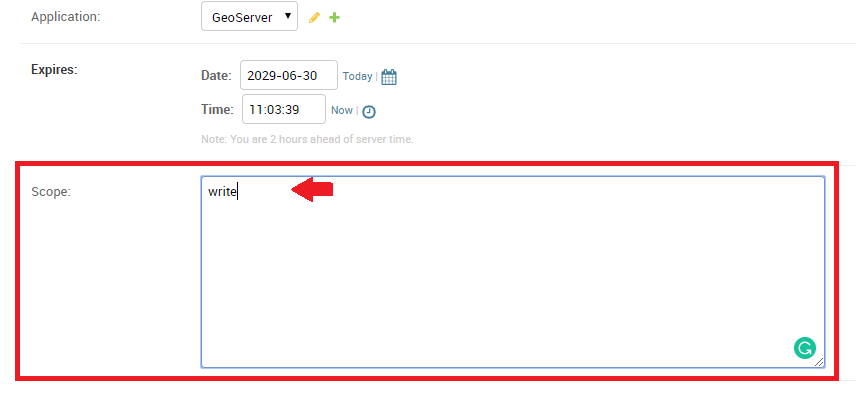
Select the Application Scope
Do not forget to Save.
From now on, GeoNode will use this Access Token to control the user session (notice that the user need to login again if closing the browser session),
and the user will be able to access the OWS Services by using the new Access Token, e.g.:
https://dev.geonode.geo-solutions.it/geoserver/ows?service=wms&version=1.3.0&request=GetCapabilities&access_token=123456
Notice the ...quest=GetCapabilities&access_token=123456 (access_token) parameter at the end of the URL.
Force a User Session to expire
Everyting said about the creation of a new Access Token, applies to the deletion of the latter.
From the same interface an admin can either select an expiration date or delete all the Access Tokens associated to a user, in order to
force its session to expire.
Remember that the user could activate another session by logging-in again on GeoNode with its credentials.
In order to be sure the user won’t force GeoNode to refresh the token, reset first its password or de-activate it.