Scaling and deploy with Rancher
Rancher is an open source software platform that enables organizations to run and manage Docker and Kubernetes in production.
With Rancher, organizations no longer have to build a container services platform from scratch using a distinct set of open source technologies. Rancher supplies the entire software stack needed to manage containers in production.
Introducing main concepts
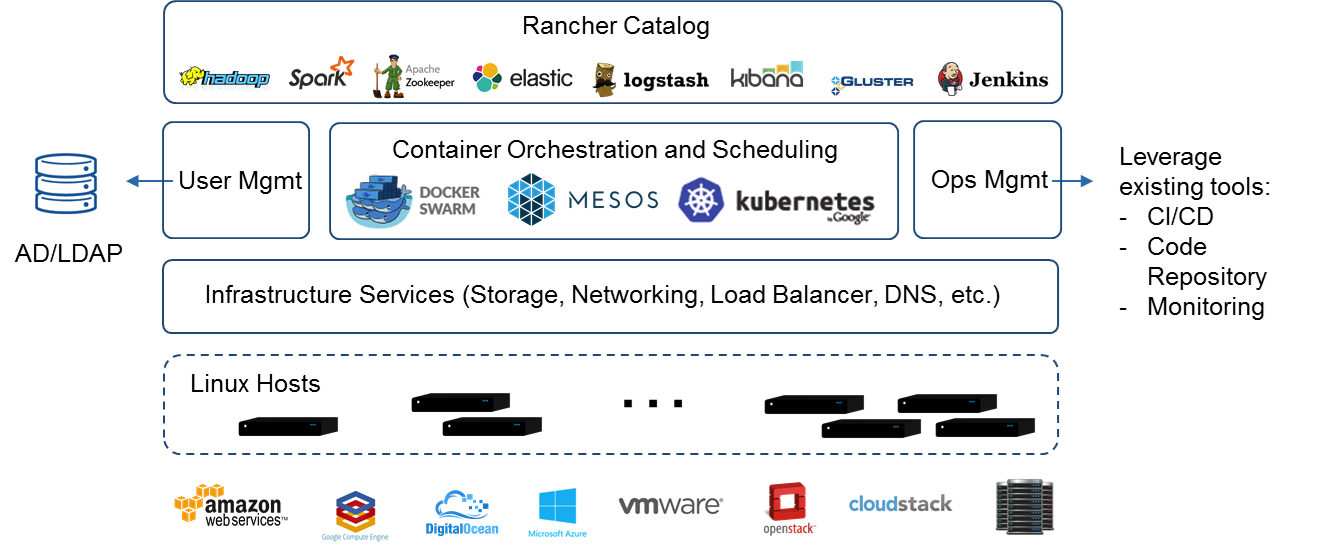
Rancher takes in raw computing resources from any public or private cloud in the form of Linux hosts. Each Linux host can be a virtual machine or physical machine.
Rancher includes a distribution of all popular container orchestration and scheduling frameworks today, including Docker Swarm, Kubernetes, and Mesos.
Rancher users can deploy an entire multi-container clustered application from the application catalog or docker compose files with few clicks.
Getting started with Rancher
Install Rancher
To install the latest stable version run the following docker command:
docker run -d --restart=unless-stopped -p 8080:8080 rancher/server:stable
Setup Rancher
Verify that Rancher server is running on the port defined above (default is 8080):
docker ps -a
After opening the browser at that port:

then the instance can be secured navigating the url Local authentication :
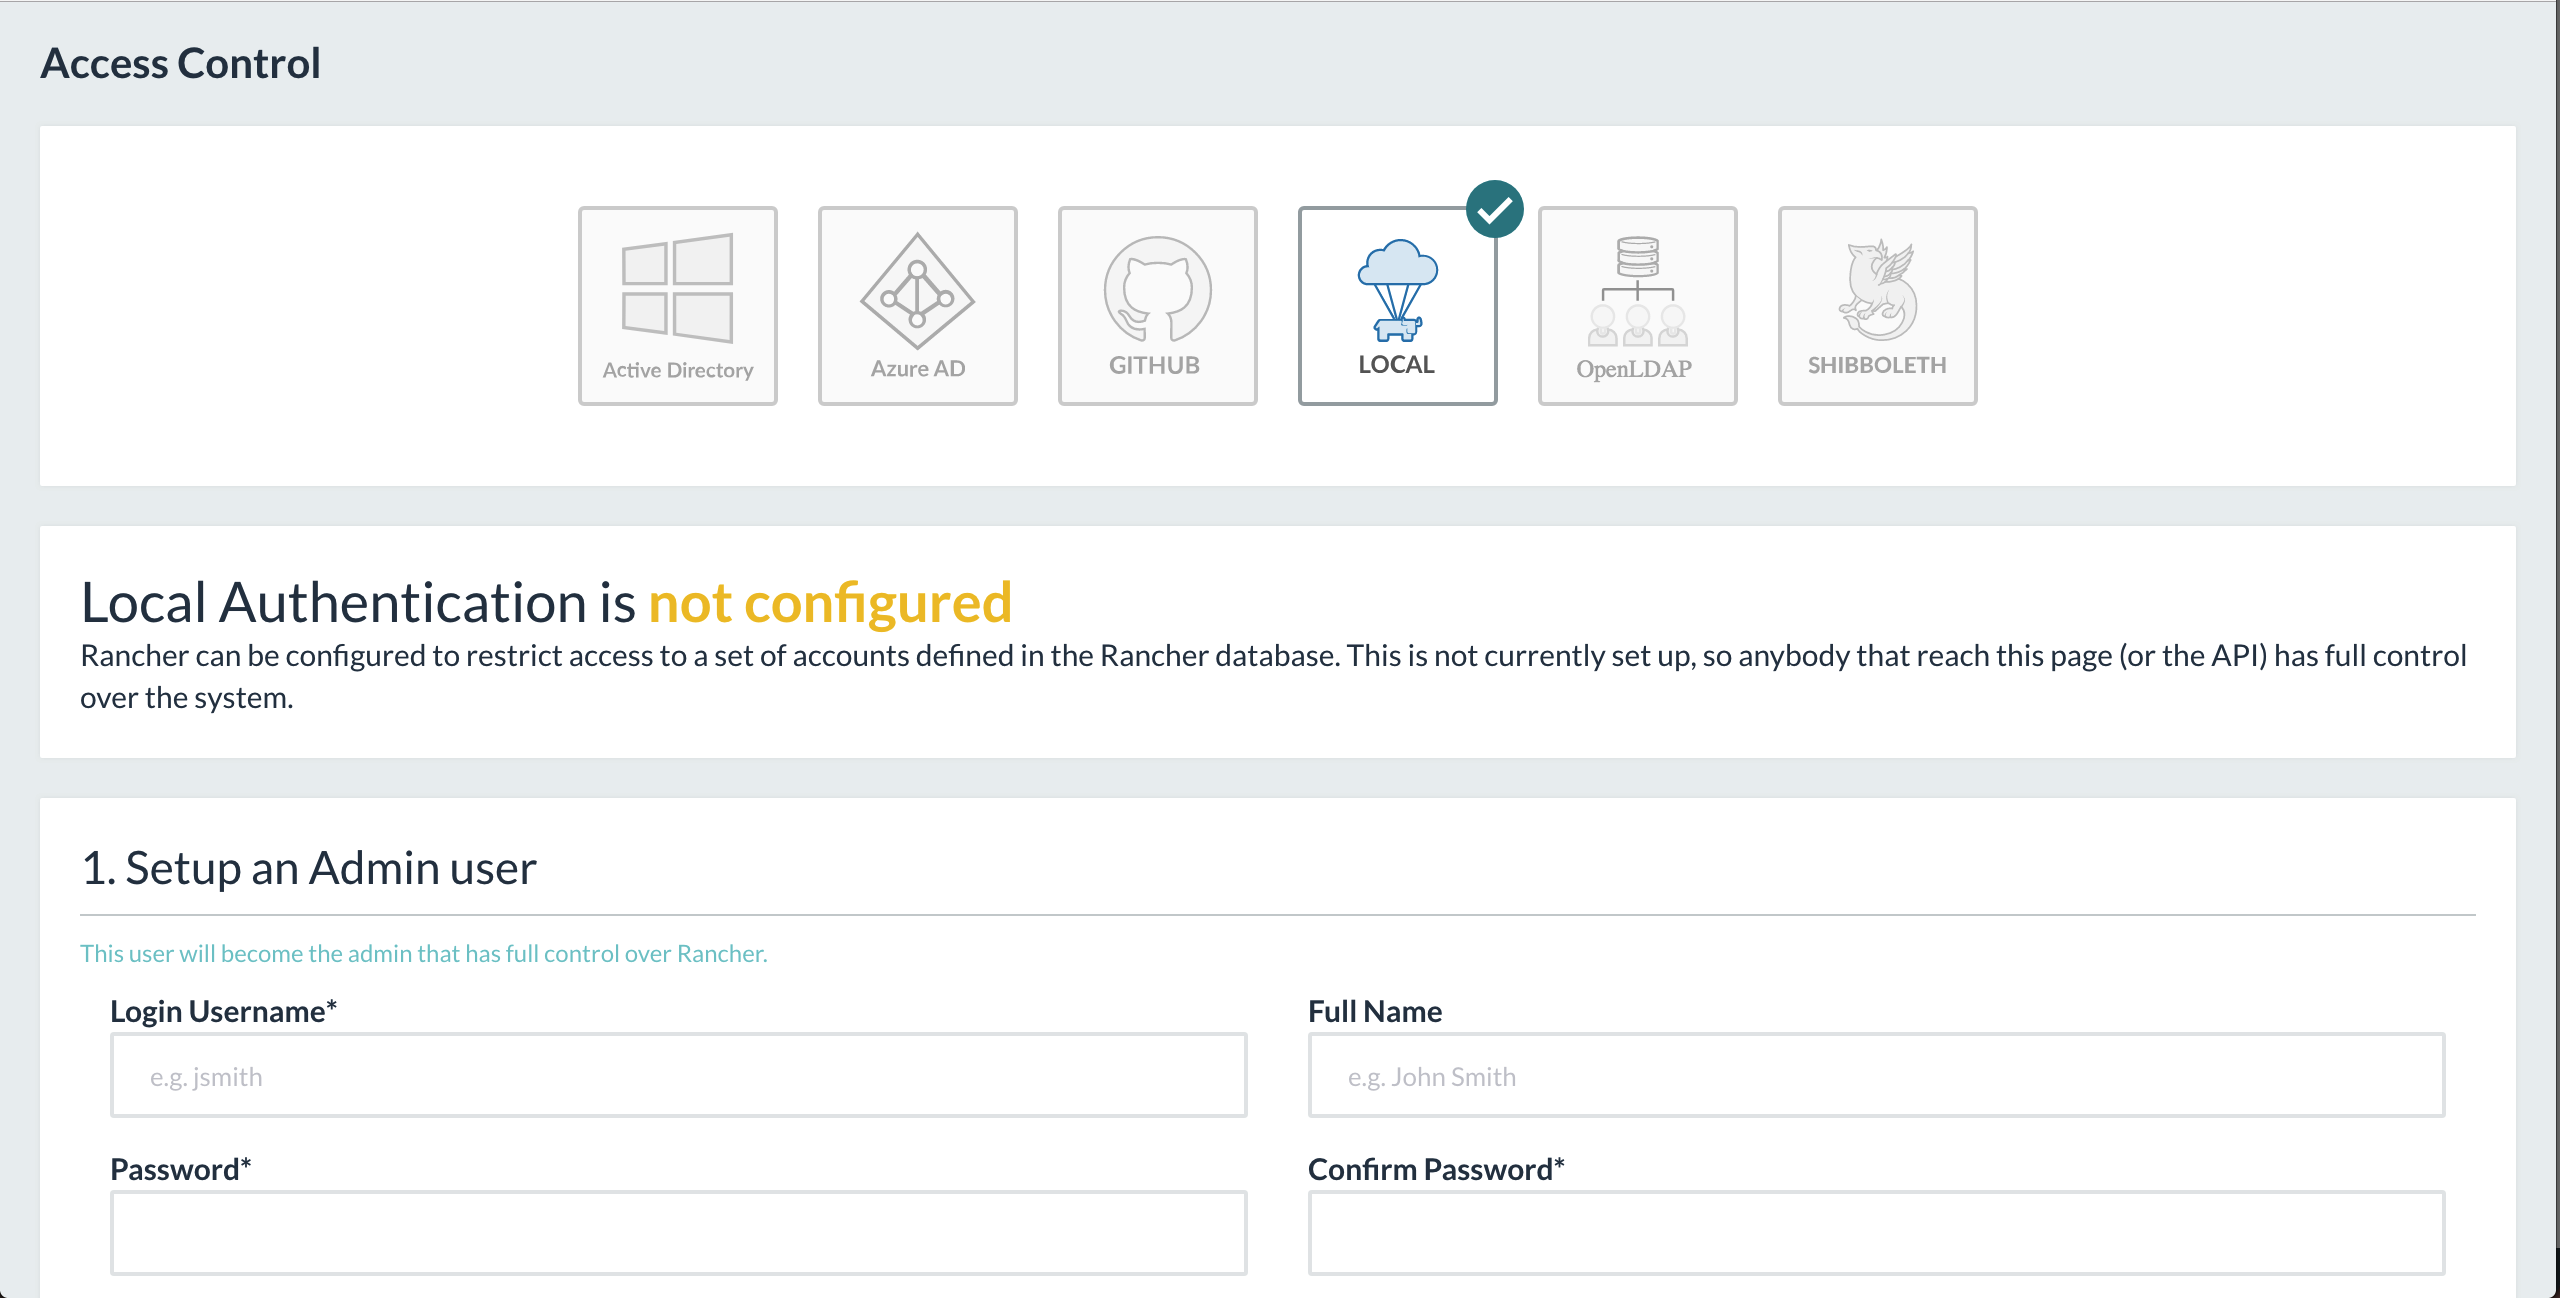
Choose a username and a passord and then enable the access control by clicking the button at the bottom.
Add new host to the infrastructure
From the Default menu follow the link add host :

and click the button Save to confirm. The administrator will be landed to the following page:

Several options will be shown to decide what kind of machine driver is going to be used. For a local bare metal or virtual machine choose the Custom option. After that follow the indicated steps to prepare the new host
Start up a Linux machine somewhere and install a supported version of Docker on it. Refer to the section on _setup_docker.
Allow IPsec networking between hosts on UDP ports 500 and 4500.
Add labels to be applied to the host. This is optional but it is required for GeoNode if you want all the containers of a stack deployed on a same host. In that case add for example Key:geonodehost and Value:<host label value> which will be translated to the label geonodehost=<host label value>.
Specify the public IP <host-server-public-ip> that should be registered for the host. This is particularly import if the machine is behind a firewall/NAT.
Copy, paste, and run the command below to register the host with Rancher. The value of registrationToken is provided by the system.
sudo docker run -e CATTLE_AGENT_IP=”<host-server-public-ip>” -e CATTLE_HOST_LABELS=’geonodehost=<host label value>’ –rm –privileged -v /var/run/docker.sock:/var/run/docker.sock -v /var/lib/rancher:/var/lib/rancher rancher/agent:v1.2.9 http://<rancher-server-ip>:8080/v1/scripts/<registrationToken> # sudo can be avoided if the user has been privileged
Click on the Close button.
After some minutes the new host should be registered and available in the active status under the menu Infrastructure => Hosts.
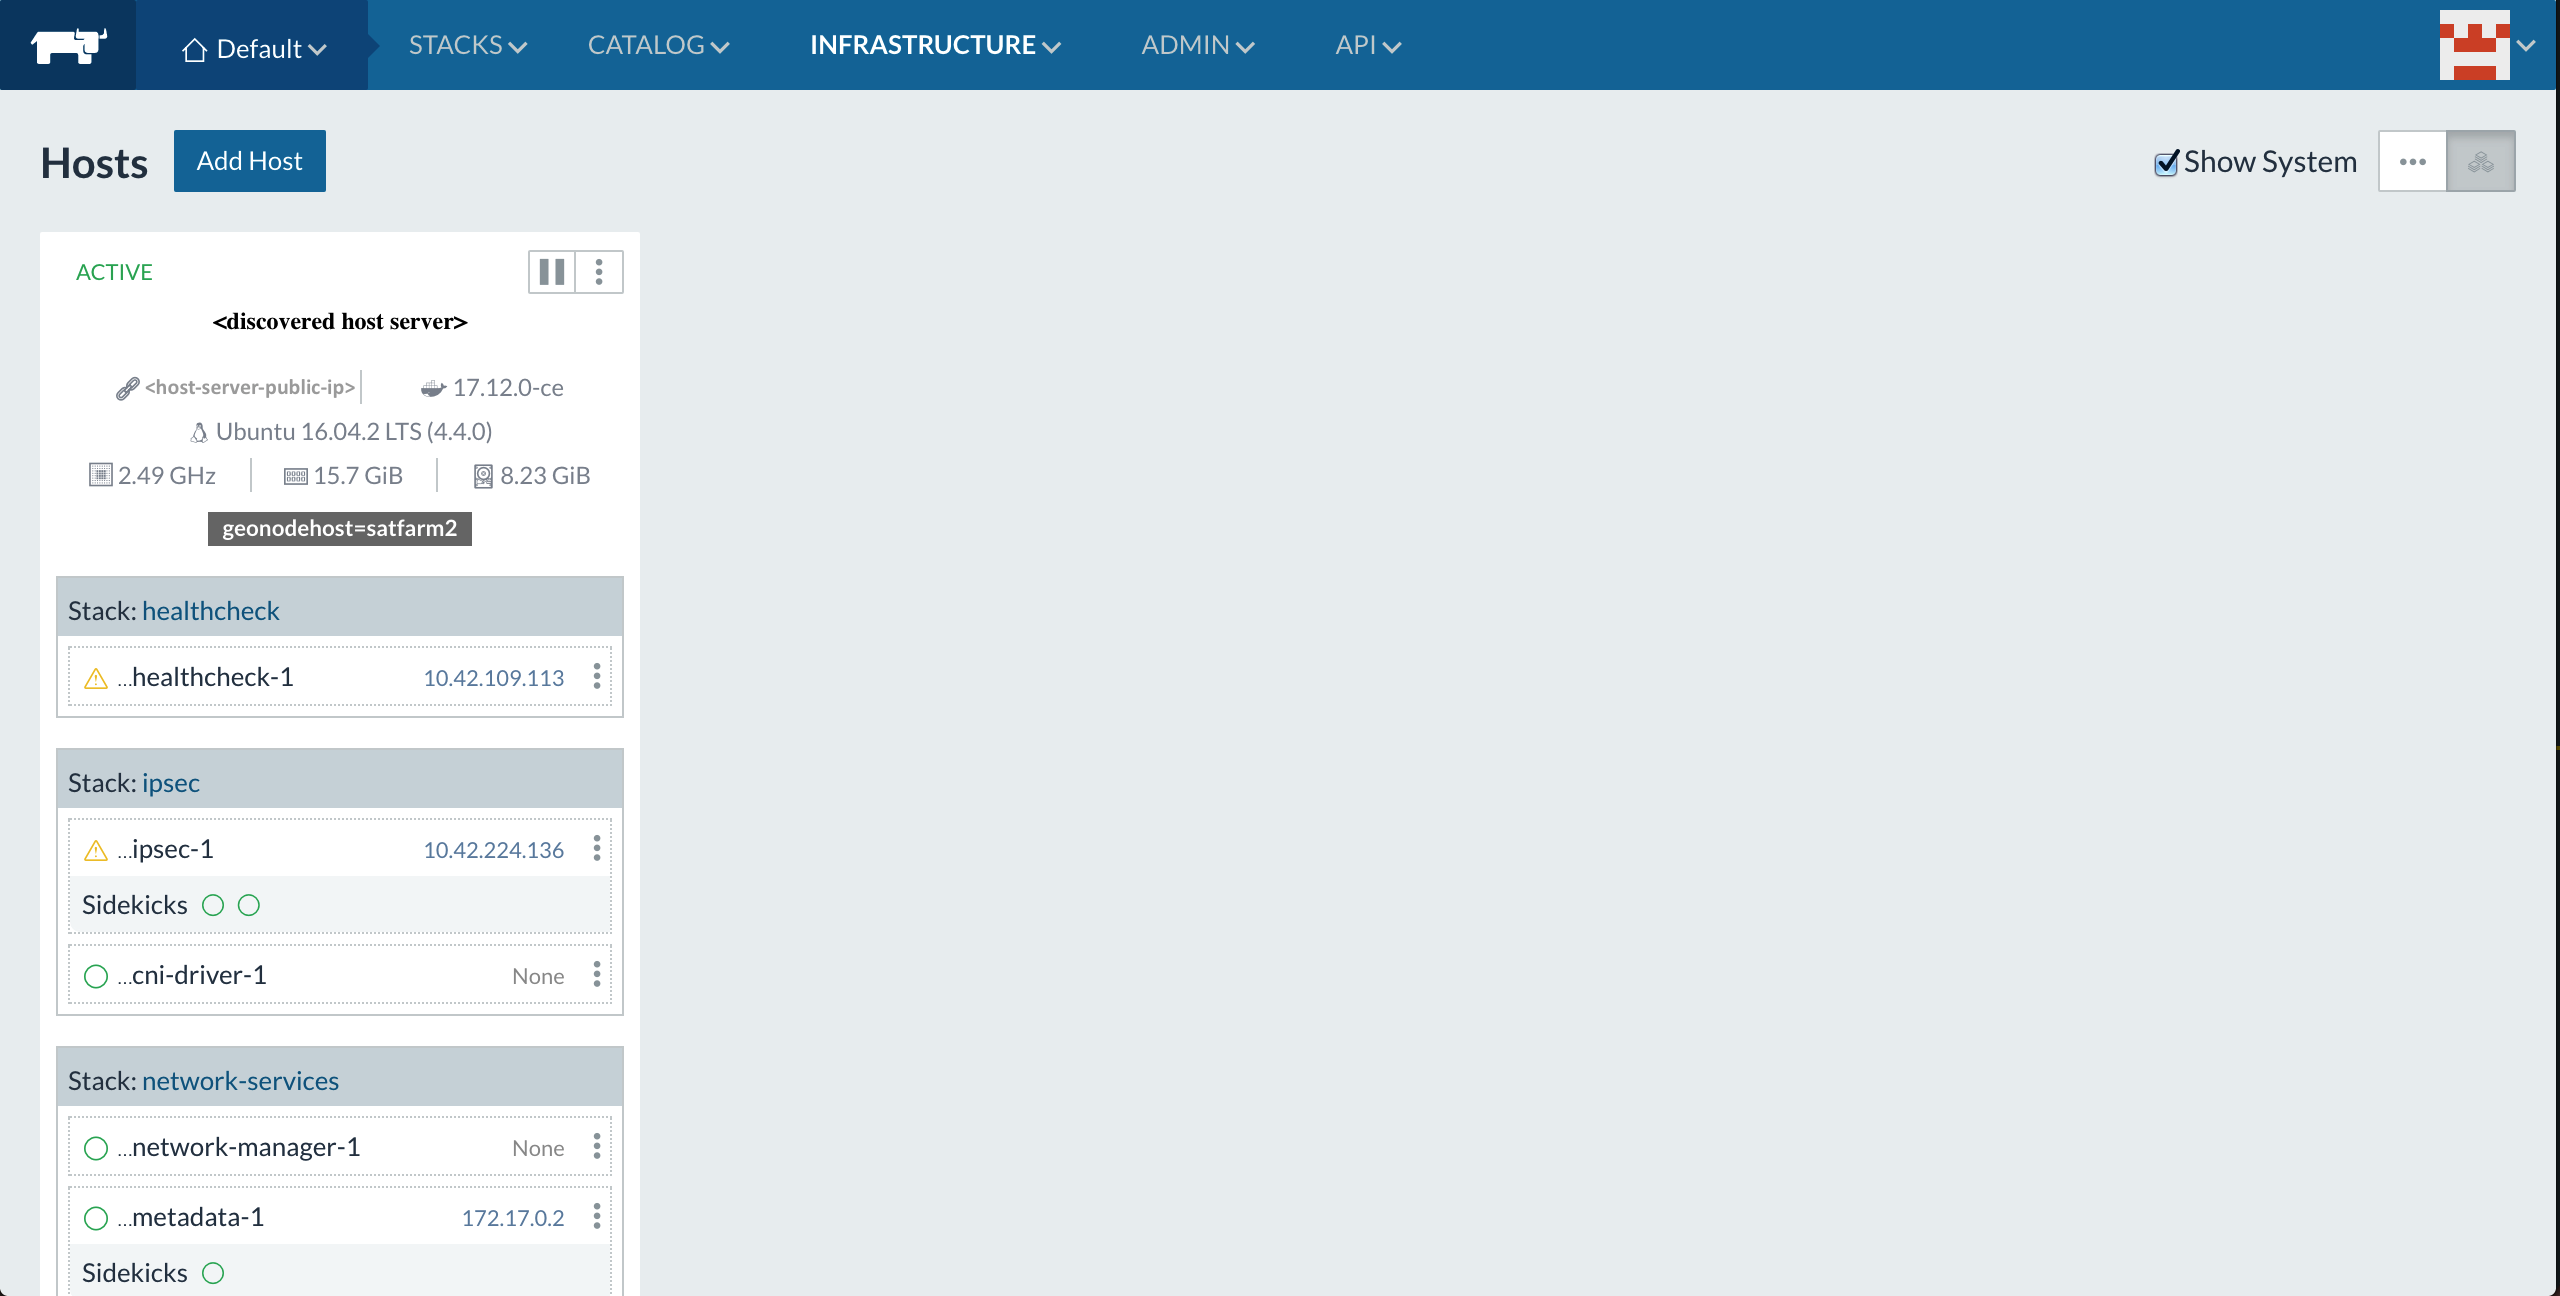
Since Rancher itself has containerized services, some of them which are managing the new host have to be available under the menu Stacks => All.

Deploy GeoNode as stack on Rancher
Create a stack from a docker-compose file
This is the first option to deploy GeoNode stack from a template like this docker compose file.
Before going to create a new stack by loading it from the Rancher console the values of the placeholders <host label value> and <host-server-public-ip> have to be edited accordingly to your previous setup.
Once the docker-compose.yml is ready follow the menu Stacks => User:

Then click the Add Stack button:

From the property docker-compose.yml load the file previously edited, then click the Create button:
Warning
The first time the host has to provision all the images and can take a while
At the end of the provisioning job all the GeoNode services will be active and the stack available as deployed application:

GeoNode is now available at the public ip address defined into the GEONODE_LB_HOST_IP variable of your docker-compose file.
As usual the default credentials for the master administrator is admin/admin.